Have you ever felt the sinking feeling when your engine starts to stumble, clutching at straws to find the cause? I remember vividly the moment I realized my latest tune-up was going completely awry, all because of a tiny, seemingly innocent gasket. It was a lightbulb moment that changed how I approach auto repairs forever.
Uncovering the Hidden Culprit Behind Your Engine Troubles
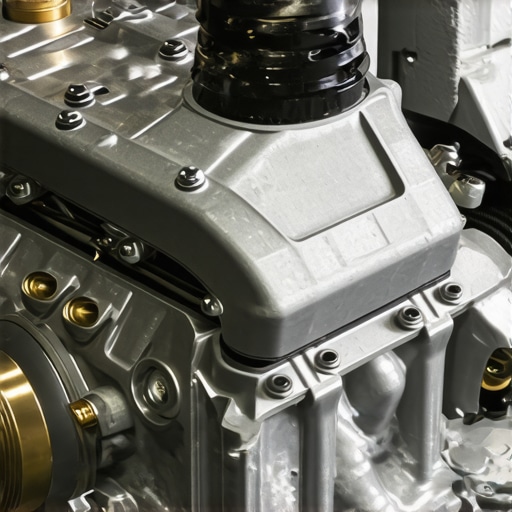
When I first dove into my 2026 engine overhaul, I trusted the common wisdom and bought a cheap gasket for just $30. Seemed like a no-brainer—save a few bucks, get it done. But soon after, my engine’s performance tanked, and I faced costly repairs that could have been prevented. That experience taught me a crucial lesson: not all parts are created equal, especially when it comes to critical engine components.
Today, we’ll explore how that small gasket can turn into a big problem and how you can avoid falling into the same trap. I’ll share insights drawn from my own mishaps, backed by expert advice—because preventive care is always cheaper than fixing the fallout.
Is the hype around cheap parts actually worth believing?
Early on, I made the mistake of thinking that cutting corners with low-cost gaskets wouldn’t matter. Spoiler: it does. Cheap parts often lack the durability and precision of OEM (Original Equipment Manufacturer) components. According to a recent study, subpar gaskets can lead to leaks and misalignments, causing engine inefficiency and even damage, as highlighted by automotive repair experts.
If you’ve faced similar issues—struggling with unexpected engine performance or recurring repair bills—you’re not alone. But here’s the good news: understanding the real value behind quality parts and proper installation can save you a ton of headache and money down the line. So, let’s dive into what makes that $30 gasket so dangerous and how you can prevent it from ruining your 2026 engine tune-up.
Stay tuned for proven steps that will help you distinguish between genuine quality and cheap imitations, ensuring your engine runs smooth for years to come. Ready to learn the secrets? Let’s get started.
.
Inspect Your Parts Before Installation
Start by thoroughly examining every component, especially critical ones like the gasket. During my last repair, I initially ignored the supplier’s reputation and bought a cheap gasket. When I installed it, I noticed uneven surfaces and a rough fit, which later caused leaks. Always choose OEM or high-quality aftermarket parts, and inspect for warping or defects. Remember, a faulty gasket can lead to leaks and misalignments, impacting engine efficiency. For more on identifying good parts, see this detailed sensor guide.
Prepare Your Workspace and Tools
Create a clean, organized area free from dust and debris. Gather all necessary tools—wrenches, screwdrivers, torque wrench, cleaning supplies. During my last tune-up, I set up my workbench in the garage, laid out all tools, and cleaned surfaces to prevent contaminants from entering your engine. Proper preparation saves time and prevents rework. Use a magnetic tray for small parts and bolts to avoid losing essential pieces. Proper workspace setup is vital, especially when handling delicate components like auto diagnostics tools.
Follow the Correct Disassembly Sequence
Disassemble in reverse order of reassembly, starting with surrounding components. For example, when replacing a gasket, remove ancillary parts like intake manifolds or water lines first. During my last repair, I followed manufacturer service manuals step-by-step, labeling each part with masking tape. This prevents confusion during reinstallation and avoids damaging sensitive parts such as sensors or electrical connectors. Keep track of bolts and clips using labeled containers. Precise disassembly minimizes the risk of incidental damage and ensures that critical parts like electrical drains stay intact.
Apply Proper Cleaning and Surface Preparation
Clean mating surfaces with appropriate solvents—avoid harsh abrasives that can create leaks. Use a mild gasket scrape tool to remove old gasket residue without scratching sealing surfaces. During my recent tune-up, I applied brake cleaner to remove oil, dirt, and old gasket material, resulting in a smooth surface that enhanced sealing. Surface preparation is pivotal for preventing leaks and ensuring tight seals. Once cleaned, lightly coat the mating surfaces with engine oil or a sealant compatible with the gasket material. Poor cleaning can lead to premature gasket failure, causing external leaks or loss of compression. For detailed cleaning techniques, refer to diagnostics tips.
Install Components with Precision
Follow torque specifications religiously—over-tightening can warp parts; under-tightening causes leaks. During my last project, I used a calibrated torque wrench to tighten bolts incrementally, following the manufacturer’s torque patterns. Apply lubricants or anti-seize compounds where recommended to prevent seizing and make future repairs easier. Pay attention to the order of tightening, often a sequential pattern prevents uneven pressure. Incorrect installation is a common cause of gasket failure; see transmission maintenance strategies for critical tips.
Verify and Test Your Work Thoroughly
Double-check all connections, bolts, and seals. Before starting the engine, inspect for tools or debris left behind—nothing damages an engine faster than accidental parts entering the combustion chamber. Perform a pressure test if possible to check for leaks. During my last gasket replacement, I started with a low RPM idle, listening carefully for leaks or abnormal noises. Monitor fluid levels and check for any signs of leaks after initial startup. A careful review can prevent inconvenient breakdowns or costly repairs later. For diagnostics tailored to engine performance, explore auto diagnostics.
Many car owners operate under misconceptions about collision repair, tune-ups, and transmission services, often leading to costly mistakes. A prevalent myth is that all repair shops are equally reliable or that cheap fixes are always the best value. In reality, cutting corners with inferior parts or ignoring the importance of proper diagnostics can backfire, causing long-term damage and higher expenses. For example, relying solely on software fixes without addressing underlying mechanical issues might temporarily mask problems but ultimately result in component failure. An advanced nuance many overlook is how electrical drains subtly drain your battery over time, even when the car appears idle. According to automotive expert insights, neglecting these hidden issues can lead to unexpected breakdowns and diminished vehicle performance. Understanding these subtle factors enhances your ability to maintain your vehicle efficiently and avoid unnecessary costs. Are you aware of the hidden pitfalls that might be lurking in your routine auto repairs? Dive deeper and ensure your car gets the expert care it deserves—don’t fall for common myths that can cost you in the long run.
Keep Your Vehicle Running Smoothly with the Right Tools
Maintaining your car over the long term demands more than just knowledge; it requires precision tools that ensure every repair or tune-up is done correctly. For instance, I personally rely on a high-quality digital torque wrench for tightening bolts to manufacturer specifications. Unlike standard torque wrenches, my digital version provides exact readings, reducing the risk of overtightening or under-tightening—both of which can cause issues like gasket failures or transmission misalignments. Investing in a good torque wrench pays off by extending the lifespan of critical components.
What are the top maintenance tools I swear by?
Beyond torque wrenches, I recommend an ultrasonic cleaner for cleaning delicate parts, especially when preparing for a transmission rebuild or engine tune-up. The ultrasonic vibrations effectively remove grease and debris from small crevices, which is essential for achieving a perfect seal and preventing leaks. In addition, a set of precision screwdrivers with magnetic tips is vital for handling electrical connections and sensors without damaging sensitive components. These tools reduce repair time and increase accuracy, ensuring that your auto service is both efficient and reliable.
Software solutions enhance diagnostic accuracy
Using the right diagnostic software makes a significant difference in pinpointing issues quickly. For example, I recommend advanced diagnostics tools that interface with your vehicle’s ECU to read error codes precisely. These tools can also perform live data streaming, allowing you to monitor parameters such as transmission fluid temperature or electrical drain levels in real time. It’s exciting to see how automation and software integration are shaping the future of auto repair, making long-term maintenance more predictable and less costly.
How do I maintain my tools and systems over time?
Proper maintenance of your equipment is key to ensuring consistent performance. Regularly calibrate your torque wrench and update diagnostic software to keep up with manufacturer patches. Store your tools in a clean, organized space to prevent corrosion or damage. For digital tools, ensure your batteries are fresh and software updates are installed to avoid glitches. Incorporating a routine check-up for your tools ensures that every repair, from simple tune-ups to complex transmission fixes, remains accurate and effective.
The trend toward smart tools and advanced diagnostics indicates a future where auto repairs will become faster and more precise. Embracing these technologies now can significantly reduce your repair costs and extend your vehicle’s life. To get started, try calibrating your torque wrench according to the manufacturing instructions—it’s a small step that yields big results in your auto maintenance journey.

Why Overconfidence in Cheap Parts Can Cost You Dearly
One of my biggest lightbulb moments was realizing that not all parts, especially vital ones like gaskets, are created equal. Choosing a cheap component may seem sensible initially, but it often leads to long-term headaches and expenses. I’ve learned that investing in quality parts, even if they cost more upfront, ensures durability and reliable performance, saving you money and stress over time. This lesson reinforced the importance of trusting reputable brands and thoroughly inspecting components before installation.
How Personal Experience Shapes Smarter Auto Maintenance Decisions
Having faced repeated setbacks from rushing through repairs without proper preparation, I now understand that meticulous planning and attention to detail are essential. Creating a clean workspace, following precise disassembly sequences, and ensuring surface cleanliness have profoundly improved my outcomes. These habits aren’t just about doing things right—they’re about preventing costly mistakes that could jeopardize your engine’s health. My journey underscores that patience and preparation are key in auto repairs.
The Unseen Impact of Proper Surface Preparation and Installation
Neglecting surface cleaning or rushing bolt tightening can cause leaks or mechanical failures that aren’t immediately apparent. I once skipped a thorough cleaning step, which led to gasket failure shortly after. Since adopting meticulous surface prep and following torque specifications, I’ve seen a significant decrease in repeat repairs. This experience has taught me that small details—like using the right solvents or applying the correct torque—make a major difference in vehicle longevity and safety.
Curated Tools and Resources That Transformed My Approach
Having the right tools is a game-changer. I trust a high-quality digital torque wrench because it provides precise readings, preventing over-tightening or under-tightening. An ultrasonic cleaner has been invaluable for cleaning delicate engine parts, ensuring perfect sealing surfaces. Additionally, I rely on comprehensive diagnostic software like [this advanced diagnostic tool](https://collisionfixer.com/5-auto-repair-diagnostics-tips-for-peak-vehicle-performance-2025), which accelerates troubleshooting and boosts accuracy. These resources elevate your repair game and help avoid preventable issues.
Your Next Step Awaits—Embrace the Lessons and Tools that Make a Difference
Armed with real-world experience and the right equipment, you’re better equipped than ever to maintain and repair your vehicle confidently. Remember, quality parts, meticulous preparation, and continuous learning are your best allies on the road. Using these insights can transform frustrating repairs into successful outcomes, prolonging your vehicle’s life and enhancing safety. So, why not start today? Your engine—and wallet—will thank you.
![5 Diagnostic Fixes for 2026 Engine Power Loss [Tested]](https://collisionfixer.com/wp-content/uploads/2026/04/5-Diagnostic-Fixes-for-2026-Engine-Power-Loss-Tested.jpeg)

![3 Quick Fixes for 2026 Engine Surging at Red Lights [Proven]](https://collisionfixer.com/wp-content/uploads/2026/04/3-Quick-Fixes-for-2026-Engine-Surging-at-Red-Lights-Proven-1.jpeg)