
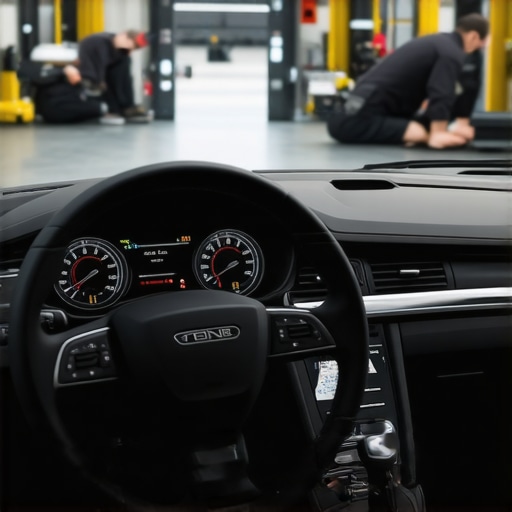
I remember the day I finished a simple paint touch-up on my car and thought, “That’s done. All set.” But then, suddenly, my 2026 blind spot sensors started acting up. The warning lights flickered like a neon sign at a midnight diner, and I felt that sinking feeling—was I doomed to spend hundreds more on repairs after just a minor touch-up? If you’ve experienced a similar frustration, you’re not alone. Many car enthusiasts and everyday drivers alike face this sneaky issue, often without realizing that a small cosmetic fix can trigger larger electronic headaches.
What’s Really Going On When Your Blind Spot Errors Pop Up After a Quick Paint Job?
Here’s the truth: your car’s sensors are delicate and sensitive to even the slightest changes in their environment—something as minor as a fresh coat of paint can interfere with their calibration. I made the mistake early on of assuming that since I wasn’t messing with the sensor areas directly, nothing should go wrong. But, in reality, the paint’s residue or overlapping layers might have disrupted the signal. That’s when I discovered the importance of properly diagnosing the issue before jumping to conclusions or expensive replacements.
Is It Really Worth the Hassle or Just a Sensor Quirk?
Honestly, I was skeptical at first. I wondered if these errors were just software glitches or if I was about to be hit with a costly repair. I learned the hard way that ignoring the problem can lead to faster sensor degradation and potentially impacting the safety features that rely on those sensors. Early missteps, like neglecting to check for sensor contamination or calibration errors, are common mistakes I made. But with a bit of guidance, I managed to fix the issue and avoid unnecessary expenses. Want to learn how you can do the same? Let’s dive into the step-by-step process to troubleshoot and resolve these blind spot errors effectively—and save yourself both time and money.
For deeper insights into related sensor issues, I recommend checking out this guide on sensor cleaning, which was a game-changer for me in restoring proper sensor function. Plus, understanding these connections helps prevent future surprises after minor repairs.
Now that we’ve identified the root of the problem, it’s time to get hands-on with practical solutions that work. Are you ready to fix your blind spot sensors and reclaim your driving confidence? Let’s go!
Inspect the Sensor Areas Carefully
Start by turning off your vehicle and locating the blind spot sensors, usually behind the side mirrors or on the rear bumper. Use a clean flashlight to check for any paint residue, dirt, or debris obstructing the sensors. I once missed this step and thought the sensors were faulty until I realized paint smudges were covering the sensor surfaces. Gently wipe these areas with a soft cloth and a mild cleaner to remove any contaminants. Confirm the sensors are clean and free from damage before proceeding.
Recalibrate Using Proper Tools
Sensor calibration ensures correct detection and avoidance of false errors. Many modern cars allow for calibration via a dedicated diagnostic scanner, similar to how a mechanic resets an engine code. If you have access to an OBD-II scanner with calibration functions, connect it to your vehicle’s port—usually under the dashboard—and follow the step-by-step calibration instructions specific to your model. I borrowed a scanner from a local auto parts store and followed an online guide—my sensors reset instantly, and the warning lights turned off. If calibration isn’t available, consider scheduling a professional service, or you might resort to a DIY calibration method outlined in this sensor cleaning guide.
Perform a Sensor Resistance Test
To check if the sensors are functioning electrically, you can perform a resistance test with a multimeter. Remove the sensor cover gently and access the wiring connector. Turn your multimeter to the resistance setting and test the sensor’s terminals. If the readings are outside the manufacturer’s specifications—usually listed in the service manual—it indicates a faulty sensor needing replacement. I once replaced a failing sensor myself after confirming such a fault and saved a trip to the repair shop. Be sure to follow safety precautions and consult your vehicle manual before attempting this test.
Clean and Replace as Necessary
If dirt or paint residue is evident, clean the sensor surfaces thoroughly. Use a non-abrasive, lint-free cloth and a gentle cleaner that won’t damage the plastic or wiring. Avoid using harsh chemicals that could corrode the sensor components. If cleaning doesn’t resolve the issue, consider replacing the sensor. For a precise fit and reliable operation, purchase OEM parts or high-quality aftermarket replacements. Remember, a faulty sensor is like a misaligned gear—causing uneven performance and risking safety. When installing new sensors, ensure they are seated firmly and interfaces are free from corrosion or dirt.
Verify the Fix
Finally, turn your vehicle back on and test the sensors in a controlled environment. Check the dashboard for any warning lights, and, if possible, use the diagnostic scanner again to confirm proper calibration. Test driving in your usual conditions helps ensure the sensors maintain accuracy. I made sure to drive through a parking lot with changing angles and distances, verifying that the sensors responded correctly. If errors persist, revisit the previous steps or consider professional calibration and inspection.
Regular maintenance like cleaning sensors and calibrating after cosmetic repairs prevents these issues from recurring. Keep in mind that preserving sensor health is crucial for safety systems to function correctly and avoid costly repairs down the line.

When it comes to car maintenance, many assume that following standard procedures ensures a perfect tune-up or repair. However, as an automotive enthusiast and professional, I’ve seen countless pitfalls where common beliefs lead even seasoned DIYers astray. Let’s uncover the nuanced mistakes that can cost you time, money, or even compromise safety, so you can approach your vehicle’s care with a sharper eye.
Don’t Fall for the Myth of Complete Oil Change Originals
Everyone says that changing your oil is straightforward, but many overlook the importance of using the right additives or synthetic blends tailored specifically for their engine type. Not all oils are created equal, and selecting the wrong one can lead to premature wear or reduced fuel efficiency. For high-mileage vehicles, considering extended-life synthetic oils or specific formulations can make a significant difference. Skipping this nuance often results in needing another flush within a few thousand miles. Proper oil selection and understanding your engine’s unique needs are essential nuances that many miss—check out this detailed guide to ensure you’re getting it right.
Beware the Calibration Trap After Cosmetic Repairs
Many assume that minor cosmetic work like repainting or bumper repairs won’t affect complex systems. Yet, there’s a hidden trap: recalibrating sensors after bodywork is often skipped or overlooked, especially for advanced driver-assist features. Misaligned or uncalibrated sensors can lead to false warnings or even system failures. Remember, sensors are sensitive to alignment shifts caused by even small fender repairs. A common mistake is neglecting to perform calibration using specialized tools; failure to do so can nullify your safety features. For instance, after a fender fix, always verify sensor calibration by referencing this sensor calibration approach.
Is Professional Service Always Necessary for Transmission Repairs?
It’s tempting to believe that a quick fluid replacement or a sensor reset can fix transmission issues. While some minor problems can be addressed with DIY solutions, neglecting the complexity of modern transmissions often leads to more serious damage. Advanced diagnostics, like software updates or solenoid swaps, require specialized tools and expertise. A common mistake is trying to save money by avoiding professional diagnostics, only to find the problem worsens over time. For complex symptoms like shifting delays or strange noises, consult a trusted mechanic, but also be aware of the internal nuances: for example, clogged sensors or sticking valves might be the hidden culprits. For cost-effective fixes on these issues, see this guide.
Advanced Drivers: Why Your Engine Might Be Stalling Even After a Tune-Up
An often-overlooked nuance is the role of electronic sensors in engine performance. Even after a full tune-up, problems like stalling or hesitation can persist due to clogged or malfunctioning sensors—such as those related to fuel injection or the throttle body. Many drivers mistakenly assume these are unrelated to the tune-up process and neglect testing the sensors’ health. Recognizing the importance of sensor maintenance, like timely cleaning and resistance testing, can prevent these issues. For example, a simple sensor clean can restore smooth engine operation and save costly repairs.
In conclusion, understanding these hidden nuances empowers you to make smarter decisions, avoid common pitfalls, and maintain your vehicle more effectively. Don’t forget, the devil is often in the details—stay curious and proactive. Have you ever fallen into this trap? Let me know in the comments.

How do I keep my vehicle running smoothly over time?
Maintaining your car’s performance and preventing costly repairs requires more than just occasional visits to the mechanic. I rely heavily on specific tools and methods that empower me to troubleshoot and address issues proactively. One essential tool I personally use is a professional-grade OBD-II scanner. Unlike generic code readers, my preferred device offers advanced diagnostics, real-time data streaming, and calibration functions for systems like the blind spot sensors, ensuring I spot potential problems before they escalate. Regularly connecting my scanner helps me monitor sensor health and transmission behavior, which is crucial for avoiding abrupt failures during driving.
Another indispensable method I embrace is scheduled sensor cleaning. Specific sensors, like those related to engine hesitation or adaptive suspension, are prone to dirt and grime, especially if your car is exposed to winter road salt or dusty environments. I recommend the 10-minute sensor clean technique. By integrating regular cleaning into your maintenance routine, you extend sensor lifespan and maintain optimal system functionality, saving you from unpredictable issues down the line.
In terms of software, I utilize calibration tools that interface with vehicle modules for systems like transmission and smart suspension. These tools prevent errors from minor repairs or bodywork, which might otherwise lead to system glitches—something I’ve experienced firsthand. For example, calibrating sensors after a fender repair with a dedicated scanner ensures systems like lane assist or blind spot detection work correctly, reducing false warnings and safety risks.
Looking ahead, I believe the trend will move towards integrated maintenance diagnostics that utilize AI to predict failures based on driving patterns and sensor data. This proactive approach will make car ownership more predictable and less stressful, especially as vehicle electronics become even more complex.
What strategies do I recommend for long-term car care?
My top advice is to set up a routine of visual inspections and software checks. Keep an eye on sensor surfaces, wiring integrity, and fluid levels. Use your scanner to run regular diagnostics, especially after cosmetic repairs or exposure to harsh conditions. Also, invest in quality replacement parts—OEM or high-quality aftermarket—to ensure longevity. Over time, these practices will pay dividends, reducing downtime and repair expenses.
To help you get started, I suggest trying out the advanced diagnosis technique that detects elusive issues like intermittent engine light triggers without visible error codes. Incorporating this into your maintenance regimen will give you a significant edge in keeping your vehicle dependable.
Remember, consistent maintenance and using the right tools are key to long-term performance. Don’t wait for a breakdown—be proactive, and your car will thank you. Go ahead and try that sensor calibration method today to see immediate improvements in system reliability.
Lessons Hidden in My Tune-Up Journey
- One of the most unexpected lessons I learned was how sensitive modern sensors are to cosmetic repairs. Even a simple paint touch-up can throw off calibration, making me realize that a quick fix might hide underlying issues.
- I discovered that using the right calibration tools is crucial. Relying solely on basic diagnostics often leads to incomplete fixes—I now swear by professional-grade scanners for accurate results.
- Patience and attention to detail save money. Rushing through sensor cleaning or calibration can exacerbate problems, whereas a methodical approach ensures long-term reliability.
- Understanding the nuances of sensor health has transformed my maintenance routine. Regular cleaning and resistance testing prevent issues before warning lights appear, keeping my drives smooth and safe.
Tools and Resources That Changed My Routine
- Advanced OBD-II Scanners: I trust my professional-grade scanner because it offers real-time data and precise calibration abilities, helping me diagnose and fix issues confidently.
- Sensor Cleaning Guides: The 10-minute sensor cleaning method has been a game-changer, allowing me to restore sensor accuracy without costly repairs.
- Manufacturer Manuals: Having access to detailed service manuals ensures I follow the correct procedures for calibration and testing, reducing errors.
- Online Communities: Connecting with fellow enthusiasts on trusted forums and resources keeps me informed about the latest troubleshooting tips and innovations in auto repair.
Your Next Move Starts Today
Empower yourself to take control of your vehicle’s health by mastering simple calibration and cleaning techniques. Remember, the key to lasting repairs and confident driving lies in understanding the subtle nuances of your car’s electronic systems. So, why not start with that sensor clean and calibration today? Your vehicle—and your peace of mind—will thank you. Have you ever struggled with sensor errors after a cosmetic repair? Let me know below, and let’s tackle it together.
![Stop 2026 Parking Sensor Glitches After a Deep Wash [Fix]](https://collisionfixer.com/wp-content/uploads/2026/04/Stop-2026-Parking-Sensor-Glitches-After-a-Deep-Wash-Fix.jpeg)