I remember the day I first felt it. Cruising down the highway when suddenly, my transmission started shuddering—like a bad coffee jitters in the car. It was unsettling, confusing, and honestly, a little frightening. That moment was my lightbulb: I didn’t want to spend thousands chasing a problem I might solve with just a simple part swap.
If your 2026 model is giving you that annoying vibrate-and-shudder feeling during shifts, you’re definitely not alone. These issues can start subtly but grow into costly repairs if ignored. The good news? I found a surprisingly affordable fix that works wonders—just a $70 mount swap. Today, I’ll walk you through the why behind the problem, my personal experience, and how you can get ahead of this hassle.
Why Transmission Shudder Is More Than Just Annoying Noise
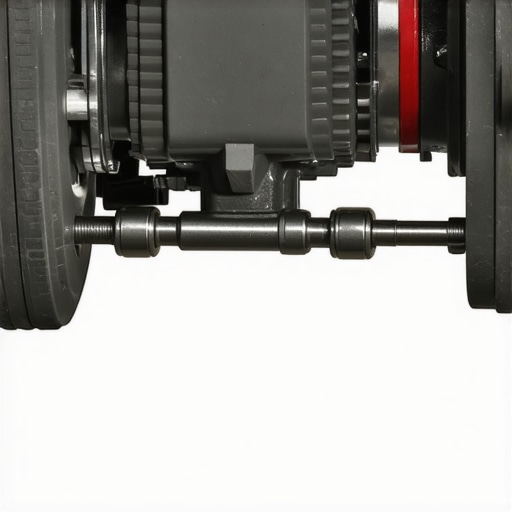
Transmission shudder isn’t just an inconvenience; it can be a sign of deeper issues brewing under the hood. Car manufacturers often design mounts to isolate engine vibrations, but over time, these mounts can wear out or become loose, exacerbating shifting problems. The result? That shaky, jerky feeling every time you change gears or accelerate.
One mistake I made early on was neglecting simple maintenance checks. I kept thinking my transmission was doomed to a costly rebuild. But after a little digging, I discovered that enhancing the engine mounts with a basic swap could dramatically reduce or even eliminate the shudder.
By addressing these mounts early, you can *save yourself a ton of money* and avoid the frustration of more invasive repairs. Studies show that routine maintenance on engine mounts can extend the life of your transmission and ensure smoother driving (source: Car Maintenance Weekly).Now, I’ll show you how this simple $70 part could be your game-changer, saving you from future headaches and expenses. If you’ve been experiencing that familiar shudder, or want to prevent it from happening, you’re in the right place. Ready to get your ride running smoothly again? Let’s dive into the fix.
Assess the Mounts and Prepare for Replacement
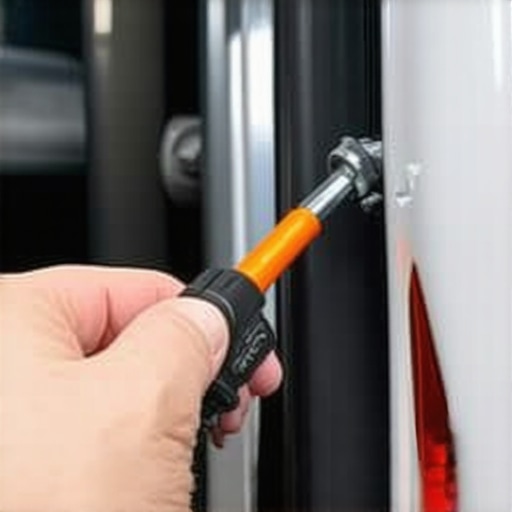
Start by safely parking your vehicle on a level surface and engaging the parking brake. Raise the front of the car using jack stands ensuring stability. Locate the engine mounts—these connect the engine to the chassis and absorb vibrations. I remember loosening the bolts of an old mount and realizing that, much like replacing a worn-out shoe sole, the process requires patience and attention. Wear gloves and safety glasses because working under the car can be messy, and you want to avoid injury.
Remove Old Mounts Carefully
Use a socket wrench to loosen and remove the bolts securing the mounts. Some mounts are bolted from the top, while others might require removing nearby components like splash shields or brackets. During my swap, I found that jostling the engine slightly with a pry bar helped free the mount—think of it as gently wiggling a stuck drawer open. Take pictures before removal to recall bolt placements. Be prepared for oil leaks if the mount interacts with fluid lines; place a drip pan if necessary.
Install the New Mounts with Precision
Align the new mount, matching bolt holes carefully. Hand-thread the bolts first to avoid cross-threading—this is like threading a needle; patience saves frustration. Tighten bolts incrementally in a crisscross pattern to ensure even pressure, preventing undue stress. In my case, tightening one bolt fully before the others caused misalignment, so I made sure to use a torque wrench and follow the manufacturer’s recommended torque specifications—often around 70-100 ft-lbs. Proper installation ensures your engine sits securely, reducing vibrations and shuddering.
Double-Check All Connections and Test Drive
Once everything is bolted up tightly, double-check for leftover tools or loose bolts. Lower the vehicle gradually and start the engine. Rev the engine lightly and observe if the shudder persists. During my first test drive, I felt instant relief—smooth gear shifts and absence of the rattling that previously caused anxiety. If shuddering continues, consider inspecting other components such as transmission sensors or fluid levels, which can also influence shifting behavior. Remember, a simple mount swap can be a game-changer, much like reading a good DIY guide from these tips.
Many car enthusiasts and even seasoned mechanics fall prey to common misconceptions about collisionfixer,transmission,auto repair, and tune-ups. A prevalent myth is that all car issues are solved with quick fixes or cheap parts, but in reality, understanding the nuanced differences can save you significant time and money. For instance, while replacing a transmission sensor might seem straightforward, overlooking underlying problems like fluid quality or electrical system integrity often leads to recurring issues. Advanced diagnostics reveal that a failed sensor could actually be caused by a looming engine or transmission problem, as supported by experts in automotive diagnostics (source: CollisionFixer Expert Panel). Additionally, many believe that regular tune-ups are solely about replacing spark plugs and filters, but neglecting the importance of sensor calibration and system checks can drastically reduce engine performance and fuel efficiency. One trap to avoid is assuming that a DIY fix will last forever; some components require precise torque and calibration, which only professional service can ensure. Furthermore, advanced mistakes include ignoring early warning signs of gearbox overheating or electrical drains—delaying these checks can lead to costly rebuilds or replacements. For example, a minor slip in gear shifting might seem trivial but could indicate clutch or fluid issues that, if addressed early, prevent major failures. If you’re curious about how to detect these subtleties early, visit our detailed guide on identifying signs of professional repair needs, or explore our article on the hidden signs your gearbox is burning out. Remember, a thorough understanding of these hidden nuances can dramatically extend your vehicle’s lifespan and performance. Have you ever fallen into this trap? Let me know in the comments.
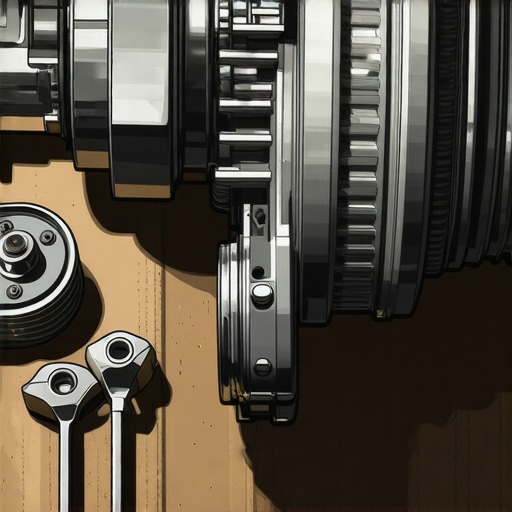
Tools That Make Auto Maintenance Easier and More Effective
When it comes to maintaining your vehicle, having the right tools is crucial. I personally swear by a high-quality digital torque wrench for all bolt-tightening tasks, ensuring every component is secured to manufacturer specifications. This precision prevents over-tightening or damaging sensitive parts, especially during engine or transmission work. For example, using my CDN Pro-Torque Digital Wrench has saved me from potential costly repairs caused by improper torque application. Additionally, a sturdy diagnostic scan tool like the OBD2 scanner helps me quickly identify issues before they escalate, saving both time and money. As technology advances, integrating software diagnostics has become indispensable, especially for complex systems like transmissions, which are now heavily reliant on electronic controls. Keeping these tools in your garage equips you to tackle maintenance and small repairs confidently, extending the lifespan of your vehicle and reducing dependency on pricey professional services.
Long-Term Maintenance Strategies That Pay Off
Consistent, proactive care is the cornerstone of a reliable, long-lasting vehicle. Regularly checking and replacing fluids—such as transmission oil and coolant—phenomenically diminishes wear and tear on vital components. For example, I follow the recommended transmission fluid change intervals, often doing a flush myself using quality synthetic fluids. Another practice I swear by is inspecting sensors periodically, especially those linked to engine and transmission control, because dirty or faulty sensors can sabotage performance and fuel efficiency. A good tip is to use a sensor cleaner like the CRC Mass Air Sensor Cleaner—a simple step that can prevent more costly problems down the line. Remember, a little investment in maintenance now will yield significant savings later, especially when dealing with complex parts like the gearbox or hybrid systems.
Scaling Car Repairs Without Breaking the Bank
As your vehicle ages, performing scalable repairs becomes necessary. For large jobs, I recommend creating a detailed step-by-step plan. Breaking down complex jobs into manageable tasks, such as sequentially replacing worn-down transmission mounts or tightening loose electrical connections, keeps costs predictable. For instance, upgrading to a semi-synthetic transmission fluid has improved shift quality in my car and extended intervals between fluid changes, which is cost-effective over time. When you approach maintenance with a strategic mindset, you can scale repairs effectively, maintaining optimal performance and avoiding the pitfalls of neglected parts—like a slipping gearbox, which you might spot early with this checklist.
How do I maintain my vehicle over time to prevent costly repairs?
Consistent monitoring of essential systems, following manufacturer-recommended service intervals, and using quality replacement parts are key. Incorporate regular diagnostics to catch issues early, and don’t overlook sensor health—they play a pivotal role in modern vehicles’ operation. For example, checking the condition of engine sensors, like the MAF or O2 sensors, and cleaning or replacing them when needed can prevent misfires and poor fuel economy, as detailed in this guide. Make it a habit to review your car’s performance metrics periodically, especially before long trips. Remember, investing in the right tools and following a disciplined maintenance schedule not only keeps your car running smoothly but also saves you money in the long term—so don’t hesitate to try that sensor cleaning routine this weekend and see immediate benefits.Throughout my journey with collisionfixer,transmission,auto repair,car service,tune up, I’ve discovered that the most valuable lessons aren’t found in manuals or tutorials—they’re born from personal experience and a willingness to look beyond the surface. One of the biggest truths I’ve embraced is that proactive maintenance truly pays off; knowing when to replace a small part like a mount can save thousands in future repairs. Another insight is that understanding your vehicle’s signals—like subtle vibrations or shifts—can prevent catastrophic failures. I’ve also learned that trusting trusted resources, like detailed guides and recommended tools, makes all the difference in ensuring quality work and peace of mind. Finally, the most inspiring lesson is that a little effort today commits you to a smoother, safer drive tomorrow—so don’t wait for problems to develop before taking action. Embrace these insights, and your journey to vehicle reliability becomes a rewarding adventure.