I remember the exact moment I realized my car’s interior was staging a mutiny. I was merging onto the highway, checked my blind spot, and felt something soft and fuzzy brush against the top of my head. For a terrifying split second, I thought a massive spider had dropped from the visor. I nearly swerved into the next lane. It wasn’t a bug, though—it was the fabric of my headliner, finally giving up its lifelong battle against gravity. If you have ever felt that orange foam dust snowing down on your dashboard, you know exactly the frustration I am talking about. It makes even the cleanest car feel like a junker, but before you go spending hundreds of dollars at an upholstery shop, I want to show you that there are ways to win this battle without ripping your hair out.
Get That Fabric Off Your Hair Without Spending a Fortune
The standard advice you will get from most mechanics is that once the glue fails, the whole board has to come out. While they are technically right about the ‘perfect’ way to do it, most of us just want to drive without a velvet tent collapsing on our passengers. I’ve spent enough time under the hood and in the cabin to know that while some things require [top signs your car needs expert auto repair now](https://collisionfixer.com/top-signs-your-car-needs-expert-auto-repair-now), a sagging ceiling is often something you can tackle in your driveway with the right attitude. We are going to look at the ‘quick-fix’ methods that actually work and identify which ones are just a waste of your time. My goal today is to help you restore your interior’s dignity without the need for a full restoration. While we are at it, if you are tired of that ‘old car’ vibe, you might also want to learn [how to get that old oil smell out of your cars interior](https://collisionfixer.com/how-to-get-that-old-oil-smell-out-of-your-cars-interior) to really freshen things up.
Is a Quick Fix Just Going to Peel Off Next Week?
This is the big fear, right? You spend an hour stretching fabric and spraying glue, only for it to sag again the first time the sun hits the roof. I’ll be honest: I made a huge mistake early on by using regular craft spray adhesive. It turned into a sticky, orange slush that bled through the fabric and looked like a topographic map of the Himalayas. It was a disaster. The trick is understanding that it isn’t the glue that fails; it is the thin layer of polyurethane foam backing that has literally disintegrated into dust. According to automotive experts at Car and Driver, heat is the primary catalyst for this breakdown, often reaching temperatures over 150 degrees inside a parked car during summer. You can’t just glue fabric to dust. Today, I’m going to show you how to bypass that foam or secure it properly so you aren’t doing this again in a month. Have you ever tried to ‘staple’ your headliner back up, only to have it look like a high school art project gone wrong? Drop a comment and let me know your most desperate DIY interior fix. If you’ve dealt with other cabin annoyances, like [the 10 cent trick to fix a floppy sun visor](https://collisionfixer.com/the-10-cent-trick-to-fix-a-floppy-sun-visor), you already know that sometimes the simplest solutions are the best.
Twist Pins Save Your Ceiling for Five Dollars
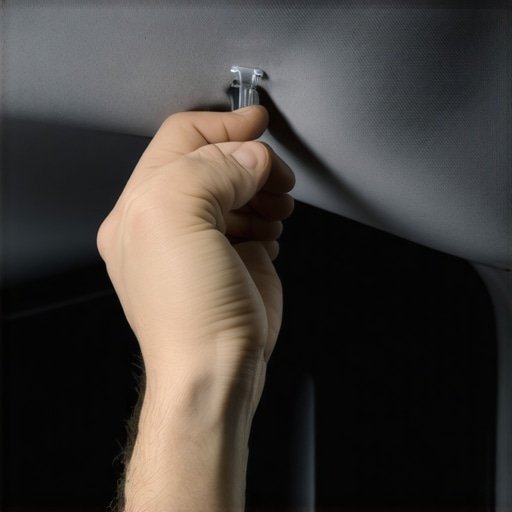
If you aren’t ready to pull the entire interior apart, the most effective driveway hack involves upholstery twist pins. These are tiny corkscrew-like needles with clear plastic heads. You literally screw them through the fabric and into the solid backing board. I used these on an old 1998 sedan that I was trying to sell for a few hundred bucks. The ceiling was draped so low it was hitting my head. Instead of a messy glue job, I spent ten minutes spacing these pins every six inches. By the time I was done, it looked like a custom button-tufted roof. It’s a fast, structural fix that doesn’t require you to wait for anything to dry. Much like how to fix a wobbly rearview mirror for under five dollars, it is about getting maximum utility with minimum financial skin in the game.
Why High-Heat Spray is Your Only Real Glue Option
If you hate the look of pins and want that smooth, factory finish, you have to use spray adhesive—but not just any can you find in the craft aisle. You need a product specifically labeled for high-heat automotive applications. Think of it like this: your car’s roof is basically a giant frying pan in July. If the glue isn’t rated for those temperatures, it will liquefy, and your headliner will fall again before the weekend is over. This is a crucial part of essential car service tips for safe summer drives that people often overlook; heat destroys cheap adhesives. When I first tried this, I used a standard multipurpose spray. It worked for three days. On the fourth day, the humidity spiked, and the fabric didn’t just sag—it slid forward and covered my sun visors. Save yourself the headache and get the professional-grade stuff.
Steam Can Bring That Dead Adhesive Back to Life
Sometimes the glue hasn’t completely turned to dust yet; it’s just gone dormant and brittle. If you have a small bubble or a corner starting to peel, a household clothes steamer can be a secret weapon. The heat and moisture can occasionally reactivate the factory resin enough to let you press it back into place with a clean paint roller. It’s a delicate dance, though. Too much steam and you’ll soak the board, causing it to warp. I’ve seen people use this trick to successfully delay a full repair for years. Taking care of these small interior details is just as important as how you maximize your cars lifespan with regular tune-ups. It is about maintenance before a small problem becomes a total failure.
Work in Sections to Avoid a Wrinkled Mess
Whether you are using glue or steam, never try to do the whole roof at once. It’s like trying to wrap a giant gift while someone is shaking the table. Start from the center and move outward to the edges. This pushes the air out and prevents those ugly waves from forming in the fabric. I once helped a friend who tried to spray the entire rear half of his SUV at once. By the time he got the fabric pulled tight, the glue had already skimmed over and wouldn’t stick. We had to scrape it off and start over. If you can handle how to fix a loose side mirror in five minutes, you have the patience for this. Just take your time, keep the fabric taut, and don’t rush the curing process.
Common wisdom says your headliner is falling simply because the glue is old. I’m here to tell you that’s a half-truth. In my experience, the real culprit is often moisture—not from the humidity in the air, but from the top down. I’ve seen nearly new cars with ceilings on the floor because the owner didn’t realize their sunroof drains were clogged. That water wicks into the backing board and rots the foam from the ‘hidden’ side. You can actually how to stop a sunroof leak with a piece of weed eater string to prevent this whole mess from starting. Have you ever fallen into this trap where you fixed the fabric but ignored the leak? Let me know in the comments. If you’re seeing moisture marks, the reason your car is leaking clear water on the floor might be the first clue that your interior is at risk.
Stop Blaming the Heat for Everything
While heat is a major factor, a study published by the International Journal of Adhesion and Adhesives highlights that automotive interior adhesives are specifically engineered to withstand ‘creep’ at temperatures exceeding 160°F, yet they are incredibly sensitive to chemical contaminants left on the substrate. This means when you try to spray new glue over the old, disintegrated foam, you aren’t just fighting gravity—you’re fighting a chemical barrier. The ‘Oops’ factor here is huge: many DIYers use aggressive solvents like brake cleaner to ‘prep’ the board, not realizing that these chemicals can actually dissolve the structural resins of the headliner board itself. If you melt that board, you’ve crossed the line into needing top signs your car needs expert auto repair now because once that composite loses its shape, no amount of spray can save it.
Can You Safely Use Steam on Modern Composite Boards?
This is where things get technical. On older cars with thick, fiberglass-based boards, steam is a miracle worker. But on modern vehicles that use compressed cardboard or thin plastic composites, steam can be a death sentence. The moisture can cause the board to swell or delaminate, leaving you with a ceiling that looks like a bag of wet laundry. If you aren’t sure what your board is made of, test a tiny corner near the back window first. This level of detail is just as vital as knowing your essential car service tips for safe summer drives. It is about understanding the materials you are working with before you apply heat or moisture.
The Chemical Trap That Could Melt Your Interior
Another common mistake is the ‘more is better’ approach with adhesive. I’ve seen people soak the fabric in so much glue that it bleeds through and creates a permanent, crusty stain that looks like a spilled latte. The key is a ‘mist’ coat on both surfaces, followed by a five-minute wait for it to become tacky. If it isn’t sticky like a Post-it note, it isn’t ready. Skipping this cure time is why most driveway repairs fail within the first week. Take your time, trust the process, and remember that sometimes the best fix is a slow and methodical one.
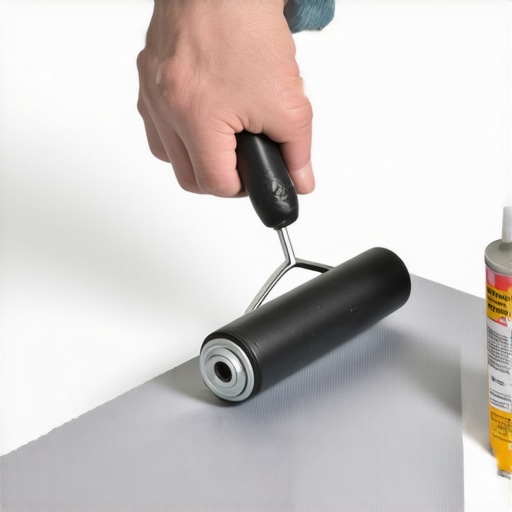
To get that factory-flat look when you are finishing a headliner, you need a silicone seam roller or a weighted brayer. I never use my hands to press the fabric down because your fingertips create localized pressure points that leave permanent dents in the fresh adhesive. A roller distributes the load evenly, which is how you get professional results without the professional price tag. I learned this the hard way after leaving ten visible thumbprints in my first project. According to technical data sheets from the 3M Automotive Aftermarket Division, achieving high bond strength with contact adhesives is 90% dependent on ‘uniform application pressure’ during the first 30 seconds of contact. Using a clean roller ensures you aren’t introducing skin oils into the chemical mix, which can degrade the glue over time.
How do I keep my car’s interior and mechanical parts from failing again?
Maintenance isn’t just about the aesthetic stuff you see; it’s about the systems that keep the car worth driving. Once you’ve fixed the headliner, you’ve basically protected the resale value, but you can’t stop there. I always suggest looking at the bigger picture to maximize your cars lifespan with regular tune-ups. If you’re ignoring a rough idle while fixing a saggy roof, you’re just decorating a sinking ship. Just like a headliner needs the right glue to stay up, your gears need the right fluid environment to stay moving. If you notice hesitations during your drive, understanding how transmission overhauls save you money in the long-run can help you decide when a DIY fix has reached its limit and when to call in the pros.
I predict we are moving toward an era where ‘repairable’ car interiors become a luxury feature. Modern manufacturers are shifting toward heat-welded plastics and integrated electronic ‘skins’ that make headliner removal almost impossible for the average owner. If you have an older car with a modular interior, cherish its simplicity. You can actually fix things without a proprietary computer degree. However, on the mechanical side, the future is already here: I’m seeing more DIYers use affordable Bluetooth OBD-II adapters. Learning how to read live data to find a misfire is the next logical step after you’ve mastered the physical repairs in the cabin. It’s about having a health-first mindset for your entire vehicle rather than just reacting to failures.
If you really want to level up your garage game, I challenge you to go beyond the dashboard. The next time you have the hood open to check your work, don’t just glance at the dipstick. Look for the top signs your car needs expert auto repair now, such as weeping gaskets or cracked serpentine belts. Keeping a car on the road for 200,000 miles isn’t about luck or a special brand of oil; it’s about an obsession with catching the small stuff before it becomes a catastrophe. Grab a flashlight, get under the dash, and see what else needs your attention today.
Hard Truths About Your Ceiling Board
Scraping is everything. If you leave even a tiny patch of old foam, the new glue will just stick to the dust and peel off within 48 hours. I spent four hours once just prepping the board, and that headliner is still holding five years later. Humidity is the silent enemy. If you try to do this on a rainy day, the moisture in the air can affect how the spray adhesive cures. Wait for a dry, sunny day to ensure a permanent bond. Don’t rush the reinstall. Let the glue set for at least an hour before you try to put the trim pieces back on. Pushing on fresh fabric too soon is how you get those annoying thumbprint dents.
#IMAGE_PLACEHOLDER_E#
The Kit I Use to Save Every Interior
High-heat adhesive is the most important part; I only trust 3M because I have seen cheaper brands melt in the summer heat. A flexible putty knife is vital for tucking the fabric edges under the rubber seals without tearing the material. Sometimes you just need the 10 clip that stops your window from rattling to finish the job and make the whole door assembly feel solid again. I also recommend keeping a small upholstery brush on hand to keep the new fabric looking fresh and free of dust during the process.
Drive with Pride Again
Don’t let a sagging ceiling convince you that your car is ready for the scrap heap. Small interior victories give you the confidence to handle larger auto repair tasks. Whether you are dealing with a sagging roof or learning how to fix a cracked windshield before it spreads, every fix saves you money and keeps a reliable vehicle on the road. Your car is an investment, and taking care of the cabin makes every commute feel a little less like a chore. If you have also wondered why your car smells like gas only when you start it, tackling these small projects one by one is how you build a car that lasts a lifetime. Did your first headliner fix look like a professional job, or did it end up with more wrinkles than a pug? Let us swap stories in the comments below!