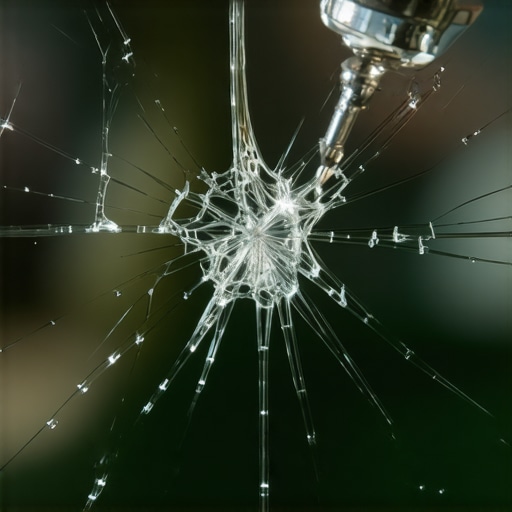
I remember sitting in my driveway, staring at a tiny, star-shaped chip on my passenger side and thinking, ‘Eh, I’ll get to it Saturday.’ I’ve spent my life around car service and heavy machinery, so you’d think I’d know better. But I was tired. Well, Saturday came, and so did a forty-degree temperature swing. I walked out to find a jagged line stretching halfway across my view. It’s a gut-wrenching feeling knowing a five-minute fix could have saved me a four-hundred-dollar invoice. Today, I want to make sure you don’t make that same boneheaded mistake. We’re going to walk through exactly how to seal those chips the moment they happen, keeping your original glass intact and your wallet full. Have you ever watched a tiny crack grow right before your eyes while you were driving? Drop a comment and tell me how long it took to spread!
Don’t Let That Tiny Chip Turn Into a Total Loss
It’s easy to ignore the small stuff. We do it with a persistent oil leak or a squeaky hinge, but windshields are different. Your windshield isn’t just a window; it’s a structural component of your car’s safety system. In a rollover, that glass provides up to 60% of the roof’s structural integrity. When you have a crack, you’re compromising that strength. I learned the hard way that the real cost of ignoring a cracked windshield isn’t just about the money—it’s about the safety of everyone in the cabin. According to the National Windshield Repair Division, repairable chips are usually smaller than a quarter; anything larger often requires a full replacement to maintain safety standards. If you catch it early, you can keep the factory seal, which is almost always superior to a rush job from a mobile glass van.
Can a Ten Dollar Resin Kit Really Save Your Glass?
I get the skepticism. I used to think those little bridge tools and tubes of resin were just snake oil designed to fleece DIYers. I thought if it wasn’t a professional vacuum-sealed pump, it wasn’t going to work. My first attempt was a disaster—I didn’t clean the site properly and ended up sealing a piece of dirt inside the crack forever. It looked like a dead bug was permanently stuck in my line of sight. But once I figured out the ‘secret sauce’ of pressure and curing time, I realized these kits are a godsend. They work by replacing the air trapped in the crack with a clear resin that has the same refractive index as glass. It’s not just about aesthetics; it’s about stopping the vibrations and thermal expansion from ripping the glass apart. If you’ve been putting off a regular tune up or minor body work, don’t let this be another item on the ‘later’ list.
Purge the Contaminants Before You Press Go
Before you even open that resin tube, you have to realize that dirt is the enemy of a clear repair. I once spent forty minutes on a repair during a humid Tuesday in July, thinking a quick wipe with an old t-shirt was enough prep. I was wrong. A tiny speck of road grime stayed trapped inside, and the resin bonded to the dirt instead of the glass. It created a permanent, grey ‘fossil’ of my laziness right in my line of sight. To avoid this, use a safety pin or a dental pick to gently scrape out any loose glass shards from the center of the impact. Then, hit it with a blast of compressed air. Think of it like a regular tune up for your glass—skipping the prep makes the actual work useless. If the area is wet, use a hair dryer to ensure every microscopic void is bone dry, otherwise, the resin will just sit on top like oil on water.
Force the Resin Into the Micro-Fissures
This is where most people get nervous, but it is just basic physics. You need to mount the suction-cup bridge directly over the chip, centering the injector tube exactly above the ‘bullseye.’ The goal is to create a localized vacuum. When you screw in the injector, you are essentially mimicking the precision of a transmission overhaul—everything has to be perfectly aligned for the fluid to flow exactly where it is needed. Drop about four to six drops of resin into the chamber. The ‘magic’ happens when you tighten the plunger. You will see the dark air pockets inside the crack start to disappear as the resin displaces the oxygen. This is a lot like checking for a persistent oil leak; you have to look closely at the edges to ensure the fluid has reached the very end of the damage. If the crack doesn’t vanish immediately, don’t panic. Sometimes you need to gently flex the glass from the inside with your thumb to ‘encourage’ the resin to flow into those tight, hair-thin spots.
The Waiting Game and the UV Cure
Once you have injected the resin, you have to let it sit under pressure for about ten minutes. This is not the time to rush. In the world of expert auto repair, patience is usually what separates a hack job from a professional finish. After the time is up, remove the bridge and place a clear curing strip over the pit with one final drop of resin. If you aren’t working in direct sunlight, you will need a UV lamp. I have seen guys try to use standard flashlights, but without that specific UV wavelength, the resin stays a sticky, useless mess. It is similar to why your transmission shifts early into top gear when sensors are off—the timing and environment must be perfect for the system to work. Once the resin is hard to the touch, use a fresh razor blade held at a 90-degree angle to scrape off the excess. When you see those white flakes flying off and a smooth surface emerges, you know you have successfully avoided the real cost of ignoring a cracked windshield.
I’ve seen plenty of ‘weekend warriors’ argue that a piece of glass is just a piece of glass. That’s a dangerous myth. In the era of smart cars, your windshield is an extension of your computer system. If you choose the cheapest glass available, you might find that the subtle error that makes your cars automatic braking too sensitive is actually a slight distortion in the glass itself. It’s not just about visibility anymore; it’s about data. When I’m performing an essential car service, I always check the glass clarity around the camera housing. One ‘oops’ factor I see constantly involves the pressure stage of the repair. Most people think more pressure is always better. But glass is flexible. If you crank down on that injector bridge too hard, you’re actually bowing the glass inward. The resin fills the gap, but once you release the pressure, the glass springs back and creates a ‘flower’ effect—a series of tiny new cracks radiating from the center. It’s a gut-punch that turns a $10 fix into a $500 replacement. This level of precision is exactly why people often misdiagnose complex issues, much like why most Libertyville shops misdiagnose a simple oil pan leak as something far more expensive.
Why does the repair still look cloudy after the resin cures?
This is the advanced question I get most often. Usually, the ‘cloudiness’ is oxygen that wasn’t fully purged or a mismatch in the resin’s refractive index. A technical report by the Glass Association of North America (GANA) highlights that the chemical composition of the resin must stay stable across varying temperatures to maintain clarity. If you used an old kit that’s been sitting in a hot garage for three years, the chemicals have likely broken down. Have you ever fallen into this trap? Let me know in the comments. If you’ve already messed up a repair, don’t panic, but do recognize top signs your car needs expert auto repair now. Sometimes the only way forward is a professional shave-and-fill or a total swap. While you’re at it, check if your transmission feels like its neutralizing or if other maintenance items are piling up. It’s better to tackle the ‘safety trifecta’—brakes, tires, and glass—all at once during a regular tune up than to piece-meal your safety.If you want that repair to last as long as a well-executed transmission overhaul, you need to recognize the difference between injection resin and pit filler. Most cheap kits give you one bottle and expect it to do both. It won’t. Injection resin is thin, designed to penetrate the deepest micro-fissures, while pit filler is a thick, heavy-duty polymer meant to cap the impact point and withstand the constant friction of your wipers. I personally use the Delta Kits professional bridge because it allows for ‘dry vacuum’ cycles. This means you can suck the air out of the crack before you ever drop the resin in. It is the same logic as finding the $15 tool to find a short circuit in your dash—having the right leverage saves you hours of frustration.
How do I keep a repaired chip from yellowing over the years?
The secret isn’t in the repair itself, but in the post-care. UV exposure is the primary reason resin turns that nasty amber color after two years. To prevent this, I always apply a high-quality glass sealant after the resin has cured and been scraped flush. Think of it like the $5 trick to clean foggy headlights forever; you need a protective layer to block the elements. Additionally, avoid using harsh, ammonia-based glass cleaners on the inside or outside of the repair zone. These chemicals can slowly degrade the bond. According to the ANSI/NWRA ROLAGS 2 (Repair of Laminated Automotive Glass Standard), a proper repair should maintain optical clarity and structural integrity for the remaining life of the glass, but that assumes you aren’t blasting it with industrial degreasers every weekend during your essential car service routine. Looking ahead, the days of simple DIY glass repair might be numbered. We are moving toward ‘Smart Glass’ which incorporates LIDAR sensors and heads-up display (HUD) films directly into the laminate. If you chip one of these, a simple resin fill might distort the sensor’s field of vision, leading to the subtle error that makes your cars automatic braking too sensitive. In the future, we’ll likely need handheld calibration tools just to verify a chip repair hasn’t blinded the car’s ‘eyes.’ For now, your best move is to keep the contaminants out. The moment you hear that ‘thwack’ on the highway, pull over and put a small piece of clear packing tape over the chip. This prevents road oils from getting inside, ensuring that when you do apply your resin, it bonds to glass, not grime. I challenge you to go out to your driveway right now and inspect your glass—if you find a tiny ‘star,’ seal it today before the next temperature swing ruins your week.
Three Hard-Earned Lessons from the Driveway
After years of fixing glass in my own garage, I’ve realized that patience is your most valuable tool. First, never repair a windshield in direct sunlight; the resin will cure before it even reaches the bottom of the crack, leaving you with a messy, failed attempt. Second, the ‘thumb test’ is real—gently pressing from the inside can help open the microscopic fissures just enough for the resin to slide in, much like how essential car service tips for safe summer drives emphasize preparation over speed. Finally, I’ve learned that keeping the original factory seal is always worth the effort. Once you cut that seal for a replacement, you’re often fighting wind noise and potential leaks for the rest of the car’s life. It is far better to spend ten dollars now than to deal with top signs your car needs expert auto repair now later down the road.
The Essential Toolkit for Every Glovebox
I don’t leave home without a few specific items to ensure my glass stays intact. I highly recommend keeping a small roll of clear packing tape in your side pocket; slapping a piece over a fresh chip keeps road salt and rain out until you can get home to your resin kit. For the actual repair, I trust the bridge-style injectors over the simple ‘syringe’ kits because they provide much better leverage and pressure control. Just as how transmission overhauls save you money in the long run by preventing total mechanical failure, a high-quality resin kit prevents the total loss of your glass. I also suggest a dedicated UV flashlight; relying on the sun is too unpredictable, and a consistent cure is the secret to a crystal-clear finish.
Secure Your Safety and Your Wallet
Taking care of your car shouldn’t feel like a chore, but rather an investment in your safety. A clear windshield is your primary sensor for the world around you, especially in modern vehicles where any distortion can lead to the subtle error that makes your cars automatic braking too sensitive. By tackling these small chips yourself, you are proving that you value the structural integrity of your vehicle. Whether you are performing a regular tune up or just checking your wiper blades, remember that the small details make the biggest difference in the long run. Don’t wait for the crack to reach the edge of the glass—grab your kit and seal it today. Have you ever tried a DIY glass repair only to have it fail a month later? Let me know what went wrong in the comments below!