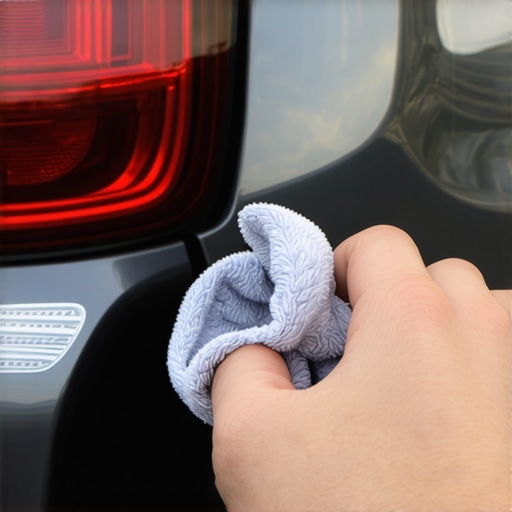
I’ll never forget the rainy Tuesday I almost flattened my neighbor’s prized rose bushes. I shifted into reverse, glanced at my dashboard, and saw nothing but a milky, grey smudge. It looked like I was trying to navigate through a bowl of clam chowder. My backup camera, once my favorite safety feature, had succumbed to that dreaded cloudy lens syndrome. I felt like a total amateur. It’s frustrating because we rely so much on these little pieces of tech for safety, yet they are often the first thing to fail when the elements get nasty. According to the National Highway Traffic Safety Administration, backup cameras have significantly reduced backup accidents by nearly 17%, so when yours goes dark or blurry, it’s more than just an annoyance—it’s a safety risk.
Why Your Backup Camera Looks Like a Blurry Dream
When I first saw the fog, I thought a quick wipe with my thumb would fix it. I was wrong. The issue isn’t just dirt; it’s often UV damage and micro-scratches that have oxidized the outer plastic layer. It’s similar to how headlights get yellow over time. If you’ve noticed your car needs expert auto repair now for other issues, don’t let this one slide. We often ignore the small stuff until we’re staring at a repair bill from a fender bender. I’ve found that many people assume the sensor itself is dying, but 90% of the time, the brain is fine—it’s just the eye that’s cloudy.
Is a Cloudy Lens Actually Worth Fixing Yourself?
You might be skeptical. After all, if the plastic is etched, can a DIY fix really bring it back to life? I used to think the answer was a hard no. I figured the seal was broken and moisture was trapped inside. While that does happen occasionally, most cloudiness is purely surface-level. If you can handle a regular tune-up or even just checking your oil, you can absolutely handle this. It’s one of those essential car service tips that saves you a fortune before a long road trip.
The One Mistake That Cost Me Two Hundred Dollars
Early on, I made a massive blunder. I saw the blurriness and immediately jumped to the conclusion that the internal hardware had fried. I went online and ordered a brand-new OEM camera assembly for $200. I spent two hours pulling my trunk liner apart, skinning my knuckles, and swapping the unit. When I finally turned the key, the picture was crystal clear—but not because of the new electronics. It was clear because the new lens wasn’t oxidized. Later, I took the old camera, used a 5-dollar trick to clean foggy lenses, and guess what? It looked brand new. I had essentially thrown $195 into the trash because I didn’t know the secret to resurfacing the plastic. Have you ever replaced a part only to realize you could have fixed it for the price of a cup of coffee? I want to make sure you don’t repeat my expensive mistake.
I remember standing in my driveway with a tube of white toothpaste and a ragged t-shirt scrap. My wife walked out, saw me scrubbing the rear hatch of the SUV with dental hygiene products, and gave me that look—the one that says I’ve finally lost it. But within three minutes, the milky ‘slurry’ on the lens started to dissolve, and the deep black of the camera housing reappeared. It was a messy, minty-fresh victory. If your camera has gone soft on the edges, you don’t need a degree in auto repair; you just need to follow a process that mimics how we treat other transparent plastics on the vehicle.
Clean the Surface Grime First
You can’t see what you’re doing if the lens is covered in road salt, oils, and general road film. Use a dedicated glass cleaner or a drop of dish soap on a microfiber cloth. This isn’t just about making it pretty; it’s about ensuring that when you start the abrasive phase, you aren’t just grinding dirt deeper into the plastic. Much like how you’d handle a regular tune-up for your engine, starting with a clean slate prevents avoidable damage. If you notice the plastic feels pitted or rough even after cleaning, you are dealing with oxidation, the same culprit behind yellowed headlights.
The Proper Way to Polish Away the Fog
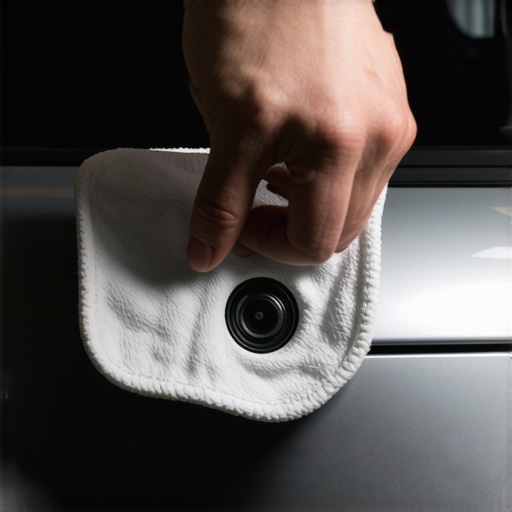
Grab that tube of non-gel, white toothpaste or a specialized plastic polishing compound. Apply a pea-sized amount directly to the lens. Using your index finger or a clean cloth, work in small, firm circular motions for about 60 to 90 seconds. Think of this as a micro-resurfacing. You are essentially sanding down the dead, oxidized layer of plastic that is scattering the light. It’s a similar logic to how a professional might handle a small scratch when you’re worried about the real cost of ignoring a cracked windshield or other glass imperfections. When you wipe the paste away with a damp cloth, the clarity should be noticeably improved.
Stop the Sun from Ruining Your Work
The biggest mistake I made during my first attempt was stopping after the polish. Without a protective layer, the plastic is ‘naked’ and will oxidize again in weeks. You need a UV-resistant sealant. I use a simple spray-on ceramic coating or a specialized plastic restorer. This creates a barrier against the sun’s rays and helps water bead off so you don’t get those annoying water spots during a rainstorm. It’s one of those essential car service tips that actually makes a daily difference in how your car performs.
Check for Internal Moisture Before You Give Up
Sometimes, the cloudiness isn’t on the outside. If you’ve polished the lens until it shines like a diamond but the screen still looks like a foggy morning in London, you likely have a failed seal. Look closely at the edges of the lens for tiny droplets of water or a ‘terrarium’ effect inside the housing. If moisture has breached the unit, the DIY fix becomes much harder. This usually happens after a high-pressure car wash or a particularly deep puddle. Just as you’d learn how to fix a cracked windshield before it spreads, catching a failing seal early can save the electronics before they short out. If the internal board is wet, the camera is effectively a ticking time bomb.
Why Your Resolution Might Still Be Low
Don’t confuse a low-resolution sensor with a blurry lens. If your car is more than a decade old, that camera was likely 480p at best. No amount of scrubbing will turn an old analog feed into 4K. However, if the image has gotten worse over the last year, it’s almost certainly surface degradation. I’ve seen people assume their transmission was failing because the screen flickered while in reverse, but often it was just a loose grounding wire or a dirty lens making the computer struggle to process the image. If the picture is clear but flickers, check your wiring harness; if it’s steady but foggy, get back to the polishing.
Let’s dig deeper into why we often misdiagnose these visual glitches. Many drivers assume that if the camera flickers while they are backing up, they are witnessing the first signs of a major electronic meltdown. I’ve seen people panic, thinking their transmission jumps out of gear or that the ECU is fried, simply because the screen went static-heavy for a second. In reality, modern cars are rolling Faraday cages of electrical noise. If your camera feed looks ‘snowy,’ it might not be the lens or the sensor at all. Often, it’s the hidden ground strap that causes weird electrical ghosts. When that strap corrodes, the return path for the camera’s signal gets ‘noisy,’ making a perfectly clean lens look like it’s filming a horror movie from the 80s. Have you ever fallen into this trap where you spent a fortune on a part only to find it was a two-dollar wire? Let me know in the comments.
Don’t Blame the Computer for a Dirty Connection
Everyone says that modern car electronics are ‘black boxes’ you can’t touch, but I’ve found that the physical connection is still the number one failure point. A common myth is that if the image is distorted, the camera’s processing chip is toast. However, the Society of Automotive Engineers (SAE) has noted in various studies that connector oxidation remains a leading cause of intermittent signal loss in exterior-mounted sensors. Before you assume you need expert auto repair now, check the plug behind the bumper. A quick spray of electronic cleaner can save you a $300 trip to the dealership. This is especially true if you notice why your car beeps when there’s no warning light; your car’s brain is confused by a bad signal, not necessarily a bad sensor.
Can Electrical Interference Actually Mimic a Hardware Failure?
Advanced systems, like those involved in parking assist, are incredibly sensitive to voltage drops. If your battery is aging, it might still start the car, but the surge of shifting into reverse can cause the voltage to dip just enough to ‘brown out’ the camera. It’s a nuance that even some seasoned techs miss. They’ll replace the camera, but the real culprit is a battery that’s on its last legs. It’s similar to the subtle error that makes your cars automatic braking too sensitive; the hardware is fine, but the data it’s receiving is corrupted by poor power delivery.
The High-Pressure Trap That Ruins Modern Electronics
Here is the ‘oops’ factor that most people never see coming: the local touchless car wash. We’ve been told that keeping the car clean is vital, but those high-pressure water jets are the natural enemy of your backup camera. While the units are ‘weather-sealed,’ they aren’t designed to withstand 1,500 PSI directed at point-blank range. This pressure can force water past the rubber gaskets, leading to that permanent internal fog I mentioned earlier. If you’re going through a wash, try to avoid spraying the camera lens directly for more than a second.  I learned this the hard way after a ‘deluxe’ wash left my SUV’s rear-view screen looking like an abstract painting. Once that moisture is in, you aren’t just dealing with a cloudy lens; you’re courting a short circuit that could take out the entire display module.
I’ve realized that the ‘try and see’ method of car repair is a grand way to go broke. Instead, I rely on a digital toolkit. If your screen is blank, don’t just stare at it in despair. I use a multimeter to check for a 12V signal at the harness every single time. It’s the same logic behind why your car beeps when there’s no warning light; the system is trying to communicate that an electrical loop is broken. If you aren’t comfortable with exposed wires, at least get a basic OBD2 scanner to see if the body control module is throwing a specific communication code. You might find that you don’t need expert auto repair now, but rather a simple fuse replacement. I personally recommend the 15-dollar tool to find a short circuit in your dash because it turns a three-hour diagnostic headache into a five-minute win.
How can I maintain my camera lens so it never fogs up again?
The secret isn’t just using a better cleaner; it’s about building a better barrier. I’ve started applying a thin layer of a dedicated ceramic coating every three months. This isn’t just vanity. According to research published by SAE International in their technical papers on ADAS sensors, surface degradation on exterior lenses can lead to a significant increase in signal noise, which the car’s processor then struggles to filter out. A technical white paper from Magna International, a leading automotive camera supplier, also highlights that moisture ingress often occurs at the grommet where the wire enters the housing. By keeping the lens slick and the housing sealed with a bit of silicone grease, you’re making it easier for your car to ‘see.’ This is as vital as other essential car service tips for safe summer drives when the intense UV rays are most likely to bake contaminants onto the plastic surface. 
Moving Beyond the Analog Past
We are entering an era where the physical lens might disappear or become self-healing. Some high-end manufacturers are already testing cameras hidden behind rotating badges or using ultrasonic vibrations to literally shake water droplets off the glass. Until those become standard, you have to be your own technician. If you’re already looking into how transmission overhauls save you money, you already understand the value of proactive, long-term care over reactive, expensive fixes. My advice is to integrate this into your regular tune-up schedule. Take ten minutes this weekend to check your camera’s mounting screws, apply a UV protectant, and verify that the wiring harness is snug against the frame. That small effort prevents the ‘milky soup’ from returning and keeps your safety tech actually safe. Before you spend a dime on a replacement camera, try this: Grab a multimeter and check for ground continuity at the rear bumper plug. You might just save yourself a few hundred dollars.
The Hardest Lessons I Learned Scrubbing Rear View Tech
Looking back, the biggest takeaway from my driveway mechanical sessions is that the simplest explanation is usually the right one. I wasted hours pulling interior panels when a dirty grounding wire was the culprit. Here are a few lightbulb moments I wish I had known earlier:
- Trust your eyes, but verify with tools. Just because a lens looks clear doesn’t mean the data signal is getting through. Always check for electrical ghosts before assuming the lens is the only issue.
- UV rays are the silent killer. Plastic degrades the moment it is exposed to the sun. If you skip the sealant, you aren’t fixing the problem; you’re just hitting the snooze button on it.
- Don’t ignore the signs of a short. If your screen flickers, it is often the one electrical fault that most mechanics misdiagnose.
The Three Tools Always in My Glovebox for Backup Tech
You do not need a professional shop to maintain your visibility. I swear by a basic white toothpaste for quick polishing—it is cheap, effective, and always available. For the electrical side, I always keep a multimeter handy to ensure my regular tune-up includes checking sensor signals. I also recommend a high-quality UV-resistant ceramic spray to keep water and grime from sticking to the lens surface. Finally, keep that 15-dollar tool to find a short circuit in your dash nearby so you never have to guess about a wiring issue again.
Reclaim Your View of the Road Today
Fixing a cloudy backup camera is one of those small victories that makes you feel like a DIY hero. It is a low-cost way to ensure your safety and avoid the top signs your car needs expert auto repair now later down the road. Don’t be afraid to get your hands a little dirty; the clarity of that screen when you shift into reverse is worth every minute of effort. Taking care of these small details is just as important as knowing how transmission overhauls save you money in the long run by keeping the whole vehicle in peak condition. Have you ever had a backup camera go totally dark on you? Let me know in the comments below!