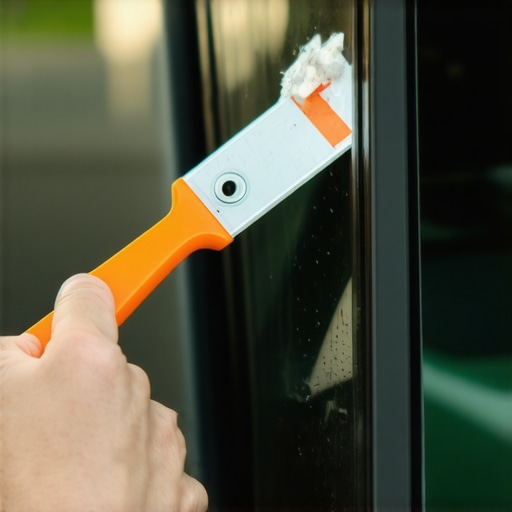
I’ll never forget the sunny Saturday I decided to ‘quickly’ clean up my old sedan’s windshield. I had a three-year-old registration sticker that had basically fused with the glass, thanks to years of blistering summer heat. I figured a butter knife and some elbow grease would do the trick. Boy, was I wrong. Within ten minutes, I hadn’t just failed to remove the sticker; I’d left a series of jagged, permanent gouges in the glass that caught the light every time I drove toward the sun. It was a classic ‘DIY disaster’ that made me wish I’d just left the expired sticker alone. But you don’t have to live with a cluttered windshield or, worse, a scratched one. Today, I’m going to show you exactly how to lift those stubborn decals without leaving a single mark behind.
Why Most People Ruin Their Windshields Before They Even Start
We’ve all been there. You look at that peeling, sun-baked rectangle of plastic and think, ‘I can just peel this off with my fingernail.’ Then the top layer comes off, leaving behind a gummy, gray wasteland of adhesive. This is usually when the panic sets in and people reach for the wrong tools. Using metal scrapers or—heaven forbid—kitchen cutlery is the fastest way to turn a simple task into a call for professional help. Glass is surprisingly delicate when it comes to sharp metal edges. In fact, many automotive glass experts suggest that modern windshields are designed for impact resistance rather than surface hardness, meaning they can scratch easier than you might think. Before you accidentally cause damage that makes you worry about the real cost of ignoring a cracked windshield, you need to understand that this isn’t a job for brute force. It’s a job for chemistry and the right kind of leverage.
Is it actually possible to get it off without a razor blade?
I get the skepticism. If you’ve ever tried to scrub off a ‘permanent’ sticker, it feels like it’s part of the molecular structure of the glass. Early in my car-care journey, I made the mistake of using a heavy-duty abrasive pad. It took the sticker off, sure, but it left a hazy ‘fog’ on the glass that no amount of essential car service tips could fix. The secret isn’t just ‘cleaning’; it’s softening. According to the glass manufacturers at Pilkington, automotive glass can actually be porous on a microscopic level, which is why adhesive bonds so tightly over years of UV exposure. This means you aren’t just scraping the surface; you’re fighting a chemical bond. Have you ever ended up with a scratched windshield trying to do something ‘simple’ like this? I want to make sure that never happens to you again. Let’s look at the specific tools that will save your glass.Heat is your best friend for sticky situations. Think of the adhesive like cold wax; it’s brittle and stubborn until it gets warm. I learned this the hard way during a freezing January morning when I tried to peel a dealership logo off my trunk. The sticker just snapped into tiny, impossible-to-grab pieces, and I spent an hour picking at it with my fingernails until they bled. Now, I use a hairdryer on the high setting, waving it about three inches from the glass for 60 seconds. You want it warm to the touch, not scorching. This softens the bond so it releases like a Post-it note rather than a permanent weld. While you’re working on the exterior, it’s a great time to check other maintenance items, as essential car service tips for safe summer drives often start with ensuring your visibility isn’t blocked by old permits or residue.
Swap the Metal Razor for Plastic
If you take a metal blade to your glass, you’re playing a dangerous game. One slip or a slightly wrong angle, and you’ve created a permanent scar. Instead, get a dedicated plastic razor blade. They look like the standard ones but are made of polycarbonate. I keep a pack in my tool tray right next to the supplies I use for every regular tune up. Slide the plastic edge under a corner once the heat has done its job. It should lift with minimal pressure. If you feel resistance, stop and apply more heat. Forcing it is how you end up needing to know how to fix a cracked windshield before it spreads because even a tiny nick can become a major structural issue under the right temperature stress.
Dissolve the Leftover Gunk with Common Shop Supplies
Once the sticker is gone, you’ll likely see a ghost of its former self in the form of sticky residue. Don’t reach for the abrasive green side of a kitchen sponge. Instead, use a solvent like Goo Gone or even a little WD-40 from the shelf. I once used a heavy-duty industrial degreaser on my interior dash by mistake and it actually bleached the plastic—a mistake I’ll never repeat. Dampen a microfiber cloth and rub in a circular motion. Microfiber is essential here; the tiny loops in the fabric catch the adhesive particles rather than just smearing them around like peanut butter. This isn’t just about aesthetics; keeping your glass perfectly clear is as vital as knowing the top signs your car needs expert auto repair now.
Finish with a Streak-Free Shine
The final step is neutralizing the solvent you just used. If you leave WD-40 or citrus cleaner on the glass, it will attract road dust faster than a magnet, leaving you with a blurry mess the next time you drive. Use a dedicated automotive glass cleaner and a fresh microfiber towel. Clean the area twice: once to remove the chemicals and a second time to ensure there’s no oily film left behind. If you notice any deep scratches that were hiding under the sticker or created by a previous owner’s poor removal attempt, it might be time to consider the real cost of ignoring a cracked windshield, as even surface damage can impair your night vision and cause dangerous glare.While cleaning your glass is about visibility, keeping the rest of your car healthy is about longevity. Many DIYers think that a “more is better” approach works for everything, especially when it comes to fluids. But here’s the truth: most people are actually over-maintaining their cars in ways that cause more harm than good. Take the transmission, for example. Common wisdom says you should flush your fluids every 50,000 miles. However, if you’ve skipped a few service intervals, a high-pressure flush can be a death sentence for an older gearbox.
Stop Chasing the Perfect Fluid Flush
In my years under the hood, I’ve seen countless drivers come in with a transmission that started slipping right after a routine flush. The problem is that high-pressure machines can force metal shavings and clutch material into tiny passages where they do not belong. Instead of a flush, a simple drain and fill is often significantly safer for the internal components. This is one of those regular tune up nuances that many shops will not tell you because flushes are more profitable. According to experts at the Automatic Transmission Rebuilders Association, the detergents in new fluid can actually break loose varnish that was helping old, brittle seals stay tight. If you are not careful, you might end up needing to know how transmission overhauls save you money in the long run much sooner than you expected.
Is a high-pressure flush actually safe for a high-mileage gearbox?
For most vehicles with over 100,000 miles that have not had regular service, the answer is a firm no. You are much better off performing a series of gradual fluid changes over several weeks to slowly introduce fresh detergents without shocking the system. This is a common point of confusion, but understanding the difference between a transmission flush and a simple fluid change is the key to avoiding a multi-thousand dollar repair bill. 
The Real Danger of Ignoring These Subtle Shifts
It is easy to ignore a small jerk or a slight delay when you put the car in gear, thinking it is just the car getting old. But these are often the top signs your car needs expert auto repair now. I once worked on a car where the owner thought their transmission made a whining sound in first gear just because of the cold weather. In reality, the filter was clogged, starving the pump of oil. If they had waited another week, the whole unit would have melted down from heat friction. Have you ever fallen into this trap where a preventative service actually broke something or you ignored a sound until it was too late? Let me know in the comments. Don’t let a simple maintenance task turn into a disaster like my sticker-removal story. Always check the nuances before you reach for the tools or book a service appointment.Most DIYers stop at a set of sockets and a floor jack, but if you really want to scale your maintenance game, you need to start looking at the digital side of things. I remember struggling for days with a rough idle that didn’t throw a single Check Engine Light. It wasn’t until I plugged in a scanner capable of reading ‘Mode $06’ data that I found a misfire on cylinder three that was happening just often enough to feel, but not often enough to trigger the dash light. Catching these ghosts early is the easiest way to manage the top signs your car needs expert auto repair now. If you are serious about your vehicle, you need to learn how to read live data to find a misfire before it destroys your expensive catalytic converter. I personally use an Autel MaxiCheck because it allows me to actuate solenoids and test individual components without taking half the engine apart.
Get Yourself a Scanner That Does More Than Read Codes
The generic $20 Bluetooth dongles are fine for clearing a simple gas cap code, but they are useless when you need to know why your fuel trims are out of spec. In my experience, spending $150 on a mid-range tablet-style scanner pays for itself the first time it prevents you from firing the ‘parts cannon’ at a problem. This level of precision is exactly what separates a hobbyist from someone performing a professional-grade regular tune up. Plus, catching a slipping clutch early via live data is one of the many ways how transmission overhauls save you money in the long run by preventing a total core failure. 
Stop Guessing if Your Battery is Actually Dying
We’ve all used a multimeter to check a battery’s resting voltage, but that measurement rarely tells the full story. A battery can show 12.6 volts but have zero cranking amps left when the starter actually draws current. This is why I swear by the Solar BA9 tester; it uses a small load to measure the actual Cold Cranking Amps (CCA) available instantly. Knowing the health of your electrical system is a core part of essential car service tips for safe summer drives, as the July heat is often more brutal on a battery than the January cold. If you suspect your power source is weak, make sure you know how to spot a fake car battery before you buy it, especially with the influx of low-quality knockoffs flooding online marketplaces. Whether you are tackling a DIY fix or booking an appointment at collisionfixer, these numbers don’t lie.
How do I keep my car running like new for decades?
The answer isn’t a secret additive or a magic spray; it’s a commitment to cleaning the things most people ignore. Every time I change my oil, I spend five minutes with a wire brush and a specific chemical compound. Using the secret to cleaning battery terminals with baking soda is a great start, but I also recommend applying a dielectric grease to every major ground point you can reach. Corroded grounds are the number one cause of ghost electrical issues, and you might find yourself needing the 15 dollar tool to find a short circuit in your dash if you let them fester. According to the ASE Technical Manual for Advanced Engine Performance Diagnostics (A8), ‘voltage drop’ across a dirty connection can trick modern ECUs into thinking a sensor has failed when it’s actually just starving for power. Looking forward, the maintenance trend is shifting away from purely mechanical work and into software calibration. Within five years, knowing how to update your car’s firmware or recalibrate a steering angle sensor will be as important as knowing how to change a spark plug. If you are feeling brave, I challenge you to pull your live data tonight—check your Long Term Fuel Trims (LTFT) and see if they are within the +/- 5% range of a healthy engine.
Lessons I Had to Learn the Expensive Way
After years of wrenching, I’ve realized that the most expensive repairs usually start as something small I ignored. First, trust your gut when it comes to weird noises. If you notice why your engine makes a tapping sound like a typewriter, don’t wait for a light to come on; that’s your car asking for help. Second, cleanliness is literally next to godliness under the hood. A dirty connection can mimic a total component failure, so learning how to diagnose a bad ground wire in minutes will save you from buying parts you don’t need. Lastly, stop over-torquing everything. I’ve snapped more bolts than I care to admit because I thought ‘tight’ meant ‘as hard as I can pull.’ Use a torque wrench for everything from spark plugs to wheel lugs.
The Gear That Actually Lives in My Trunk
I don’t believe in buying every tool in the catalog, but these three are non-negotiable for me. I always keep a high-quality OBD2 scanner like the Autel MaxiCheck because it finds the ‘ghost’ codes that standard readers miss. For electrical gremlins, I never leave home without the 15 dollar tool to find a short circuit in your dash; it has turned day-long headaches into ten-minute fixes. #IMAGE_PLACEHOLDER_E# Finally, I recommend the ‘Solar BA9’ tester. It’s the only way to know if your battery is truly healthy before a winter storm leaves you stranded. These tools, combined with a consistent regular tune up schedule, are the secret to a 300,000-mile car.
Mastering Your Machine One Project at a Time
Taking care of your vehicle doesn’t have to be overwhelming. Whether you are just scraping off an old sticker or diving into complex diagnostics, the goal is the same: stay curious and stay patient. Each small victory builds the confidence you need for the bigger ones. If you ever hit a wall or find a problem that’s just too big for the driveway, don’t hesitate to reach out to the pros at collisionfixer to get things back on track. Your car is an investment, and with these skills, you’re the best person to protect it. Have you ever tried a ‘simple’ fix that turned into a weekend-long project? Let me know in the comments below!