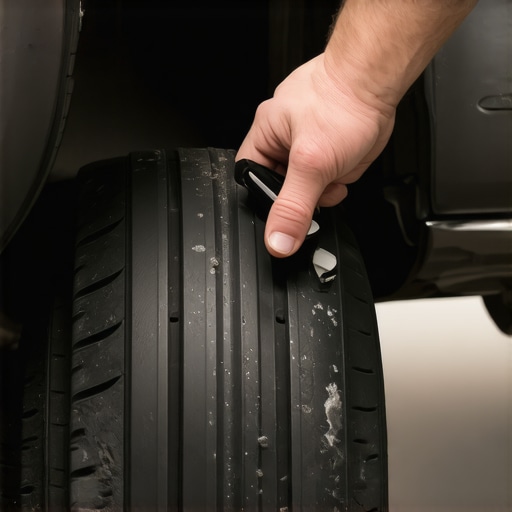
I remember the day my brake pedal suddenly went soft. It was that unsettling moment when I pressed down and felt almost nothing—like braking through air. My heart sank because I knew I was on the brink of a costly repair, or worse, an unsafe drive. That lightbulb moment made me realize how easily a simple, inexpensive fix could have prevented the panic.
If you’ve experienced a brake pedal that feels spongy or soft, you’re probably wondering whether it’s time for a full brake job or if there’s a quick fix you can try yourself. Well, I’m here to tell you that for around $20 and a little know-how, you can restore your brake feel without breaking the bank. Today, I’m going to share the simple trick I discovered that saved me hundreds—and kept me safe on the road.
Why a Soft Brake Pedal Feels Like Air Is a Sign to Act Fast
A brake pedal that feels like air isn’t just annoying—it’s potentially dangerous. When your brakes lose firmness, it indicates there’s a problem with your hydraulic system, often related to the brake master cylinder, brake lines, or fluid levels. Ignoring these signs can lead to complete brake failure, and that’s a risk no one should take.
Many folks jump straight to replacing parts without considering simpler, cost-effective solutions. The truth is, your brake system relies heavily on brake fluid, and sometimes, a little air trapped in the system is what causes that spongy feel. The good news? Bleeding your brakes can often resolve this issue quickly.
But before you rush to the shop or start bleeding your brakes blindly, make sure you understand the mistake I made early on: I replaced my brake pads and rotors, thinking that would fix the problem. Turns out, the issue was just air in the system, easily bleedable and costing me less than 20 bucks in parts.
If you’re tired of that mushy pedal or the feeling of losing braking power, stay tuned. I’ll walk you through the simple steps to fix this and keep your brakes responsive. And if you want to make sure your entire braking system is in top shape, check out our [essential car service tips for safe summer drives](https://collisionfixer.com/essential-car-service-tips-for-safe-summer-drives). Have you faced this problem before? Let me know in the comments below!
Ready to get your brakes back on point? Let’s dive into the fix that might just save you a whole lot of trouble.
Gather Your Tools and Prepare Your Vehicle
Start with basic supplies: a clear container, compressed air or a bleeder kit, and fresh brake fluid if needed. Park your car on a level surface, turn off the engine, and set the parking brake. Before beginning, consult your vehicle’s manual to locate the brake bleed screws and check your brake fluid reservoir. Remember, safety gear like gloves and eye protection is essential.
Check Brake Fluid Level and Top Off if Necessary
Open the hood and locate the brake fluid reservoir—usually near the master cylinder. If the fluid is below the recommended level, add the specified brake fluid to prevent air from entering during bleeding. This is a common issue; in my own experience, a simple top-off helped restore pedal firmness before proceeding to more involved steps.
Loosen Bleed Screws and Prepare to Pump
Locate the bleed screws on each wheel’s brake caliper or wheel cylinder. Attach a clear tubing to the screw and submerge the other end into a container to catch old fluid. Loosen the screws slightly—about a quarter turn. Have an assistant press the brake pedal slowly and firmly, then hold it down. This step mimics the way a mechanic pushes the pedal to force out trapped air.
Bleed the Brakes Systematically
Engage the Pumping Process
With the screw loosened, have your helper press the brake pedal to the floor. Then, tighten the bleed screw while the pedal is still pressed—this traps air and old fluid inside the caliper. Repeat this process of pumping, tightening, and releasing until the fluid runs clear and free of bubbles. In my case, I focused on one wheel at a time—rear passenger, front driver, and so forth—until all brakes bled properly.
Monitor and Refill Brake Fluid
Keep your eye on the master cylinder reservoir. As you bleed each wheel, you might need to top off brake fluid to avoid introducing more air. It’s a precise process; too little fluid means air can get trapped, and too much can cause spillage and damage. I found that working slowly and methodically reduced the risk of mistakes.
Final Checks and Test Drive
Once all wheels have been bled, check the fluid level again and ensure the brake pedal feels firm and responsive. Test your brakes gently at first—preferably in an empty parking lot—to confirm that the mushy feeling is gone. If pressure feels inconsistent, repeat the bleeding process. Remember, a properly bled system ensures your safety and reliable braking performance.
Additional Tips for Best Results
If air bubbles stubbornly persist, consider using a one-man bleeding kit—these are effective and make the process easier, especially for DIYers. Also, always use fresh brake fluid that meets your vehicle manufacturer’s specifications, as old or contaminated fluid can cause soft pedals regardless of bleeding. For more detailed info on vehicle maintenance, check out our tune-up tips.
As I experienced firsthand, taking the time to bleed your brakes properly is a small effort that pays off with a safer, more responsive pedal. If you run into persistent issues, it’s wise to consult a professional. For insights into other essential vehicle repairs, visit our car service guide.
 Many drivers believe that understanding basic car maintenance is enough to keep their vehicles in top shape, but in reality, there are subtleties that often trip up even seasoned DIYers. A common misconception is that replacing parts like spark plugs or filters alone guarantees optimal performance. However, neglecting the precision and timing of these replacements, or assuming they’re always the root cause of issues, can lead to more expensive repairs down the line. For instance, changing a spark plug without checking the ignition coil’s health might not resolve misfires, which is a mistake I’ve seen many make. Think about transmission repairs: many assume fluid changes are simple ‘fill and forget,’ but the specific type and condition of the fluid, along with proper flushing techniques, significantly impact longevity, as detailed in expert guides like those on transmission overhaul strategies. One sneaky trap is overlooking the importance of exact torque specifications during assembly. Over-tightening bolts can cause warping, leading to costly replacements; under-tightening risks parts coming loose. Always consult your vehicle’s manual or trusted repair resources for torque settings. Another nuance often missed involves the condition of ancillary components—like sensors or wiring harnesses—that interact with major systems. Dirty or faulty sensors can send errant signals, causing misfires or poor fuel economy, which highlights the importance of diligent diagnostics. Advanced tech has made diagnostics more accessible, but it also creates a temptation to rely solely on scan tools without understanding underlying issues. This is a mistake, as expert sources like multimeter diagnostics reveal, testing components physically is vital. Have you ever fallen into this trap? Let me know in the comments. It’s crucial to recognize that truly mastering auto repair involves understanding these nuances—so your car runs reliably and safely for years. For more on preventing costly mistakes, check out our comprehensive car service tips, and always keep learning.Maintaining your vehicle’s performance over the long haul requires more than just basic know-how; it demands precision tools, consistent routines, and an understanding of the evolving technology in automotive repair. One essential device I swear by is a high-quality scan tool like the Autel MaxiCOM series. Unlike generic code readers, this professional-grade equipment allows me to access comprehensive vehicle diagnostics, from engine codes to transmission data, enabling accurate repairs and saving me from chasing ghosts.
For electrical system troubleshooting, I rely on a durable digital multimeter such as the Fluke 115. Its accuracy and wide range of functions make diagnosing issues like bad sensors or faulty wiring straightforward. Using the multimeter, I can quickly verify the health of components like alternators or ECU connections, reducing downtime and ensuring I fix the root cause.
A pivotal part of my routine is maintaining the cleanliness and calibration of my tools. For example, regular calibration of the multimeter—as recommended in technical standards—ensures consistent accuracy. When working on critical systems like transmissions, I use specialized transmission fluid testers to assess fluid condition, directly impacting the longevity of components like torque converters.
Looking ahead, the trend points toward greater integration of diagnostic software with vehicle systems. As vehicles become more computer-dependent, tools that can interface with OEM-specific software will be invaluable. Staying updated with the latest diagnostic programs, such as those from OEM manufacturers, not only broadens your capabilities but also helps anticipate future repair needs.
How do I maintain these tools over time? Investment in protective cases, routine calibration, and timely software updates are key. For example, I schedule quarterly calibration checks for my scan tools, which can be easily done following guidelines from reputable sources like automotive technicians’ guides.
If you want to enhance your DIY repair game, I recommend mastering the use of a multimeter for basic diagnostics—it’s surprisingly simple and incredibly effective. Practice measuring voltage, resistance, and continuity; these are fundamental skills that can prevent costly misdiagnoses. And remember, keeping your equipment well-maintained ensures you’re always ready for the next repair challenge.
For additional insights on how to optimize your car’s lifespan with proper maintenance, check out our comprehensive tips on maximizing your vehicle’s longevity. Regularly inspecting and calibrating your tools not only boosts repair accuracy but also prolongs their usability, making every dollar invested worthwhile. Ready to take your repair skills to the next level? Start by giving your multimeter a quick calibration today—it’s a small step that can make a big difference.
The Hardest Lesson I Learned About auto repair,collisionfixer,transmission,car service,tune up
One of the toughest truths I faced was realizing that not every symptom signals a need for costly parts replacement. For instance, a soft brake pedal isn’t always a sign to replace your entire braking system; sometimes, it’s just trapped air or low fluid. This insight forced me to approach automotive issues with patience and a deeper understanding, saving time and money.
3 Myths About auto repair,collisionfixer,transmission,car service,tune up That Held Me Back
- Myth: Replacing parts always fixes the problem. Often, the root cause is overlooked—like air in the brake lines or contaminated fluid.
- Myth: DIY repairs are always cheaper and easier. Without proper tools or knowledge, you risk making small issues worse.
- Myth: All brake fluids are created equal. Using the wrong type can compromise your braking system’s performance.
What Experts Won’t Tell You About auto repair,collisionfixer,transmission,car service,tune up
Some of the most valuable advice comes from professionals who emphasize the importance of proper bleeding techniques over rushing to replace parts. They also highlight the significance of using diagnostic tools early—like a quality multimeter—to identify issues before they escalate. This approach not only extends the life of your vehicle but also enhances safety.
My Essential Toolkit for auto repair,collisionfixer,transmission,car service,tune up
I trust high-quality, reliable tools like the Fluke 115 multimeter for electrical diagnostics, which is crucial for troubleshooting complex issues. For more comprehensive scans, the Autel MaxiCOM series has been invaluable, providing insights that save me from unnecessary repairs. Regular calibration and maintenance of my tools ensure accuracy, which is vital for safe, effective repairs.
Your Turn to Tackle Brake Maintenance
Taking the time to learn these pitfalls and tools has made me more confident on the road. If you’re ready to empower yourself with automotive knowledge, start with simple bleeding procedures for your brakes or diagnostic checks. Remember, every small effort you make today contributes to a safer drive tomorrow. Want to share your own repair stories or ask questions? Drop a comment below and let’s learn together!
,