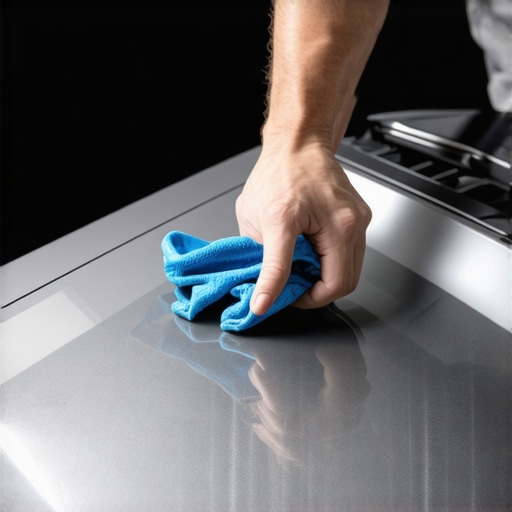
Ever stared at a deep scratch on your beloved car and felt that sinking feeling in your stomach? I’ve been there more times than I care to admit. One afternoon, after a minor parking lot scrape, I finally realized that those stubborn scratches didn’t have to mean a trip to the shop or a costly repaint. The lightbulb moment was clear: I could actually fix some of these deep blemishes myself and save both time and money.
Today, I want to share with you the journey I took to understand the best way to touch up deep scratches in my paint. And trust me, once you get the hang of it, it’s a skill worth having. We’re going to demystify the process, so you won’t have to settle for a damaged, dull-looking vehicle. Instead, you’ll be equipped with simple, effective techniques to restore your car’s appearance.
Why Address Deep Scratches Immediately
Deep scratches not only mar the way your car looks but can also lead to more serious issues like rust if left unattended. According to a study by AAA, neglecting paint damage can escalate the risk of corrosion, ultimately costing you more in repairs down the line (source). That’s why tackling scratches promptly isn’t just about aesthetics; it’s about preserving your investment.
But here’s the thing: I used to think only professionals could handle such imperfections. My early mistake was believing that touch-up paint and minor repairs were complicated or only within the realm of experts. Turns out, with a bit of patience and the right tools, you can handle many deep scratches on your own.
Is DIY Repair of Deep Scratches Really Worth the Effort?
Some might be skeptical, thinking, “Will this really make a difference?” I get it. I wondered the same thing initially. I also made the mistake early on of rushing into repairs without prepping the surface properly — leading to worse results. That taught me that the key lies in proper preparation and patience. If you’re tired of looking at those unsightly scratches every day and want to restore your car’s aesthetic without breaking the bank, you’re in the right place. Let’s dive into how you can do just that.
Gather Your Tools and Prepare the Surface
Before diving into the repair, assemble all necessary materials: automotive touch-up paint matching your car’s color, fine-grit sandpaper (around 2000-grit), painter’s tape, a microfiber cloth, rubbing alcohol, primer, clear coat, and a small applicator brush. Start by cleaning the damaged area thoroughly with soap and water, then dry it completely. Next, wipe the surface with rubbing alcohol to remove grease or residues, ensuring a smooth foundation for the repair. I once skipped this step on a rainy day, which resulted in the paint bubbling and uneven finish—lesson learned: cleanliness is key.
Sand Down the Deep Scratch
Use the fine-grit sandpaper to gently sand the scratched area, aiming to smooth the edges of the damage and create a rough surface for the paint to adhere to. Think of it like leveling a bumpy patch before applying new plaster. Wrap the sandpaper around a small block for control, and sand in a circular motion with light pressure. Be cautious not to sand too much beyond the scratch to avoid creating depressions. I recall a time when I over-sanded, exposing the primer underneath, which made the patch stand out even more. Take your time, and keep the surface moist by occasionally spraying a little water to prevent scratching too deep.
Apply Primer and Base Coat
Mask off surrounding areas with painter’s tape to avoid overspray. If the scratch reaches bare metal or primer, apply a thin layer of automotive primer and let it dry according to the manufacturer’s instructions. Once dry, use the small applicator brush to carefully apply the matching touch-up paint in light, thin layers. Patience here is vital; multiple thin coats produce a more seamless appearance than one thick coat. I once rushed this step, resulting in uneven color and a noticeable patch—so I recommend patience and multiple coats. Wait for each coat to dry fully before applying the next.
Sand and Polish for a Perfect Finish
After the paint has cured (refer to the product instructions, usually 24 hours), lightly sand the repaired area with 2000-grit sandpaper, blending the new paint with the existing finish. Follow this with a polishing compound to restore the gloss and match the surrounding paint perfectly. Think of it like buffing a gemstone; you want the repaired patch to shimmer in harmony with the rest of your car’s surface. I found that patience in polishing made the difference between a noticeable repair and a hidden one. Finish with a layer of clear coat to seal and protect the repair, giving it a durable, shiny appearance.
Everyone’s vehicle is different, but mastering these steps allows you to tackle deep scratches confidently. Remember, the key is meticulous preparation, gentle application, and patience—culminating in a seamless finish that looks almost factory new. For further maintenance tips and to keep your car in prime condition, check out essential car service tips for safe summer drives. If at any point you feel overwhelmed, don’t hesitate to contact professional auto repair experts for advice or assistance.
Many car owners believe that routine tune-ups and auto repairs are simple tasks, but in reality, there are nuanced aspects that often go unnoticed. One common myth is that a standard tune-up guarantees the vehicle will run flawlessly for another 50,000 miles. In my experience, this oversimplification overlooks the importance of diagnosing underlying issues that may not be immediately apparent. For example, neglecting to check the health of the transmission during a routine service can lead to costly repairs down the line. It’s crucial to understand that each component, from spark plugs to transmission fluid, interacts in complex ways, and a holistic approach ensures better longevity. A pitfall I see often involves using cheap, low-quality fluids or parts, which may seem cost-effective initially but can cause damage over time, especially in critical systems like the transmission. This highlights why investing in quality and proper diagnostics is essential for effective auto maintenance. Expert mechanics recognize that a detailed inspection, rather than just following a checklist, is key to identifying hidden problems before they escalate. For advanced car owners, questions like “How do I interpret subtle signs of transmission wear?” are common. The answer lies in understanding diagnostic signals, such as delayed shifts or unusual noises, which require experience to detect early (source). Relying solely on routine procedures without digging deeper can mask serious issues, leading to unexpected breakdowns. Benign-sounding advice, like postponing repairs or ignoring warning lights, often results in more significant damage, so staying alert and proactive is vital. Additionally, not everyone realizes that modern vehicles have integrated systems that require specialized tools and knowledge—ignoring this can make DIY repairs more harmful than beneficial. The lesson here is that proper car care hinges on understanding the intricate relationships within the vehicle’s systems, not just executing the basics. For a comprehensive guide on maximizing your car’s lifespan through smart maintenance, check out this resource. Remember, consulting experienced professionals ensures your maintenance is not only routine but also insightful. Have you ever fallen into this trap? Let me know in the comments.
Keep Your Car Running Smoothly with the Right Tools
Maintaining a vehicle over the long haul requires more than just regular oil changes or tire rotations. Having the proper equipment and understanding their specific benefits can significantly extend your car’s lifespan and ensure safety on the road. I’ve personally relied on a few specialized tools that have saved me time, money, and frustration, especially when diagnosing and fixing issues like transmission trouble or brake problems.
Invest in a Quality OBD-II Scanner
One of the most indispensable devices in my toolkit is a reliable OBD-II scanner. Unlike generic code readers, models like the BlueDriver or the FIXD OBD2 Scanner provide detailed diagnostics, helping me pinpoint issues with transmission or engine performance quickly. With real-time data and comprehensive reports, I can determine if a problem is minor or requires professional attention—saving me from costly repairs.
Implement a Torque Wrench
When working on critical components like wheel lug nuts or engine bolts, a torque wrench ensures I tighten fasteners to exact specifications, preventing damage or safety risks. I prefer digital models for their precision, especially during transmission repairs or when replacing brake calipers. Consistent torque application avoids uneven wear and keeps parts functioning optimally.
Use a Buoyancy-Assisted Fluid Pump
Changing fluids like transmission or brake fluid can be messy, but a fluid transfer pump reduces spillage and allows precise fill levels. I find this tool critical when topping off or flushing systems, as it prevents introducing air into hydraulic lines, which could lead to uneven brake response or transmission slipping. Accurate fluid management is vital for long-term component health.
Employ a Digital Multimeter
Electrical issues often hide behind dashboard lights or intermit stays. A digital multimeter helps verify voltage and current draw, enabling me to diagnose battery problems, alternator failures, or sensor malfunctions. Regular testing can uncover early signs of trouble—like a sluggish starter or flickering headlights—before they become major repairs.
Future Trends in Auto Maintenance Tools
Expect smart diagnostics and AI-integrated systems to become standard. Devices that connect via Bluetooth or Wi-Fi and upload data directly to apps will streamline maintenance routines. For example, predictive analytics can anticipate wear and tear, prompting timely repairs. Embracing these advancements now positions you ahead of the curve, ensuring your vehicle remains reliable and safe.
How do I keep my tools effective over time?
Regular calibration, proper storage, and cleaning are essential. For instance, a torque wrench loses accuracy if not recalibrated annually—so I send mine to a professional for checks. Maintaining your tools guarantees that your home repairs stay precise and your vehicle remains well-maintained. For more details, check out this comprehensive guide on car longevity.
Now, I challenge you to give one of these tools a try—perhaps the digital multimeter—to start diagnosing your vehicle like a pro. Remember, proactive maintenance with the right tools truly pays off in years of dependable driving. If you’re ready to take the next step, don’t hesitate to reach out for expert advice. Your car will thank you.
What the Road Taught Me About Handling Deep Scratches
One of the toughest lessons I learned was that patience and attention to detail matter more than rushing through repairs. I once tried to fix a deep scratch quickly, only to end up with a patch that stood out more than the original blemish. This taught me to slow down, prep thoroughly, and apply each step with care, leading to a seamless finish. Sometimes, the biggest breakthroughs come from trial and error—like realizing that proper surface cleaning before painting can make all the difference.
Gear Up for Success with Trusted Tools
Over time, I discovered that investing in quality tools like a reliable OBD-II scanner or a digital torque wrench transformed how I maintain my vehicle. These devices help me catch problems early and ensure repairs are precise, saving me time and money. For example, using a good spray gun for paint application prevents drips and uneven coverage, making DIY touch-ups look professional. Trusting tools that deliver consistent results is key to building confidence in your auto repairs.
Embrace the Challenge: Your Car Repair Journey Starts Now
Remember, tackling deep scratches and other auto maintenance tasks isn’t just about saving money; it’s about empowering yourself to take control of your vehicle’s care. The sense of accomplishment you feel when you restore that flawless shine is unbeatable. So, don’t hesitate—start small, learn as you go, and watch your skills grow. Your car—and your wallet—will thank you for it. Ready to give it a try? Share your experiences or ask questions below, and let’s keep the conversation moving!