Ever been in the middle of packing up your car for a road trip, only to hear that audible snap from the interior? Or maybe you’ve noticed that small piece of plastic trim hanging loose after a minor fender bender? I know I have, and let me tell you, initially I panicked—thinking I’d need some complex fix or a costly visit to the shop. But here’s the thing: those tiny interior pieces are surprisingly resilient once you know a simple trick.
Today, I want to share my personal experience with fixing broken plastic interior trim quickly, without the headache or hefty bill. We’ll go through a proven method that helped me restore my car’s interior in under an hour, and I’ll give you some insider tips along the way.
Why Fixing Broken Interior Trim Matters More Than You Think
You might be tempted to ignore those small damages—after all, they’re just cosmetic, right? But the truth is, loose or broken plastic trim isn’t just about appearance. Over time, it can cause rattles, distract you while driving, or even lead to more significant damage if left unchecked. Plus, a well-maintained interior keeps your car feeling fresh and adds to its resale value.
One common mistake I made early on was waiting too long to address minor damages—thinking they’d sort themselves out. But this often leads to the plastic pieces cracking further or falling off, which can complicate repairs and increase costs. According to experts at collisionfixer.com, addressing minor damages promptly can prevent escalation and save you money in the long run. They also emphasize choosing straightforward repairs over expensive replacements whenever possible.
So, if you’ve ever experienced that nagging feeling when a trim piece pops loose or cracks apart, you’re not alone. I’ve been there, and I know the frustration. But good news—there’s a simple, effective way to fix it yourself, often with just a few supplies. Keep reading, and I’ll walk you through the best quick fix I’ve found, so your car can stay looking sharp and functioning smoothly.
Pulling Off the Damaged Piece Without Causing More Damage
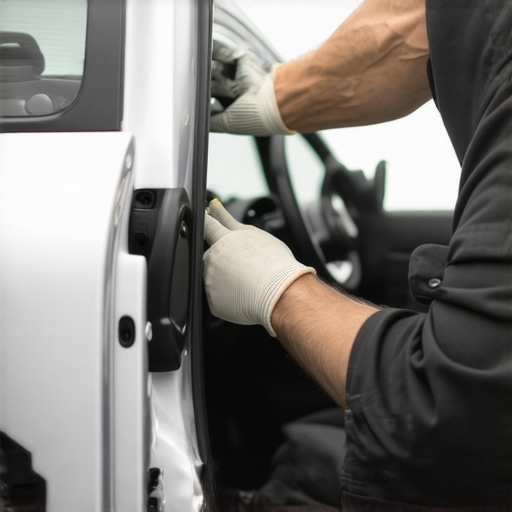
First, carefully assess the broken trim to understand how it’s attached. Take a plastic pry tool, much like opening a computer case, and gently insert it between the trim and the panel. Apply slow, even pressure to release the clips without cracking the plastic further. I recall one time I worked on my SUV, and applying too much force snapped a clip; so, patience is key. Using a pry tool minimizes stress on surrounding plastics and keeps the repair straightforward.
Applying Adhesive Like a Pro
Once the piece is free, clean both surfaces with rubbing alcohol to remove dust, grease, or old adhesive—think of it as preparing a surface for a new paint job. Use a high-quality plastic adhesive or epoxy, like a two-part epoxy, for best results. Apply a thin layer to both sides according to the product instructions. I once tried a rubber cement, but it failed to hold over time; investing in proper adhesive makes the fix last. Clamp or hold the pieces together firmly for the recommended curing time, typically 15-30 minutes. This process is akin to gluing broken ceramics, requiring careful alignment and patience.
Reattaching the Trim and Securing the Clips
Position the trim back onto the panel, aligning the clips with their respective holes. Press firmly around the edges to ensure clips snap into place—imagine clicking together Lego pieces. If some clips are missing or damaged, replacement clips can be bought from auto parts stores, often for less than a dollar each. During my fix, I kept pressing until I heard the satisfying click; this ensured a snug fit, preventing future rattles or detachment. If necessary, reinforce the clips with a bit of extra adhesive for added security.
Double-Check Your Work and Put Everything Back
Finally, gently wiggle the trim to ensure it’s firmly attached. Clean up any excess adhesive with a razor blade or a screwdriver tip, being careful not to scratch the plastic. This step is crucial to prevent squeaks or loose panels over time. Remember, proactive measures now save you from pesky rattles or costly replacements down the line. As soon as I finished my last fix, I took the car for a test drive, and that quiet, snug trim made a noticeable difference—no more rattles on rough roads. Keeping interior plastics in good repair isn’t just aesthetic; it preserves your vehicle’s value and comfort.
Many auto enthusiasts and everyday drivers alike harbor misconceptions that can lead to costly repairs or overlooked issues. One widespread myth is that all car problems require expensive replacements; in reality, understanding diagnostics and maintenance nuances can save a significant amount of money. For example, regular tune-ups, including changing spark plugs and filters, often prevent severe transmission issues down the line, as explained in expert analyses on how regular maintenance prolongs vehicle lifespan.
Another common mistake is assuming that a noisy or rough-running engine always signals a major overhaul. Sometimes, minor repairs or precise diagnostics—like checking for vacuum leaks—can resolve the problem without hefty expenses. This approach underscores the importance of avoiding the trap of jumping straight into costly repairs without thorough inspection.
Many drivers also underestimate the power of basic fluid checks. Using the wrong transmission fluid or neglecting to replace it at proper intervals is a quick route to expensive transmission rebuilds, yet it’s a mistake easily remedied with proper knowledge. As shown in CollisionFixer’s detailed guides, such as [how transmission overhauls can save money](https://collisionfixer.com/how-transmission-overhauls-save-you-money-in-the-long-run), proactive care is vital.
An advanced misconception involves the diagnosis of engine misfires. Some believe a misfire always points to a bad ignition coil or spark plug, but in fact, issues like vacuum leaks or fuel injector problems can mimic these symptoms. A diagnostic approach that considers these nuances can lead to targeted repairs, avoiding unnecessary replacements.
Furthermore, many car owners overlook the significance of subtle warning signs that precede major failures. For example, irregular shifts or delayed engagement might be dismissed as minor quirks, yet these could be early indicators of transmission or sensor issues, as discussed in related articles about preventing costly repairs. Staying alert to such nuances is a hallmark of an informed vehicle owner.
Have you ever fallen into this trap of misconceptions? Let me know in the comments! Understanding these hidden nuances ensures you’re not just fixing your car but truly caring for it, saving money, and extending its lifespan. For more expert tips like these, explore CollisionFixer’s [essential car service guides](https://collisionfixer.com/maximize-your-cars-lifespan-with-regular-tune-ups).
Invest in Reliable Diagnostic Equipment for Long-Term Success
As a passionate auto enthusiast, I can’t emphasize enough the importance of owning a quality code scanner. I personally use the Autel MaxiCOM MK808, not just because it’s user-friendly, but because it provides comprehensive diagnostics that help me identify issues like transmission faults or engine misfires before they become costly repairs. Regular use of a scanner allows me to monitor real-time data, pinpoint problems early, and plan maintenance efficiently, which is essential for extending my vehicle’s lifespan.
Utilize Quality Hand Tools for Precision and Safety
I always keep a set of professional-grade hand tools, such as GearWrench ratchets and screwdrivers, because they are built to last and provide the torque needed for stubborn bolts. These tools help me perform tune-ups, replace filters, or fix minor issues without risking damage to parts. Investing in a good torque wrench ensures I tighten components to manufacturer specifications, preventing long-term damage and ensuring safety. Remember, using subpar tools can lead to stripped screws or worse, compromised safety, so choose wisely.
Adopt Routine Maintenance Schedules Based on Manufacturer Guidelines
Following a detailed maintenance schedule is paramount. I rely on the manufacturer’s service manual, which outlines tasks like oil changes, fluid replacements, and filter swaps at specific intervals. Staying on top of these ensures optimal performance and reduces costly repairs down the line. For instance, my transmission benefits tremendously from regular fluid changes, which I perform using high-quality synthetic fluids as recommended in expert guides. This proactive approach can prevent transmission shuddering or overheating, saving hundreds later.
Leverage Software for Advanced Diagnostics and Updates
Modern vehicles are increasingly reliant on software. I utilize automotive diagnostic software like OBDLink MX+, compatible with my laptop and smartphone, to update ECU firmware and run deep diagnostics. Keeping the ECU software current helps in detecting the latest issues and improves overall vehicle responsiveness. The future of car maintenance is headed toward integrating more connected diagnostics and predictive analytics, making proactive repairs more feasible. Staying ahead with software updates ensures your vehicle remains reliable and efficient.
How do I maintain my car’s transmission in peak condition over time?
Maintaining your transmission involves regular fluid changes using the recommended synthetic fluids, inspecting for leaks, and listening for unusual noises or delayed gear shifts. Consulting expert resources or contacting a trusted mechanic can provide tailored recommendations to keep your transmission smooth and responsive. Remember, neglecting transmission maintenance can result in costly overhauls, but with attentive care, you can prevent most issues. For detailed guidance, check out this comprehensive article—and try performing a transmission fluid change yourself to save both time and money.
The Hardest Lesson I Learned About auto repair,collisionfixer,tune up,car service,transmission
One of the toughest realizations was understanding how fragile the plastic clips can be—sometimes, a little too much force causes more damage. Patience and gentle prying are essential, and rushing only leads to costly surprises. I’ve also learned that proper surface cleaning with rubbing alcohol creates a bond that lasts, rather than just slapping on glue and hoping for the best.
3 Myths About auto repair,collisionfixer,tune up,car service,transmission That Held Me Back
I used to believe that every car interior issue required expensive replacements—turns out, many can be fixed with basic adhesives and a bit of care. I also thought that DIY means risking more damage; in reality, with the right tools and patience, I gained confidence and saved hundreds of dollars. Lastly, I assumed that quick fixes wouldn’t last, but proper preparation and curing made my repairs hold up over time.
What Experts Won’t Tell You About auto repair,collisionfixer,tune up,car service,transmission
Professionals often advise addressing minor damages promptly to prevent escalation, but it’s also about knowing when to do a simple repair yourself and when to seek expert help. I discovered that investing in quality adhesives and tools upfront pays dividends, and that understanding your vehicle’s clip and attachment mechanisms simplifies many fixes. Hidden truths include the importance of surface prep and the value of watching detailed how-to guides to avoid common pitfalls.
My Essential Toolkit for collisionfixer, tune-up, car service, transmission
I swear by a set of reliable plastic pry tools, a quality adhesive like two-part epoxy, rubbing alcohol for surface prep, and replacement clips from auto parts stores. These tools and supplies empower me to fix interior plastics confidently. Trusting brands and sources I’ve tested ensures my repairs last, and staying prepared with the right gear makes DIY repairs faster and more satisfying.
Books That Changed How I View car repairs and maintenance
While I primarily rely on online guides, classics like the Haynes Repair Manuals give detailed diagrams and step-by-step instructions that complement my hands-on approach. They helped me understand vehicle mechanisms better, making DIY fixes less intimidating. For deeper insights, resources on vehicle maintenance schedules and troubleshooting offer invaluable knowledge, reducing guesswork and preventing costly mistakes.
Where to Go from Here
If you’re tired of feeling helpless when your car interior shows signs of wear, start small with basic repairs. Use the techniques I shared—like gentle prying and proper surface prep—to tackle those loose trim pieces yourself. Over time, you’ll build skills and confidence, transforming DIY from a daunting task into a rewarding part of maintaining your vehicle. Remember, consistent, proactive care keeps your car in top shape, preserving its value and your peace of mind. Ready to give it a try? Share your experiences or ask questions below, and let’s keep the conversation going!