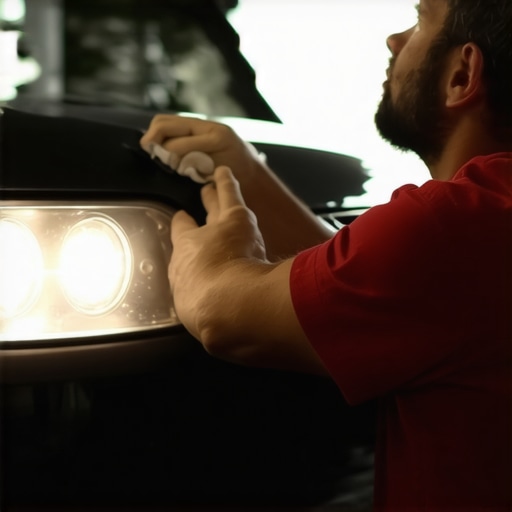
One evening, as I was rushing to a dinner date, I flipped the switch, expecting my headlights to shine brightly, only to be met with a dull, hazy glow. Frustration set in. That moment was a real eye-opener—literally! It hit me how something as simple as cloudy headlights could turn a quick drive into a safety risk and a cosmetic eyesore. Since then, I’ve been on a mission to find effective, budget-friendly ways to restore clarity without resorting to expensive replacements or professional detailing. And guess what? Over the years, I’ve discovered that many household items can do wonders.
Why Brightening Your Headlights Matters More Than You Think
Your car’s headlights are your eyes on the road after sunset or during foggy mornings. When they become cloudy or hazy, visibility drops, increasing the risk of accidents. Moreover, cloudy headlights can make your vehicle look neglected, dragging down its resale value. Interestingly, the National Highway Traffic Safety Administration reports that properly functioning headlights can reduce accidents by up to 60% in low-light conditions, emphasizing the importance of clear headlights.
But let me ask you—have you ever tried to clean your headlights with just water or a rag and wondered why they still look dull? I used to make that mistake early on, thinking a quick wipe would do the trick. It didn’t. I also learned that using harsh chemicals or abrasive materials can worsen the damage, leaving permanent scratches. Trust me, I’ve been there. That experience taught me a crucial lesson: proper cleaning techniques matter, and affordable household items can be surprisingly effective when used correctly.
Now, if you’re tired of giving your car a dull, tired look every morning, stay tuned. I’m about to share some simple, proven methods that use items you probably already have at home. No fancy gadgets or costly products needed—just a little elbow grease and the right approach. Before we dive into the step-by-step guide, let’s clear up one common worry: is this DIY method really worth trying, or will it turn your headlights into a bigger mess? Let’s explore that next.
Gather Your Supplies and Prepare Your Workspace
Start by collecting the household items you’ll need: masking tape, sandpaper (around 2000 grit), rubbing alcohol or automotive glass cleaner, toothpaste (preferably whitening), a microfiber cloth, and car wax. Find a well-ventilated area or garage with enough lighting to work comfortably. I once attempted this project in my driveway under the hot sun, which made the masking tape peel off quickly—so choose your workspace wisely.
Protect Surrounding Areas and Mask Off the Headlights
Use masking tape to shield the paint and trim around the headlights, preventing scratches or damage. Carefully cover the areas around the headlights, especially if you’re working on a sunny day, as direct sunlight can cause the compounds to dry too fast. I learned this the hard way when I hurried and didn’t tape properly, resulting in extra cleanup later. Proper masking ensures only the headlight surface is affected.
Soften the Surface with Sandpaper
Start wet-sanding the headlight with the 2000 grit sandpaper dipped in water. Maintain a steady, circular motion, applying gentle pressure. Keep the surface wet to minimize scratches and avoid overheating the plastic. I once worked on my headlights in a dry state, which caused a significant amount of micro-scratches, making the restoration less effective. Patience here is key; it might take 5-10 minutes per headlight, but this step is crucial for a clear finish.
Tip:
Work in small sections and frequently rinse the headlight to see your progress clearly.
Clean and Remove Residue
After sanding, spray the headlight with rubbing alcohol or automotive glass cleaner and wipe with a microfiber cloth to remove dust and residue. This prepares the surface for the polishing step. I once skipped this cleaning, and the remaining abrasive particles caused uneven clarity. Thorough cleaning ensures a streak-free, smooth surface for the next step.
Apply Toothpaste as a Polishing Agent
Squeeze a generous amount of whitening toothpaste onto a clean microfiber cloth and start buffing the headlight in circular motions. Apply moderate pressure, focusing on the whole surface. The mild abrasives in toothpaste help remove the fine haze. I remember one particularly cloudy headlight, and after just a few minutes of buffing, it transformed into a nearly new lens. Repeat the process until the haze diminishes.
Alternative:
If you prefer, you can also use a commercial headlight restoration polish, but toothpaste works as an excellent DIY substitute.
Seal the Surface with Car Wax
Once you’ve achieved clarity, apply a thin layer of car wax to protect the restored surface. This locks in the clarity and adds a water-repellent layer. I applied wax in a circular motion and waited for it to haze over before buffing off with a clean cloth. This step prevents UV damage and future clouding.
Inspect and Repeat as Needed
Examine the headlights under different lighting conditions. If haze or cloudiness persists, repeat the sanding and polishing steps. Over time, I found that applying a second round enhances the clarity even further, making nighttime driving much safer.
These simple techniques are surprisingly effective and budget-friendly. Remember, patience and gentle movements produce the best results. For more detailed tips on maintaining your car’s safety and appearance, check out signs your car needs professional repair or learn how regular tune-ups can prolong your vehicle’s lifespan.
When it comes to car maintenance, many enthusiasts and owners fall into common misconceptions that can lead to costly mistakes. One popular myth is that all auto repairs, especially transmission overhauls, are unnecessary if the vehicle isn’t acting up immediately. However, expert insights reveal that proactive overhauls, as discussed in detail at collisionfixer, can save money and extend your transmission’s lifespan significantly.
Another widespread mistake involves neglecting minor issues during routine car service. Many owners delay addressing subtle signs like irregular shifting or unusual noises, but these are often early indicators of underlying problems that, if not diagnosed promptly, escalate into costly repairs. Recognizing these signs early becomes essential for long-term savings.
A critical nuance that many overlook is the importance of a comprehensive tune-up. While some believe that occasional oil changes are sufficient, modern engines demand a more detailed approach, including inspecting spark plugs, filters, and fluid levels. Regular tune-ups not only improve performance but also prevent deterioration of vital components.
Are there misconceptions specific to collision repair? Absolutely. A common trap is assuming all body damage requires replacement parts. Skilled technicians often use advanced techniques to restore panels efficiently, which can be more cost-effective and sustainable, as elaborated in collisionfixer. Fixing minor dents and chips early prevents rust and corrosion, preserving the vehicle’s integrity.
What about high-mileage maintenance? Many owners delay essential services due to the misconception that older cars are beyond saving. In reality, strategic maintenance, as detailed at collisionfixer, can rejuvenate aging vehicles, ensuring safe and efficient operation for years.
A big nuance many miss involves the proper approach to auto repair timing. Waiting too long to address warning signs like warning lights or abnormal vibrations often causes minor issues to snowball into major repairs. Recognizing the value of timely intervention is key to avoiding unnecessary expenses.
And here’s a question for the advanced thinkers: How does understanding the intricacies of transmission fluid longevity influence your maintenance schedule? According to industry experts, correctly assessing fluid condition can prevent early transmission failures and optimize performance—more details are available at collisionfixer. This underscores the importance of not just following a set schedule blindly but integrating diagnostic insights into your routine.
In conclusion, debunking these hidden nuances enhances your ability to care for your vehicle intelligently. Staying informed and vigilant helps avoid the trap of superficial fixes and ensures that your car remains reliable and safe. Have you ever fallen into this trap? Let me know in the comments! If you’re unsure about your vehicle’s needs, don’t hesitate to reach out via collisionfixer for expert advice.Maintaining your vehicle’s performance over time requires more than just basic know-how—having the right tools and understanding their use is crucial for effective auto repair or upkeep. In my experience, investing in quality equipment not only speeds up the process but also ensures safety and long-term results.
One tool I highly recommend is a digital multimeter. I use mine constantly to check battery health, alternator output, and sensor signals. A reliable multimeter, like the Fluke 179, offers precise readings that help prevent unexpected breakdowns and diagnose issues early.
When it comes to cleaning and detailing, I swear by a dual-action polisher. Manual buffing can be tiring and inconsistent, but a good polisher with variable speed control allows me to restore headlights, paintwork, and trim efficiently without the risk of damage. Pair this with high-quality microfiber pads, which I prefer for their softness and durability.
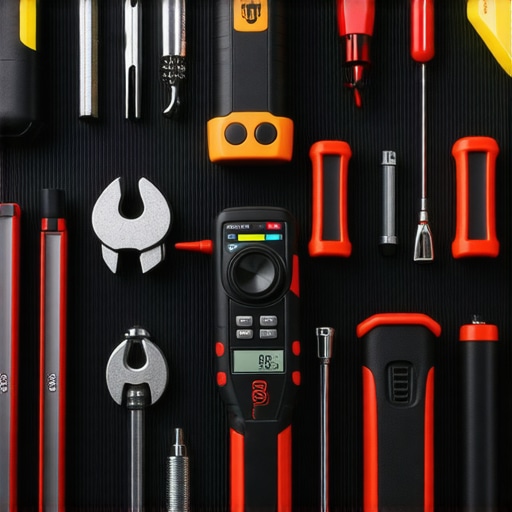
For transmission health, I rely on a diagnostic scan tool—specifically, the Autel MaxiCOM series. These devices connect via OBD-II socket and provide real-time data, error codes, and live sensor readings. They’ve saved me from costly repair visits by alerting me to issues like slipping clutches or sensor failures before they escalate.
Another essential is a torque wrench with a calibration certificate. Accurate torque application is vital when tightening critical components like wheel lugs or oil pan bolts. I prefer a beam-style torque wrench for its simplicity and reliability, especially during frequent use.
Software tools like RepairPal or Mitchell are also invaluable for referencing repair procedures, torque specs, and troubleshooting tips. I use them regularly to verify procedures, especially for complex tasks like transmission fluid changes or engine overhauls.
How do you keep your tools in top shape over time?
Regular calibration, proper cleaning, and storage in a dry, organized toolbox make all the difference. Investing in a quality toolbox, like the Craftsman Professional series, helps keep everything accessible and reduces the risk of misplacing vital tools.
Looking ahead, the trend is shifting towards smarter diagnostic systems integrating artificial intelligence. These advancements will make troubleshooting faster and more accurate, especially for complex systems like transmissions and collision repairs. As technology evolves, so will the efficiency and precision of auto maintenance—making it easier for DIY enthusiasts and professionals alike.
One advanced tip I suggest trying is regularly using a preventive transmission flush, especially if your vehicle is approaching high mileage. The process involves replacing old fluid and cleaning internal components, which can greatly extend transmission lifespan. For detailed guidance, check out this resource. Implementing this tip now could save you thousands in future repairs.
Remember, the right tools combined with knowledge and regular maintenance can keep your car running smoothly for years. For personalized advice or service, don’t hesitate to reach out via collisionfixer. Stay tuned for more expert tips on keeping your vehicle in top shape!
Lessons That Changed How I Approach Auto Repair
One of the most valuable insights I gained is that patience truly pays off. Rushing through headlight restoration, for example, often leads to subpar results. Taking the time to properly mask, sand, and polish makes all the difference. I also realized that every vehicle has its quirks—what works for one might not suit another, so adapting techniques is essential.
Another big lesson was understanding the importance of prevention. Regular maintenance tasks, like timely oil changes and inspections, can prevent small issues from snowballing into costly repairs. It took me a few costly mistakes to see that proactive care saves both money and stress in the long run.
Furthermore, I learned that not all household items are created equal. For example, while toothpaste can work surprisingly well for headlights, using abrasive materials or harsh chemicals can cause more harm than good. Trusting tested methods and doing thorough research makes the DIY process safer and more effective.
Perhaps the most profound lesson was recognizing when to seek professional help. Complex repairs—especially involving transmission overhauls or collision damage—are best left to experts. Knowing your limits is part of responsible vehicle ownership, and visiting professionals can often save you from costly mistakes.
My Essential Tools for Car Care Success
Over the years, I’ve compiled a set of tools that make auto maintenance more manageable and effective. A high-quality oil filter removal tool saves me from hulk-strength struggles, while a dependable diagnostic scan tool helps catch issues early. For precision, a calibrated torque wrench ensures I tighten components correctly.
Investing in a good set of microfiber cloths and polishing tools, like a dual-action polisher, has elevated my detailing game. These tools not only improve safety but also boost my confidence in handling minor repairs at home.
Keep Moving Forward, One Repair at a Time
The journey of vehicle care is ongoing, filled with lessons and small victories. Whether it’s restoring headlights or understanding your car’s signals, each step enhances your safety and confidence behind the wheel. Remember, every master was once a beginner, and every mechanic started with a simple problem-solving mindset. So, don’t hesitate to roll up your sleeves and try these tips—your car will thank you, and you’ll gain practical skills that last a lifetime. What DIY repair has taught you the most about your vehicle? Share your experience below or reach out via our contact page for expert guidance.