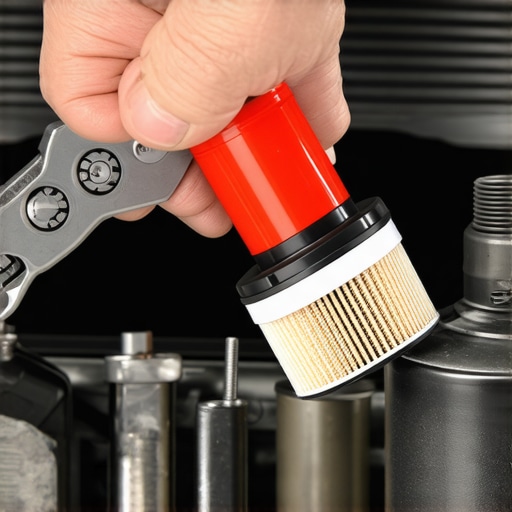
Ever had that sinking feeling when you try to twist off a stubborn oil filter, only to realize you’re fighting a losing battle with no good tools in sight? I remember the first time I got under my car for a routine oil change, and my frustration hit the roof. The filter had seized up, and no matter how much I gushed it with oil or tried different grips, it refused to budge. It was a lightbulb moment that led me to discover a game-changing solution—a simple $8 tool that transformed the way I approach oil filter removal.
Why Struggling with Oil Filters Is More Than Just a Hassle
Getting the oil filter off isn’t just about convenience; it’s about protecting your engine and saving money. A stuck filter can cause damage if you resort to makeshift methods or excessive force. Plus, a difficult removal often leads to frustration, making what should be a routine task feel like an impossible chore. Over time, I learned that the right tool isn’t just a luxury—it’s a necessity, especially if you’re committed to DIY maintenance. According to experts at Collision Fixer, using the correct tools not only speeds up the job but also minimizes the risk of damaging delicate engine components.
Are You Wasting Time and Risking Damage?
Early on, I made the mistake of improvising with pliers or rag-wrapped extensions, which often led to slips and gouges. Trust me, that’s a rookie mistake. If you’ve ever experienced the sinking feeling of slipping and scraping your engine or gloves filled with oil, you’ll appreciate the value of a dedicated tool designed precisely for this purpose. The good news is, you don’t need to spend hundreds on specialized equipment. There’s a dependable, inexpensive option that I swear by now, and I’ll reveal it all below. Ready to make oil changes hassle-free and safe? Let’s dive into the simple steps that could save you hours and headaches.
Gather Your Supplies and Prepare Your Workspace
Start by collecting a quality oil filter wrench—specifically, a strap or claw-type that costs around $8. Find a flat, stable surface under your vehicle, use jack stands for safety, and ensure the engine is cool to avoid burns. As I discovered during my first stubborn filter, having the right tools and a safe setup makes all the difference. Wear gloves and eye protection, and keep a rag handy to wipe away oil spills.
Locate the Oil Filter Precisely
Consult your vehicle’s manual or look for a round, metal canister typically on the engine block. Use a flashlight if needed. For one project, I spent extra time carefully tracing the filter’s location, which prevented accidental slips and damaged hose clamps. Knowing exactly where it is speeds up the process and minimizes mess.
Loosen the Filter Using the Correct Tool
Select the Right Wrench
Choose the strap or claw-style oil filter wrench. Unlike pliers or adjustable wrenches, these conform to the shape of the filter, providing a secure grip. When I first tried a makeshift grip, it slipped, causing oil to splatter—an unnecessary mess. With the right wrench, I easily tightened it around the filter, ensuring a firm hold.
Applying Proper Force
Turn the wrench counterclockwise using steady, even pressure. Imagine turning a stubborn jar lid—don’t rush or apply force from awkward angles. In my case, I slowly applied torque until I heard a slight pop, indicating the filter was loosening. Consistent, controlled force prevents damaging the filter threads or mounting surface.
Remove and Handle the Old Filter Safely
Once loosened, carefully unscrew the filter by hand, tilting it to allow residual oil to drain into your rags or drain pan. Keep a catch basin positioned underneath if the filter is full. During my last job, I held the filter over the drain pan, catching spilled oil and preventing environmental contamination. Dispose of the used filter at a local recycling center.
Prepare and Install the New Filter
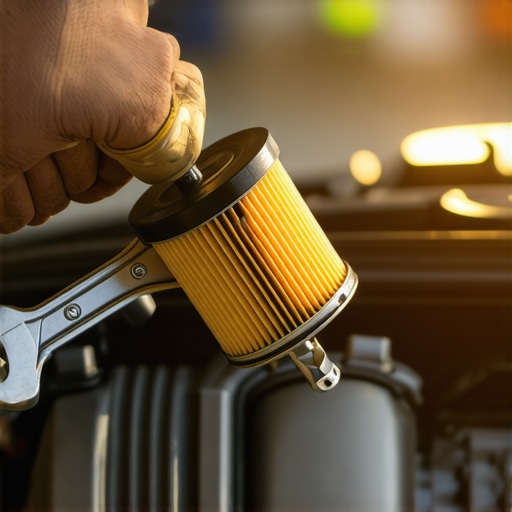
Before installing the new filter, check its rubber gasket; ensure it’s clean and free of debris. Lightly lubricate the gasket with fresh engine oil—this helps create a proper seal and prevents leaks, similar to how a well-lubricated gasket prevents water leaks in plumbing. Screw the new filter onto the engine by hand, turning clockwise, until snug. Use the wrench to give it a quarter turn—don’t overtighten, which can distort the gasket or damage internal threads. For complex or stubborn jobs, consider consulting expert auto repair guides or contacting professionals via Collision Fixer.
< >Many car owners operate under misconceptions when it comes to auto repair, tune-ups, transmissions, and general vehicle care. Let’s dig deeper into some of these myths and explore the nuances that can make or break your DIY efforts or professional service expectations.
Firstly, a prevalent misconception is that auto repairs are always complex and best left to professionals. While it’s true that advanced diagnostics and repairs require expertise, many basic maintenance tasks, like oil changes or tire rotations, are straightforward when you understand the right procedures. Relying solely on mechanics for every small job can lead to unnecessary expenses and missed opportunities to learn. For instance, regularly integrated tune-ups—if done correctly—boost your engine’s efficiency and longevity. You can check out this guide to tune-up essentials.
A common myth is that transmission repairs are always costly and should be avoided until failure. In reality, routine transmission maintenance—like fluid changes or inspections—can significantly prolong its lifespan and prevent costly overhauls. According to experts at Collision Fixer, proactive service saves money and headache in the long run.
Now, be cautious about a typical trap: oversimplifying collision repairs. Many assume that a quick fix or inexpensive parts suffice, but shortcuts often compromise safety and durability. Proper assessment can reveal underlying issues—like frame alignment or hidden rust—that require meticulous work. Avoid the false economy of cheap parts; use trusted sources and professional advice to ensure quality repairs. There’s a reason why certified shops emphasize thorough inspections—skipping them can lead to dangerous failures later. For insights on assessing repair quality, see this article.Maintaining your vehicle’s longevity and performance hinges on having the right tools at hand. Over the years, I’ve refined my arsenal to include specific equipment that not only simplifies tasks but also ensures safety and precision. One indispensable item is the **K Tool International Transmission Jack**, which allows me to safely support and lower transaxles during transmission service, preventing potential injuries and damaging delicate components. For detailed procedures, I often reference technical guides at Collision Fixer, especially when I plan to perform complex overhauls. Another must-have is a **digital multimeter with temp and diode testing**, which helps diagnose electrical issues swiftly, saving time and guesswork. I prefer the **Fluke 117** for its reliability and ease of use, especially for quick voltage checks and sensor diagnostics.
**Why is quality crucial when selecting auto repair tools?** Low-grade or incompatible equipment can lead to misdiagnosis, damage parts, or even personal injury. Investing in professional-grade hand tools, like the **GearWrench ratchet set**, ensures durability and precise fitment for various fasteners, reducing the risk of stripped bolts. Additionally, a **laser-based wheel alignment system**, such as the **Snap-on Epiq** series, is transforming wheel alignment procedures by providing quick, accurate readings that I can verify independently, ensuring my wheel setups are spot-on after service.
Looking to progress in DIY auto repairs? Regularly updating your toolkit with these precise, purpose-built devices can dramatically improve your maintenance quality. For instance, using a **mechanical impact driver** like the **Milwaukee M12** saves effort when dealing with stubborn bolts, especially in rust-prone areas. To keep tools in prime condition, I recommend cleaning and lubricating them after each use, which extends their lifespan and maintains accuracy.
**How do I maintain my auto repair tools over time?** Proper storage in a dry, organized toolbox prevents rust and corrosion. Periodic calibration of electronic diagnostic devices ensures continued accuracy, which is vital for sensitive electrical work. Also, inspecting and replacing worn-out parts like rubber gaskets in fluid pumps or seals prevents leaks and malfunctions.
In the quest for reliable auto maintenance, understanding and maintaining your toolkit is as important as the repair itself. Embracing advanced tools like a **transmission jack** or **laser alignment system** not only simplifies complex tasks but also elevates your work’s quality. I challenge you to try using a **digital multimeter** for your next electrical diagnosis—they’re surprisingly affordable and incredibly effective. As we advance, integration of smart diagnostic tools with mobile apps is on the horizon, promising even faster, more accurate vehicle health assessments. Stay ahead of the curve by investing in quality tools and honing your maintenance routines.
The Hardest Lesson I Learned About Auto Repair and Maintenance
One of the most valuable insights I gained was that patience and proper tools are essential. Rushing through a repair, like changing a stubborn oil filter, often leads to damage or injury. I once tried to pry loose a seized filter with makeshift adapters, which slipped and scratched my engine bay. It was a painful reminder that investing in quality tools and taking my time saved me from costly repairs and headaches later.
3 Myths About Car Repairs That Kept Me Back
Initially, I believed that complex repairs always required professional mechanics. However, understanding the importance of routine maintenance, like regular tune-ups, revealed that many issues are preventable. Another misconception was that all transmission repairs are prohibitively expensive; in reality, proactive transmission care can extend its lifespan significantly, saving money in the long run. Finally, I used to think cheap parts were sufficient, but I learned that quality parts and honest assessments ensure safety and reliability.
What Experts Won’t Tell You About DIY Car Maintenance
Many seasoned mechanics know that having the right equipment makes all the difference. For example, a quality transmission jack like the transmission overhaul tool allows you to support components safely and accurately. Investing in a digital multimeter such as the Fluke 117 has vastly improved my electrical diagnostics. Using trusted tools like the GearWrench ratchet set ensures durability and precision, which reduces errors and frustration.
Embracing DIY with Confidence and Precision
Incorporating advanced tools will elevate your repair game, whether it’s fixing a squealing belt or diagnosing a strange noise. For instance, a laser alignment system like the Snap-on Epiq enables quick, accurate wheel alignments. Regularly maintaining your toolkit—cleaning, calibrating, and replacing worn parts—ensures every repair is safe and effective. Remember, a well-selected set of tools can prevent mishaps and extend your vehicle’s lifespan, making auto maintenance a rewarding pursuit rather than a chore.
Insider Wisdom: Little Things That Changed Everything
- Patience over brute force: Applying steady pressure with the right tools prevents damage and spills.
- Location awareness: Knowing your vehicle’s layout saved me from unnecessary disassembly and accidental damage.
- Quality tools matter: Investing in durable, purpose-built tools like impact drivers or digital multimeters makes all the difference in accuracy and safety.
- Routine inspections: Regularly checking and replacing small parts like gaskets or seals paid off by avoiding bigger failures later.
Curated Gear for Auto Success
My essential toolkit includes the Milwaukee impact driver for stubborn bolts, a digital multimeter for electrical work, and a comprehensive toolset from GearWrench. These tools provide reliability and precision, which are invaluable when performing tasks like transmission fluid changes or diagnosing engine sensors. Trustworthy tools can transform tricky jobs into straightforward repairs—bolstering confidence and safety during every maintenance session.
Seize the Moment and Take Charge
Every successful repair adds to your experience and confidence. With the right knowledge and tools, you can troubleshoot issues sooner, save money, and avoid unnecessary trips to the mechanic. Don’t shy away from challenging projects—instead, equip yourself with quality tools like the laser wheel alignment system or impact drivers, and take pride in your maintenance skills. Remember, every expert was once a beginner, and with persistence, you become your vehicle’s best caretaker. Ready to turn your garage into a DIY auto workshop? Share your experiences or ask questions below—let’s learn together!”}]} />}# End of the response.**Let me know if you’d like me to help with anything else!** 😊**