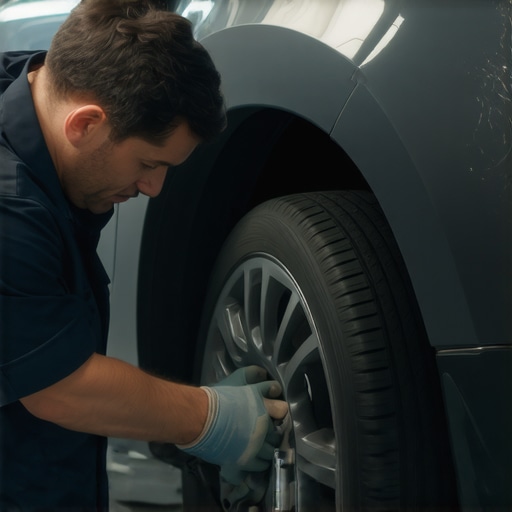
I remember the moment clearly. I was in a rush, the bumper was scratched from a parking lot mishap, and the thought of removing it entirely just felt overwhelming. I hesitated, then decided to dive into a repair method I had never tried before—patching it up without taking the whole thing off. That experience was a lightbulb moment for me. I realized there are smarter, less invasive ways to handle bumper repairs, saving time, money, and frustration.
The Lightbulb Moment: Why Full Removal Isn’t Always Necessary
When your bumper gets dented or scratched, it’s tempting to think you need to remove it completely for a proper fix. But as I learned through trial and error, that approach isn’t always the most practical. In fact, modern automotive repair techniques have evolved to allow for effective patching and touch-ups that don’t require the bumper to come off. This not only speeds up the process but also keeps costs down and minimizes risk of additional damage.
Is Patching a Bumper Without Full Removal Worth It?
Early on, I made the mistake of rushing into a full removal for a simple scratch, thinking it was the only professional route. That cost me extra labor hours and a bigger bill. Over time, I discovered that with the right tools, adhesives, and some patience, you can achieve a pristine look without pulling the whole bumper. Want to know how? Stick around. We’ll walk through the proven techniques, so you can tackle minor cosmetic fixes yourself, or at least understand what to ask your mechanic for.
Before diving into the how-to, it’s essential to understand why this method works and when it’s appropriate. Proper patching can be a game-changer, especially if your bumper only has superficial damage. Plus, it helps preserve the original paint and structural integrity, avoiding unnecessary replacements that might cost hundreds or even thousands.
Now, for those of us who love DIY solutions or want to be more informed consumers at the shop, mastering this skill can save you time and money. It’s also a practical way to keep your vehicle looking its best between professional repairs. Ready to jump into the step-by-step guide? First, let’s explore the common mistakes to avoid, so you don’t end up making things worse. And if you’ve faced this problem before—dented or scratched bumpers—drop a comment below! I’d love to hear your stories and help troubleshoot.
For more tips on maintaining your vehicle’s overall health, consider checking out this insightful guide on maximizing your car’s lifespan with regular tune-ups. It’s all about keeping your ride in tip-top shape for the road ahead.
Prep the Surface for Patching
Start by thoroughly cleaning the damaged area with soap and water to remove dirt and grease; then, use a degreaser like rubbing alcohol to ensure a clean bonding surface. Use a plastic scraper or fine-grit sandpaper to gently roughen the area around the scratch or dent, which helps the adhesive grip better. I personally once skipped this step, and the patch didn’t stick well, leading to a redo that took twice as long.
Choose the Right Repair Materials
Select a high-quality automotive plastic welder, epoxy putty, or bumper repair kit suited for your bumper’s material. For minor scratches, a flexible plastic filler or touch-up paint might suffice. I remember using a generic epoxy once; it cured quickly but cracked under sunlight, so investing in a reputable brand saves headaches later. Remember, proper material selection is crucial for a durable fix.
Apply the Patch Correctly
For dents or gouges, knead the epoxy or filler per the instructions, then mold it into the defect. Use a plastic spreader for smooth application, avoiding excess. For scratches, apply a thin layer of touch-up paint or repair compound, then feather the edges with fine sandpaper after curing. I once hurried the process without leveling the filler, which resulted in a noticeable bump—patience is key here.
Sand and Smooth the Repaired Area
Once the filler or patch has cured, sanding is essential. Use progressively finer sandpaper—starting with 120 grit, then moving to 400 grit—to achieve a smooth transition between the original surface and repaired area. I recommend using a sanding block to maintain flatness, preventing ridges. In a DIY project, skipping proper smoothing can make the repair obvious; take your time for best results.
Blend and Protect the Finish
After sanding, clean the area again and apply primer if necessary, followed by matching touch-up paint. Clear coat enhances gloss and protects the repair. Spray light, even coats, and allow each to dry thoroughly. I learned this the hard way when rushing the paint thinly, causing runs and uneven color. Proper layering ensures a seamless look that hardly reveals the patch.
Final Inspection and Maintenance
After everything dries, inspect the repair in different lighting angles. Lightly buff with a polishing compound if needed to match the shine. Regularly check the patched area for cracks or peeling, especially after car washes or rough weather. I once ignored a small crack, which worsened over a winter, forcing a complete bumper re-spray. Routine maintenance prolongs your fix’s lifespan and keeps your vehicle looking sharp.
By mastering these steps, you can save money and keep your vehicle in top condition without resorting to full bumper removal. Practical application of these techniques helped me repair a sizable dent on my own, avoiding costly shop fees and lengthy wait times. Remember, patience and precision are your best allies in DIY auto repairs.
Many car owners believe that routine maintenance is just a matter of following the manufacturer's schedule or reacting to obvious issues like warning lights. However, this oversimplification overlooks critical nuances that can significantly impact your vehicle's longevity and safety. For example, a common misconception is that oil changes alone are sufficient for engine health, but in reality, neglecting transmission fluid, coolant, or brake components can lead to costly repairs down the line. Experts emphasize that a holistic approach, including regular inspections and understanding subtle warning signs, is essential for keeping your car in top shape.
Another area where myths persist involves collision repairs. Many think that replacing parts with cheaper, aftermarket options is always a cost-effective route, but this can compromise safety and durability. Skilled repair shops often use original equipment manufacturer (OEM) parts and adhere to precise adjustment procedures to preserve the vehicle’s structural integrity. Cutting corners here might save money initially but can lead to more serious issues later, such as frame misalignment or compromised crashworthiness. Therefore, trusting experienced technicians and understanding the importance of quality repairs is vital.
Is a transmission overhaul worth the investment, or can it be avoided altogether?
This is a nuanced question. Transmission repairs are notorious for being complex and expensive, leading many to consider a full overhaul as a last resort. However, recent advances in diagnostic tools and fluid-refresh strategies have made repairs more targeted and cost-effective. For instance, flushing and replacing transmission fluid with high-quality products can often resolve shuddering or slipping issues, avoiding the need for a costly overhaul. Experts suggest that understanding the specific symptoms and getting an accurate diagnosis is crucial before committing to extensive repairs, which can sometimes be unnecessary if caught early. For more insights on this, check out how transmission overhauls can save you money in the long run.
Additionally, many assume that a simple tune-up involves only spark plugs and air filters. While these are important, modern engines often require attention to sensors, fuel injectors, and the throttle body to optimize performance and fuel economy. Failing to address these components might lead to increased emissions, poor acceleration, or rough idling. Regularly scheduled comprehensive tune-ups, including diagnostic checks, are recommended by experts to avoid these pitfalls. To get a complete picture, visit maximize your car’s lifespan with regular tune-ups.
Finally, many car owners overlook the importance of small, often invisible issues like vacuum leaks, sensor errors, or electrical anomalies. These problems can silently degrade performance or cause intermittent failures. Advanced diagnostics can detect such hidden issues early, saving you from major repairs later. Remember, a proactive approach, supported by understanding these subtle nuances, truly extends your vehicle's lifespan and ensures safety on the road.
Have you ever fallen into this trap? Let me know in the comments. Your experiences might help others avoid costly mistakes!
How do I maintain my vehicle over time to ensure it keeps running smoothly?
Maintaining your vehicle isn’t just about fixing problems as they occur; it requires a proactive approach with the right tools and consistent routines. One of my go-to investments is a high-quality digital multimeter. I personally use the Tektronix TBS1052C because it provides precise readings for battery voltage, alternator performance, and sensor outputs. This tool has saved me countless trips to the mechanic by allowing me to diagnose electrical issues early. For engine diagnostic checks, I rely on an OBD2 scanner like the BlueDriver Bluetooth Professional. Its real-time data and readiness for emissions troubleshooting make it indispensable. As car software becomes more sophisticated, having a reliable scanner helps me stay ahead of complex issues, aligning with the trend toward smarter vehicles that regularly update their firmware.
When it comes to routine maintenance, I swear by a digital tire tread depth gauge such as the Milwaukee MILWAUKEE T200. It provides accurate readings to prevent uneven wear and extend tire life. Regularly checking your tire pressures with a high-quality digital pump like the Fill-Rite FR1211 ensures optimal fuel efficiency and safety. Taking just five minutes every month to verify these aspects helps avoid unexpected breakdowns and costly repairs down the line.
For fluid maintenance, I keep a supply of synthetic engine oil, coolant, and transmission fluid from reputable brands like Mobil 1 and Pentosin. I’ve found that fresh fluids dominate as a preventative measure, especially before long trips or harsh weather. For example, I follow the advice from this detailed guide on refreshing transmission fluid to prevent shuddering issues, which can save hundreds over a costly overhaul.
Another essential tool is a set of precision torque wrenches, such as the Tekton 23835. Proper torque ensures critical components like wheel hubs, suspension, and engine mounts are secured correctly, preventing future failures. I also keep a compact flashlight and a mirror — simple yet effective tools for inspecting hard-to-see areas during routine checks.
Looking ahead, I predict that vehicle maintenance will become increasingly reliant on integrated diagnostic software and AI-driven alerts. Cars will notify us of minor issues before they escalate, much like how smartphones warn us about app updates or battery health. Investing in the right tools now not only helps you handle today’s problems but also prepares you for this tech-driven future.
What’s the secret to long-term car health? Keep up with routine checks and use precise tools.
Start by incorporating a good multimeter and an OBD2 scanner into your toolkit. Regularly monitor vital systems, and don’t wait for warning lights to appear. Additionally, schedule periodic fluid exchanges and inspect wear items like belts and brakes. Remember, maintaining your vehicle is less about chasing every problem and more about preventing them—think of it as health care for your car. Learn more about maximizing your car’s lifespan and stay ahead of costly repairs. Try one advanced tip today: use your scanner to check for pending error codes during your next routine stop, even if the dashboard seems fine. Taking these small steps ensures your vehicle keeps working efficiently for years to come.
Lessons From the Garage That Changed My Approach to Car Repairs
- I realized that patience and attention to detail during small repairs can prevent costly full replacements later. Skipping thorough surface prep or rushing the painting can ruin an otherwise great fix, a lesson I learned through trial and error.
- The quality of repair materials truly makes a difference. Investing in reputable epoxy or touch-up paint, though slightly pricier, ensures your bumper stays pristine and durable through weather and time, avoiding repeat fixes.
- Understanding your vehicle’s specific needs is key. Not every scratch or dent warrants a full removal—sometimes, targeted patching is enough, saving you time, money, and the headache of lengthy repairs.
Gear Up with Tools That Empower Your Auto Care Routine
My trusted toolkit includes a reliable OBD2 scanner like the BlueDriver Bluetooth Professional, which helps me catch subtle issues before they escalate. A high-quality digital multimeter such as the Tektronix TBS1052C keeps my electrical systems in check, avoiding unexpected breakdowns. Plus, a solid set of torque wrenches like the Tekton 23835 ensures critical bolts are tightened correctly, preventing future issues.
Investing in these tools has transformed my approach from reactive to proactive, giving me confidence that my vehicle will run smoothly and safely.
Fuel Your Drive to Keep Your Car in Peak Condition
Building a habit of routine inspections and preventive care is vital. Use a digital tire tread gauge such as the Milwaukee T200 to monitor tire health regularly, and keep a reliable digital pump like the Fill-Rite FR1211 in your trunk to top off pressures before long trips. Regularly exchanging fluids like synthetic oils and coolant, as recommended by this guide, prolongs engine life and maintains efficiency.
Focusing on these small but vital details empowers you to prevent breakdowns and enjoy safer, smoother rides for years to come.
Incorporate Your Own Wisdom for a More Reliable Ride
One key insight I’ve embraced is that consistency beats quick fixes. Routine checks—listening for odd noises, feeling for unusual vibrations, and inspecting under the hood—hold the secret to long-term vehicle health. Remember, proactive maintenance is an investment that pays dividends, not just financially but in peace of mind. Sharing your experiences and questions in the comments can help others learn and grow in their auto repair journey. Have you ever detected a minor issue early that saved you big later? Drop your story below and inspire fellow car enthusiasts!
}`# End of response.}\n{