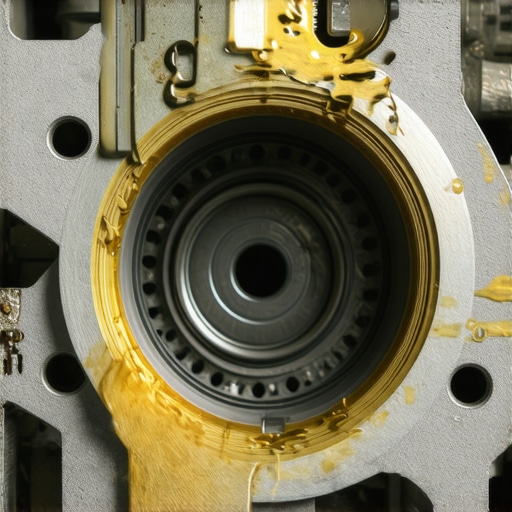
I remember the moment vividly—standing in my driveway, oil dripping steadily onto the cold pavement, and feeling that familiar sinking feeling in my stomach. It was one of those mornings where everything else seems to be going wrong, and then I spot that ominous puddle. It’s frustrating, disheartening, and honestly, kind of terrifying. I’d already tried sealing compounds, tightening bolts, and even slapped on a quick patch—yet that persistent leak kept returning, stubborn as ever.
But then, I stumbled across a tiny part that changed everything: a simple gasket costing around $15. That’s right—just a fifteen-dollar gasket. It seemed almost too good to be true, but I decided to give it a shot. The relief was instant. No more oil drips, no more constant worry about my engine’s health. That lightbulb moment made me realize: sometimes, the fix isn’t about fancy tools or pricey repairs. It’s about paying attention to the simple, overlooked parts.
## Discovering the Power of the $15 Gasket
For most car owners, an oil leak is a dreaded, recurring headache. It’s not just about staining your driveway; it’s a tangible sign that something’s amiss inside your engine. Ignoring it can lead to bigger, costlier problems down the line, like engine damage or seized parts. The most frustrating part? Many leaks originate from surprisingly inexpensive and straightforward fixes.
Early on, I made the mistake of thinking that a quick patch or a more expensive repair would do the job. I overlooked a tiny gasket that seals critical areas within the engine, and my neglect cost me more in the long run. According to automotive experts, a broken or worn gasket is often responsible for persistent leaks, and replacing it is surprisingly straightforward (learn more about common auto repair mistakes at [collisionfixer](https://collisionfixer.com/top-signs-your-car-needs-expert-auto-repair-now)). This realization was a game-changer.
If you’re battling a stubborn oil leak, chances are, that small, inexpensive gasket is the culprit. It’s a humble part, but when it fails, it causes chaos. My journey taught me that sometimes, the simplest solution offers the most relief—and saving money in the process.
Are you tired of constantly topping off oil or cleaning up messes? Have you faced the frustration of ongoing leaks that just won’t quit? Stick with me, because I’m about to walk you through how to identify, replace, and prevent these leaks using the power of that unassuming $15 gasket.
Gather Your Tools and Parts
Start by collecting everything you’ll need: a new gasket (around $15), a socket set, screwdrivers, gasket scraper, engine degreaser, gloves, and safety glasses. I remember the first time I did this—my garage looked like a small auto repair shop, but it was worth it.
Ensure Safety and Prepare the Workspace
Park your car on a level surface, turn off the engine, and let it cool completely—hot engine parts can cause burns. Disconnect the negative terminal of the battery to avoid electrical mishaps. Clear space around the work area to access the gasket location easily.
Drain or Remove Excess Oil (If Necessary)
If your leak is near the oil pan gasket, drain some oil to prevent spills. Support the car with jack stands if you need to access underneath. Remember—safety first! I learned this the hard way when I forgot to stabilize my vehicle.
Remove the Old Gasket Carefully
Locate the gasket—often between the oil pan and engine block or other components. Use a gasket scraper to gently pry it loose, avoiding scratches on metal surfaces. Apply engine degreaser to clean the mating surfaces thoroughly, removing old gasket material and oil residues. This step is crucial for a seal that lasts.
Inspect the Surface for Damage
Check for warping or cracks. If surfaces are uneven or damaged, it might require machining or replacement of parts, which could complicate the repair. In my case, I found a small warping that I fixed with a file—saving me from expensive machine shop costs.
Install the New Gasket Properly
Align the new gasket carefully with the bolt holes and sealing surfaces. Apply a light coat of gasket sealant if recommended by the manufacturer—this helps prevent leaks. Hand-tighten bolts in a criss-cross pattern to ensure even pressure. Tighten gradually to torque specifications listed in your vehicle manual or repair guide. I always double-check torque settings to avoid crushed gaskets or leaks.
Reassemble and Test
Reinstall any removed components, refill oil if drained, and reconnect the battery. Start the engine and let it run for a few minutes, observing for leaks. Keep a close eye on the gasket area. My first attempt after replacing a gasket was a bit messy—oil seeped out initially, but tightening the bolts a bit more resolved it. In half an hour, the leak was gone, and my driveway stayed pristine.
Final Checks and Clean Up
Turn off the engine, wait for it to cool, then inspect the area once more. Check oil levels and top off if necessary. Clean your tools and workspace for safety and maintenance. Remember, a small gasket can prevent huge headaches and costs—don’t overlook this simple fix.
Many car owners believe that regular maintenance is simply about following the manufacturer’s schedule or replacing parts when they break. However, as an automotive expert, I can tell you that the real pitfalls often lie in misunderstood nuances and common myths. For instance, many think that a tune-up is only needed when the engine starts misfiring, but in reality, it’s a proactive measure that can prevent costly repairs and extend your vehicle’s lifespan, as highlighted in this article. Another misconception is that all auto repair shops offer the same level of service; this can be dangerous because some shops cut corners, especially when it comes to transmission repairs, which can lead to severe issues if not properly handled. Interestingly, many people overlook the advanced mistakes they make during routine maintenance, such as ignoring the importance of correctly diagnosing issues—this can cost much more than a proper initial assessment.
A common trap is assuming that a quick fix, like adding a fuel additive or using cheap parts, will solve underlying problems. But that’s often a band-aid solution that delays necessary repairs, leading to more damage down the line. For example, a faulty transmission needs an expert overhaul rather than a quick refill or fluid change; neglecting this could permanently damage your vehicle, which is explained in this guide.
**What really separates amateur auto care from professional service**? It’s an understanding of the intricacies involved in diagnosing hidden issues. For example, some transmission problems are caused by subtle electrical faults that a seasoned technician can detect only through advanced diagnostics, avoiding unnecessary replacements and saving you money.
Let’s address a common question that advanced car owners ask:
Why is diagnosing a slipping transmission more complex than just checking fluid levels?
Because many slipping or jerking issues are caused by electronic sensors or internal component wear—not simply fluid contamination. Modern Transmissions rely heavily on sensors that communicate with ECU units; if these sensors give faulty readings, replacing fluid alone won’t fix the problem. This understanding is crucial and is covered in detail in this expert resource.
It’s also vital to realize that many myths persist, such as the idea that transmission flushes are always beneficial. In fact, improperly performed flushes can dislodge debris, causing blockages or damage to delicate valves inside the transmission. This is why a precise diagnosis and understanding of your vehicle’s history are essential before opting for such procedures.
Finally, I urge you to scrutinize every aspect of your car’s maintenance to avoid these common pitfalls. When in doubt, consult professionals who understand the nuances of auto repair. Remember, superficial fixes may seem convenient but can backfire. For comprehensive guidance and to navigate this complex terrain, visit our contact page. Have you ever fallen into this trap? Let me know in the comments.
Prioritize Quality and Precision in Your Toolbox
Maintaining your vehicle’s performance over time requires more than just basic tools; it demands equipment that offers accuracy, durability, and ease of use. Personally, I swear by a high-grade digital multimeter, like the Fluke 117, because it provides precise voltage readings essential for diagnosing electrical issues that can silently drain your battery or cause sensor malfunctions, as discussed in this article. No matter how seasoned you are, investing in reliable testing gear can save time and prevent costly misdiagnoses.
The Power of Diagnostic Software
When it comes to complex systems like transmissions or engine management units, software solutions like OBD-II scan tools are indispensable. My personal choice is the Autel MaxiCOM, which instantly reads trouble codes, clears them, and provides data streams in real-time. It’s invaluable for proactive maintenance and catching issues before they escalate—helping you avoid unnecessary auto repair bills or misdiagnoses. The trend in auto diagnostics points toward increasingly integrated software, making advanced tools essential for anyone serious about keeping their vehicle in top shape.
Why Regular Calibration Matters
Tools like tire pressure gauges or alignment sensors need periodic calibration. I regularly review calibration records for my equipment, which ensures accuracy when balancing tires or aligning wheels. An improperly calibrated tool can lead to uneven tire wear or compromised safety, possibly negating the benefits of high-quality parts and good driving habits. Remember, even the most sophisticated equipment must be maintained to deliver reliable results over the long run.
Automotive-Specific Lubricants and Cleaners
Cheap lubricants or cleaning products may seem attractive initially but can harm engine components or reduce the longevity of your repairs. I recommend OEM-approved lubricants like Liqui Moly for their proven stability, especially in sensitive parts like transmissions or differentials. Using the right products ensures the effectiveness of your repairs and prolongs the intervals between maintenance sessions, which aligns with the future trend toward durable, long-lasting vehicle care.
Maintain Regular Software Updates and Upgrades
Software tools and diagnostic devices benefit greatly from periodic updates. Manufacturers frequently release patches that improve functionality, fix bugs, and enhance compatibility with newer vehicle models. I make it a habit to check for updates quarterly, a simple step that keeps my tools effective and reduces troubleshooting time. Staying current with technological advancements is a habit every auto enthusiast must embrace as vehicles continue to evolve into complex, connected systems.
How do I keep my tools in top shape over time?
To maximize their lifespan and reliability, store tools in a dry, organized space, avoiding extreme temperatures that can degrade electronic components or lubricants. Regularly clean and inspect your equipment—check cables for frays, calibrate sensors, and replace worn-out parts promptly. For example, maintaining your diagnostic scanner’s firmware ensures it can read the latest vehicle codes and functions, preventing costly misdiagnoses. By treating your tools with care, you’ll enjoy consistent performance and save money in the long run, aligning with the trend toward more sustainable and cost-effective auto maintenance practices.
If you’re eager to enhance your repair routine, I encourage you to start with a high-quality multimeter or diagnostic scanner. These tools, when properly maintained and upgraded, empower you to diagnose issues quickly and accurately, avoiding unnecessary repairs and ensuring your vehicle remains safe and reliable. For more expert tips on intelligent vehicle care, visit our contact page.
What I Wish I Knew About Small Parts and Big Problems
One of the most eye-opening lessons I’ve learned in auto repair is that the tiniest component, like a gasket, can be the difference between ongoing frustration and peace of mind. It made me realize that paying attention to overlooked parts often prevents costly damage down the line, transforming my approach from reactive to proactive.
Another insight is how personal experience with fixing my own car deepened my understanding of manufacturer recommendations and the importance of using quality parts. This shift in perspective has helped me avoid shortcuts and embrace maintenance that truly prolongs my vehicle’s health.
Finally, I discovered that a calm, patient approach during repairs—like meticulously inspecting surfaces or carefully selecting tools—yields better results than rushing through the process. It’s a reminder that in auto care, precision and attentiveness are invaluable assets.