
I vividly remember the day I discovered a simple kitchen ingredient could rescue my car’s stubborn battery corrosion. It was a sweltering summer afternoon, and after trying everything from expensive commercial cleaners to DIY concoctions, I was about to give up. Frustration mounted as I watched the corrosion eat away at my battery terminals, making it nearly impossible to start my car. That’s when I noticed that everyday household item sitting right in my pantry—baking soda.
That lightbulb moment changed everything. I realized that some of the most effective car maintenance tricks are right there in our kitchens, often overlooked. Today, I want to share with you how you can harness the power of a common staple to remove battery corrosion effectively and cheaply.
Why Negotiating Battery Corrosion Matters More Than You Think
Battery corrosion isn’t just a cosmetic issue; it can seriously impair your vehicle’s performance. When corrosion builds up, it obstructs the flow of electricity between the battery and the vehicle, leading to sluggish starts or even complete failure. Regular maintenance of your battery terminals can extend your battery’s life and save you costly repairs down the road.
But here’s the catch: many car owners neglect this simple step because they either don’t know how or assume it requires harsh chemicals or professional help. That assumption often leads to frustration or costly replacements. The good news? There’s a cost-effective, DIY-friendly solution that you can do right at home.
Early in my repair journey, I made the mistake of using abrasive tools and aggressive cleaners that ended up damaging my battery terminals more than helping. Trust me, I learned the hard way that patience and the right method matter. I’ll guide you through a straightforward process that’s safe, effective, and gentle on your car.
If you’ve ever faced a struggling start on a chilly morning or had to jump-start your car because of corroded terminals, this method is for you. Before we get into the nitty-gritty, let’s address the big question I hear from skeptics—”Is this kitchen staple really enough for such a stubborn problem?”
Is using baking soda for battery corrosion really worth the hype?
Many folks dismiss simple solutions without giving them a fair shot, thinking they won’t cut it for tough issues. I get it—trusting a common household item over professional chemicals sounds too good to be true. But after my own experience and plenty of research, I can confidently say that baking soda is not only effective but safe and eco-friendly.
According to automotive experts, baking soda neutralizes the acid buildup caused by corrosion, which is primarily a reaction of sulfuric acid in the battery with environmental moisture. This reaction produces the characteristic white or greenish deposits on terminals. By applying baking soda mixed with water, you can gently break down this buildup without damaging the delicate metal parts.
Now, I’ll walk you through the steps I’ve personally tested and refined to ensure your battery terminals are clean and corrosion-free. Ready to keep your car happy and reliable? Let’s dive into the simple process that can save you a trip to the mechanic.
Prepare Your Workspace and Gather Supplies
Park your car on a level surface and turn off the engine. Open the hood and locate the battery terminals. For safety, wear gloves and eye protection. You’ll need baking soda, water, an old toothbrush or small wire brush, and a clean rag. Having a spray bottle filled with water and a pair of pliers can also help. I once worked in my driveway during a rainy afternoon, which made the process messier but also taught me the importance of covering nearby electronics. Ensure the area is well-ventilated.
Disconnect the Battery Terminals Carefully
Start with the negative terminal to prevent sparks—use pliers if needed to loosen the clamp, then gently lift it off. Repeat with the positive terminal. Remember, disconnecting in the wrong order can cause short circuits. I learned this by mistakenly yanking the positive first, resulting in a small spark. Place the cables away from the battery to avoid accidental contact during cleaning. This step is crucial to prevent electrical mishaps while working on corrosion cleanup.
Mix Baking Soda Solution for Cleaning
In a small container, combine a tablespoon of baking soda with a cup of water, stirring until fully dissolved. The mixture should be thick enough to cling to the terminals. Think of it as a gentle neutralizer that works like magic—similar to how a doctor uses baking soda on bee stings. I once slapped a glob of this paste directly onto the terminals, which immediately started fizzing as the baking soda reacted with the acid deposits, indicating it was working.
Apply Baking Soda Solution to Corroded Areas
Use the toothbrush or wire brush to apply the baking soda paste onto the corrosion-affected areas. Let it sit for 5-10 minutes. As the solution sits, it will foam and loosen the corrosion particles, making them easier to remove—like how a gentle scrub can restore old jewelry. In my experience, applying the paste and letting it sit allows the baking soda to neutralize the acid deposits, making the cleaning much more effective. For stubborn deposits, reapply the paste and scrub gently but thoroughly.
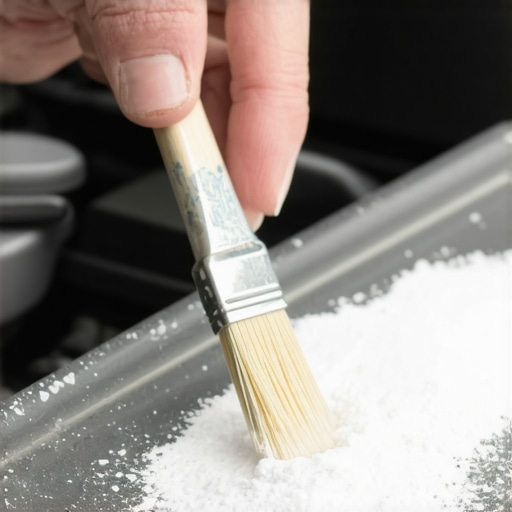
Scrub and Rinse the Terminals
Gently scrub the terminals with the toothbrush, focusing on crevices where corrosion tends to hide. After scrubbing, rinse the area with water—using a spray bottle helps target the cleaning without splashing onto other engine parts. Wipe dry with a clean rag immediately to prevent moisture from causing new corrosion. I remember once splashing water across the engine bay, which led to a short circuit; now I use a spray bottle for precise rinsing, ensuring no water drips into sensitive electronics.
Reconnect the Battery Terminals Correctly
Attach the positive terminal first, then the negative, tightening each clamp securely but without over-tightening to avoid damage. Double-check that the cables are properly seated and not touching any metal parts. Restoring connections felt satisfying after cleaning, almost like giving a fresh start to your car’s power system. Properly reconnecting ensures good electrical contact and minimizes chances of future corrosion.
Test Your Work and Observe the Results
Start the engine and check if the car starts smoothly. Observe the battery terminals for any signs of further corrosion over the next few days. If issues persist, it might be time to consider professional help—think of it as visiting a doctor after a home remedy doesn’t fully solve the problem. Properly cleaned terminals improve electrical flow, which can enhance your car’s performance and prevent unexpected breakdowns. regular maintenance, like those discussed in regular tune-ups, can extend your battery’s life and keep you safe on the road.Many car enthusiasts and everyday drivers alike operate under misconceptions about transmission and auto repair, often leading to costly mistakes. For instance, a common myth is that all transmission issues require a full overhaul, but in reality, many problems can be fixed with targeted repairs or fluid services, saving time and money. One frequent oversight is neglecting the subtle signs of transmission wear, such as slight slipping or delayed engagement, which, if ignored, can escalate into complete failure, as highlighted in expert analyses on the importance of early diagnosis. An oops factor to watch out for is assuming that transmission fluid changes are unnecessary or can be postponed indefinitely; in truth, regular fluid maintenance is crucial for prolonging transmission life and maintaining smooth shifting. Did you know that some technicians recommend specific flush methods over simple drain-and-fill procedures? Choosing the wrong approach can cause more harm than good, especially in high-mileage cars. For advanced readers, a pertinent question arises: How does the composition and condition of transmission fluid influence the longevity of the system beyond basic maintenance? Studies from automotive engineers show that synthetic fluids can significantly improve thermal stability, reducing wear, which is essential for high-performance or heavy-duty vehicles. To deepen your understanding, I recommend checking out how transmission overhauls can be a cost-effective solution in the long term, rather than frequent partial repairs. Avoid the trap of undervaluing preventive maintenance and jumping to extremes like total replacements at the first sign of trouble. Instead, empower yourself with knowledge about the nuances of auto systems. For more tips on extending your vehicle’s lifespan and avoiding common pitfalls, visit the regular tune-up guides. Have you ever fallen into this trap? Let me know in the comments!Keeping your vehicle in top shape requires more than just knowledge—having the right tools makes all the difference. Personally, I swear by a high-quality digital multimeter; it’s invaluable for diagnosing electrical issues accurately without unnecessary guesswork. I prefer a Fluke 117, as it offers precision and durability, and I use it regularly to test batteries, check alternator output, or troubleshoot sensor signals. Another essential is a cordless impact wrench; it saves time and effort during tire rotations, brake replacements, or suspension work. I opt for a Bosch 18V model because of its power-to-weight ratio, which makes heavy-duty tasks less taxing. When it comes to cleaning engine components or electrical contacts, a set of precision screwdrivers with insulated handles ensures I don’t accidentally damage sensitive electronics.
Advanced car maintenance benefits hugely from software tools. For instance, an OBD-II scanner like the AutoEnginuity Enhanced offers deep diagnostic insights beyond basic codes, helping prevent costly repairs down the line. Connecting your vehicle to software such as this can reveal underlying issues that might not manifest through symptoms alone. I recommend integrating these diagnostics into your routine tune-ups to catch minor problems early—this aligns with guidance from automotive technical standards documented by SAE International.
Looking ahead, the trend toward wireless diagnostic tools and portable scan devices is expected to grow, making professional-grade diagnostics accessible for everyday enthusiasts. This evolution promises faster, more accurate troubleshooting, enabling you to maintain your vehicle proactively.
How do I maintain these tools over time? Regular calibration is the key. For electronic testers, sending them to the manufacturer annually for calibration ensures consistent accuracy. Keep manual tools clean and dry; applying a light coating of machine oil on metal parts prevents rust. Additionally, storing digital tools in protective cases preserves their functionality and extends their lifespan. Consistent maintenance of your equipment not only guarantees reliable readings but also saves money by avoiding premature replacements.
If you’re serious about car care, investing in these tools pays off. They improve repair quality, reduce dependency on professional shops for minor issues, and foster a deeper understanding of your vehicle’s systems. For expert assistance or to discuss your specific needs, don’t hesitate to reach out through our contact page. Remember, the right tools combined with proper maintenance can help you troubleshoot effectively, like a pro, and keep your vehicle working longer and better—so why not start today by trying out that advanced diagnostic scanner I mentioned? It’s a game-changer for serious DIYers.
The Hardest Lesson I Learned About Transmission Repair
One of the most valuable lessons I’ve embraced is that not every transmission problem warrants an immediate overhaul. Sometimes, simple maintenance like fluid changes or targeted fixes can extend the lifespan significantly. I once dismissed minor slipping signs, thinking a full rebuild was inevitable, only to realize later that regular tuning and using quality fluids could have saved me thousands. This taught me to approach auto repairs with patience and a willingness to explore less drastic solutions before jumping to conclusions.
3 Myths About Auto Service That Held Me Back
For years, I believed that all car issues required professional intervention and expensive parts. It was a misconception that prevented me from attempting home fixes like cleaning battery terminals with baking soda or checking fluid levels myself. Learning the truth—that many basic maintenance tasks are DIY-friendly—empowered me to take control of my vehicle’s health and save money. Challenging these myths opened my eyes to the importance of continuous learning in auto care.
What Experts Won’t Tell You About Transmission Fluids
One insight that changed my approach was understanding the impact of synthetic versus conventional transmission fluids. Experts suggest that high-quality synthetic fluids can significantly improve shifting smoothness and longevity, especially in high-mileage or performance vehicles. I had always overlooked the significance of choosing the right fluid, but now I appreciate that a small investment here prevents costly repairs later. This tip is a game-changer for anyone serious about car maintenance.
My Essential Toolkit for Reliable Auto Repairs
Over time, I’ve assembled a set of tools that make DIY car care more manageable. A high-quality digital multimeter allows me to diagnose electrical issues accurately, while an impact wrench speeds up tire or brake work. Insulated screwdrivers are invaluable for electronics, and a good set of pliers helps with various tasks. Trusting these tools has transformed my repair process from guesswork to confidence, and I recommend building your toolkit gradually for consistent results.
The Power of Preventive Maintenance and Regular Checks
The most profound realization I had is that preventive maintenance isn’t just a recommendation—it’s essential. Scheduling regular tune-ups, fluid changes, and inspections can prevent major failures and save money in the long run. For example, simply cleaning battery terminals with baking soda or adjusting loose belts can avoid breakdowns. Taking proactive steps makes car ownership less stressful and more economical. To make this easier, I follow a maintenance calendar and keep track of service dates.
Keep Your Car in Peak Condition and Drive with Confidence
Embarking on your auto repair journey might seem daunting at first, but with patience, the right knowledge, and quality tools, you can handle many tasks yourself. Don’t shy away from learning, experimenting, or seeking advice—every small step builds your confidence. Remember, a well-maintained car is safer, lasts longer, and costs less over its lifetime. Dive into the resources, tools, and guides available, and start making those improvements today! For tailored assistance or to discuss specific issues, feel free to reach out via our contact page. Your journey to mastery begins now—are you ready to turn DIY into a rewarding experience?