
It was a rainy Tuesday night in Charlotte when I realized I was practically driving blind. I kept flicking my high beams on and off, wondering if my bulbs were dying or if the storm was just that intense. Then I pulled into my driveway, walked to the front of the car, and saw it: my headlights looked like they’d been coated in dried mustard. That ugly, yellow, crusty oxidation wasn’t just an eyesore; it was a safety hazard. I’ve spent years tinkering with cars, from minor essential car service tips for safe summer drives to full engine swaps, but those headlights always felt like a losing battle. I’m going to show you the real way to strip that fog away and keep it gone, because honestly, most of those ‘magic’ wipes you see on late-night TV are a total waste of your hard-earned cash.
Your Headlights are Blinding You for All the Wrong Reasons
Most people think foggy lenses are just a cosmetic issue that makes an old car look even older. I used to think that too. But here’s the scary part: according to research from AAA, cloudy headlights can reduce light output by up to 80 percent compared to new ones. That is a massive drop in visibility. When I first noticed mine getting bad, I made the classic rookie mistake—I tried scrubbing them with a harsh abrasive kitchen cleaner. It looked great for about twenty minutes while it was wet. As soon as it dried, the plastic looked like I’d rubbed it with a piece of sidewalk chalk. I’d actually stripped the remaining factory UV coating and left the plastic wide open to the elements. If you’ve noticed this on your own vehicle, it might be one of those top signs your car needs expert auto repair now, or at least a very dedicated Saturday afternoon in the garage. Have you ever tried one of those ‘miracle’ toothpaste hacks only to have the fog come back even worse a week later?
Can You Really Restore Them Without Buying New Assemblies?
There’s a lot of skepticism out there, and for good reason. You’ve probably seen the kits at the local parts store and wondered if they actually work or if you’re just throwing twenty bucks down the drain. I’m here to tell you that you don’t need to spend hundreds of dollars on new plastic housings. There is a specific 5-dollar trick to clean foggy headlights forever that involves a bit of elbow grease and the right sealant, rather than just a quick wipe. The ‘trick’ isn’t just getting the oxidation off—anyone can sand down plastic—it’s keeping it off. Without a proper UV protectant, you’re just creating a blank canvas for the sun to bake all over again. Today, we’re going to dive into the exact grit levels you need and why the final step is the only one that actually matters for the long haul.
Protect Your Paint Before You Touch the Plastic
Before you even think about picking up a piece of sandpaper, you need to treat your car’s bodywork with some respect. I learned this lesson the hard way back in 2012 with my old silver Tacoma. I thought I was being careful, but one slip of the hand left a nasty scuff right on the fender that looked like a cat had used it as a scratching post. Now, I use two layers of high-quality blue painter’s tape around the entire perimeter of the headlight. Think of this tape as a safety barrier; it’s the difference between a successful DIY project and a costly trip to the shop. Just as you would learn how to fix a cracked windshield before it spreads, you have to contain the damage before it starts. If you’re worried about the rest of the car’s appearance while you’re at it, knowing the best way to clean your engine bay without shorting wires can help you keep the whole front end looking pristine.
Work Through the Grits Like a Professional
Restoration is all about progressive refinement. You start with a low grit, like 400 or 600, to aggressively chew through that yellowed ‘mustard’ layer. When I did my wife’s SUV last summer, the water running off the lens was literally orange—that’s years of sun damage finally giving up the ghost. You must keep the surface wet at all times. If the sandpaper gets dry, it generates heat, and heat melts plastic, which is a nightmare to fix. Once the yellow is gone and the lens looks like a uniform, frosted white, you move to 1000 grit, then 2000, and finally 3000. Each step is designed to remove the scratches left by the previous one. It’s a lot like a regular tune up for your engine; you can’t skip the small parts and expect the whole system to run perfectly. 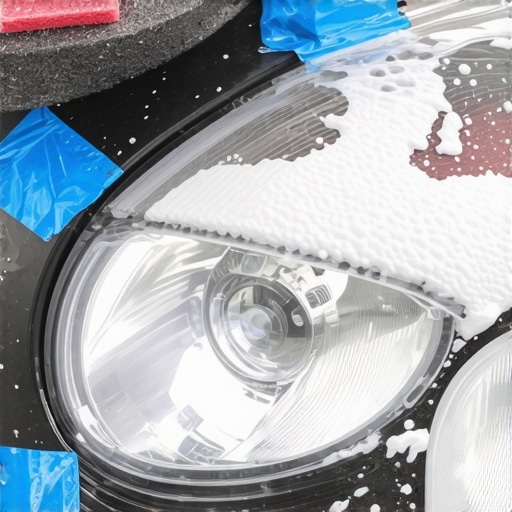
Seal the Deal with Proper UV Protection
Here is where most people fail. They get the lens looking crystal clear with some polish and then call it a day. Within two months, the sun has baked that raw plastic, and they’re right back where they started. You need a dedicated UV-resistant clear coat or a high-end ceramic sealant. This is the core of the 5-dollar trick to clean foggy headlights forever. I prefer a wipe-on liquid sealer because it’s more forgiving than a spray in a windy driveway. When you apply that final coat, the ‘frosted’ look instantly vanishes, and the lens becomes optically clear. It’s a magic-trick moment that never gets old. Just remember to let it cure in a garage or under a carport. If a rogue dust bunny or a Charlotte thunderstorm hits that wet sealant, you’ll be starting the whole sanding process over from scratch tomorrow morning.
While getting those headlights clear is a great Saturday win, I’ve noticed a lot of DIYers get overconfident and start messing with things that can actually break their car if they aren’t careful. Take transmissions, for example. The common wisdom is that you should flush your fluid every 60,000 miles. It sounds like a great way to maximize your cars lifespan with regular tune ups, right? Well, here is the contrarian truth: if you have a high-mileage car that has never had a transmission service, performing a high-pressure flush now might actually kill the gearbox. Over time, friction material from the clutches suspends itself in the old, gritty fluid. When you flush that out and replace it with slippery new detergent-rich fluid, those old clutches can start to slip. I’ve seen cars drive into a shop and have to be pushed out because a ‘preventative’ flush finished off a tired unit. If you’re noticing that why your transmission slips when the engine is cold, a flush is rarely the cure-all people think it is.
The Additive Trap Most Drivers Fall Into
When things start acting up, the first instinct is to head to the auto parts store for a ‘mechanic in a can.’ We’ve all been there, looking at those bottles promising to stop leaks or fix shifts instantly. But here is the ‘oops’ factor: many of these additives work by swelling rubber seals. It’s a temporary band-aid that eventually makes the seals brittle and prone to catastrophic failure. According to a report by the Car Care Council, neglected transmission maintenance is one of the leading causes of premature vehicle retirement, yet adding the wrong chemicals can accelerate that process. Instead of reaching for a bottle, look for top signs your car needs expert auto repair now. Often, a simple sensor replacement is all you need, rather than a chemical cocktail that messes with the fluid’s chemistry. Have you ever tried one of those ‘stop-leak’ products only to have the problem come back twice as bad? Let me know in the comments, because I’ve heard some absolute horror stories.
When Does a Full Overhaul Actually Save You Money?
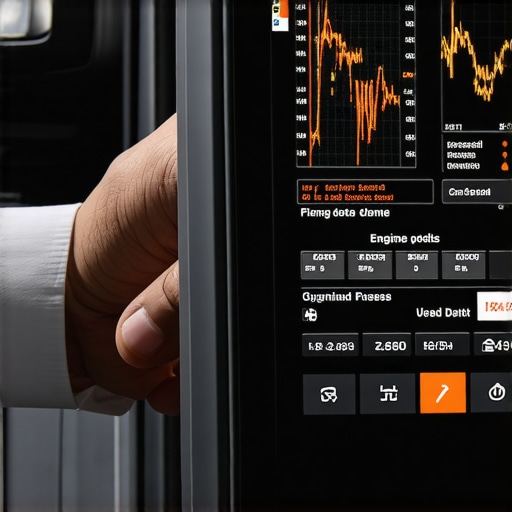
Advanced drivers often ask if it’s better to just swap in a used transmission from a junkyard or bite the bullet on a rebuild. In my experience, a used unit is a gamble—you’re often just buying someone else’s headache. This is where how transmission overhauls save you money in the long run because you’re addressing the specific failure points of your known unit. It’s the difference between a quick fix and a permanent solution. This analytical approach applies to everything under the hood. For instance, people often blame the oil for everything, but the truth about high-mileage oil additives is that they are frequently used to mask deeper mechanical issues like worn rings or bad valve guides. If you want to be a better owner, stop looking for shortcuts and start looking at the data. Use an OBD-II scanner to look at live data streams rather than just reading the ‘Check Engine’ codes; that’s where the real experts find the truth. Before you commit to any major repair, it’s always worth checking our privacy policy and reaching out through our contact us page if you have specific questions about a quote you’ve received.
If you really want to graduate from being a ‘parts changer’ to a true diagnostician, you need to stop relying on blind luck and internet forums. I never start a complex engine or cooling project without my PowerProbe and a reliable radiator pressure tester. For years, I chased phantom overheating issues on an old Jeep until I finally sat down and learned how to find a hidden coolant leak with a pressure tester instead of just guessing which hose felt soft. A pressure tester allows you to simulate the high-stress environment of a hot engine while the car is actually off and safe to touch. Similarly, if your dashboard looks like a Christmas tree, the 15-dollar tool to find a short circuit in your dash—a simple fused jumper lead or a multimeter—will save you from the nightmare of ripping out your entire interior to find one frayed wire. I personally insist on a digital multimeter with a ‘Min/Max’ capture feature because it catches momentary voltage drops that happen too fast for the human eye to register. This level of technical precision is exactly what separates a messy hack job from a professional-grade regular tune up.
How do I maintain my car’s vital systems over time?
Consistency beats intensity every single time. You cannot ignore your car for two years and then expect a single ‘super service’ to magically reverse the neglect. I keep a detailed digital log for every vehicle I own, tracking not just the mileage but the specific brand and weight of fluids used. According to the SAE J1979 standard, which dictates how your car’s computer communicates diagnostic data via the OBD-II port, modern vehicles track hundreds of ‘Mode $06’ data points. These points can tell you a cylinder is starting to misfire or a catalyst is losing efficiency months before a warning light ever pops up on the dash. I make it a hard rule to check my transmission fluid’s clarity and scent every time I rotate my tires. If you stay ahead of the curve, you will truly understand how transmission overhauls save you money in the long run by simply avoiding the need for them through thermal management and clean additives. 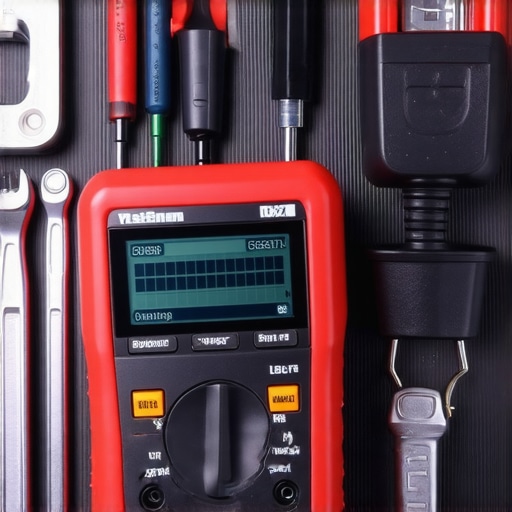 As we look toward the next decade, the DIY landscape is shifting rapidly toward software-defined maintenance. We are moving away from purely mechanical fixes and into the world of ‘coding’ or ‘initializing’ new parts to the vehicle’s central ECU. If you haven’t invested in a bidirectional scan tool yet, you’re going to find yourself increasingly locked out of even basic tasks, like retracting electronic parking brakes for a simple pad swap. It is the reason that staying current with essential car service tips for safe summer drives now includes checking for manufacturer software updates as much as checking your tread depth. If the complexity ever feels like it’s out-pacing your garage setup, don’t hesitate to look for top signs your car needs expert auto repair now and take it to a specialist who has the expensive factory licenses. Before you put your tools away, I want you to try one specific thing: grab a multimeter and check your battery’s resting voltage tomorrow morning. If it’s reading under 12.4 volts, put it on a quality trickle charger immediately. It is a five-minute check that could save your alternator from an early grave. If you find yourself in over your head with a complex repair, you can always reach out via our contact us page or check our privacy policy for more information on how we support the DIY community.
Lessons I Learned the Hard Way about Hidden Damage
Over the years, I’ve realized that the most expensive car repairs often start as tiny, ignored symptoms. I used to think I could wait until a sound got loud enough to identify, but that’s a gamble that usually ends with a tow truck. One major lightbulb moment was discovering that the truth about high-mileage oil additives is often just a mask for mechanical wear. Another realization? If your dashboard lights are acting up, don’t just replace the battery; use the 15-dollar tool to find a short circuit in your dash before you spend hundreds on electronics. Finally, never underestimate the power of a clean engine bay; it’s much easier to spot a fresh leak on a clean surface than on a block covered in a decade of grease.
My Personal Arsenal for Complex Diagnostics
To truly move beyond basic maintenance, you need to invest in gear that gives you data, not just a physical connection. I never tackle a cooling issue without a radiator pressure tester to help how to find a hidden coolant leak with a pressure tester safely. I also swear by a high-quality OBD-II scanner that supports live data streaming, allowing me to see exactly what the computer sees in real-time. For electrical gremlins, a digital multimeter is non-negotiable for checking ground integrity. Having these tools turns a stressful weekend into a systematic process of elimination.
#IMAGE_PLACEHOLDER_E#
Take Control of Your Vehicle’s Future Today
Working on your own car is about more than just saving money—it’s about the peace of mind that comes from knowing the job was done right. Whether you are performing essential car service tips for safe summer drives or preparing for a major project, your attention to detail is your greatest asset. Don’t be afraid to dig into the technical side of your machine. When you understand the “why” behind your regular tune ups, you become a more capable owner. Have you ever found a ‘simple’ fix that turned into a weekend-long project because you missed a small detail? Let me know in the comments below!