If you’ve ever caught your fingernail on a stubborn deep scratch on your car’s paint and felt a sinking feeling in your stomach, you’re not alone. I remember the first time I noticed a jagged mark across my vehicle’s door—it wasn’t just an eyesore, it felt like a defeat. At that moment, I realized that while I could shell out hundreds for a professional repair, sometimes, with a little patience and know-how, you can tackle these blemishes yourself, right in your driveway.
Why Fixing Deep Scratches at Home Matters More Than Ever
Deep scratches not only diminish your car’s appearance but can also lead to rust and long-term damage if left untreated. Professional repairs can be costly, often running into hundreds of dollars, and waiting for a scheduled service adds time to your day. Plus, I found that attempting DIY fixes gave me a satisfying sense of control and empowerment over my vehicle’s upkeep. According to a recent study by the Car Care Council, car owners who maintain their vehicles proactively save significantly on repair costs over time. So, tackling those stubborn scratches myself isn’t just about aesthetics; it’s a smart move for my wallet too.
Faced this problem before? You’re not alone.
If you’ve ever tried to buff out a scratch only to find it seems worse afterward, I get it. A common mistake I made early on was using the wrong type of polish, which made the damage look more pronounced. Trust me, learning what works (and what doesn’t) is vital, and that’s what I’m here to share with you—no gimmicks, just straightforward, proven tricks that can make your car look new again.
Now, let’s dive into the techniques that have helped me and many others restore their car’s finishing touches without breaking the bank. Ready to learn some pro tricks? Let’s go!
Prep Your Workspace and Tools
Start by finding a well-lit, dust-free area in your driveway or garage. Gather supplies: automotive primer, touch-up paint matching your car color, fine-grit sandpaper (2000 grit recommended), microfiber cloths, rubbing alcohol, and a clear coat. I learned this the hard way when I tried fixing a deep scratch on a rainy day; everything got contaminated, leading to a subpar finish. Ensuring a clean environment ensures better adhesion and a smooth finish.
Clean and Assess the Damage
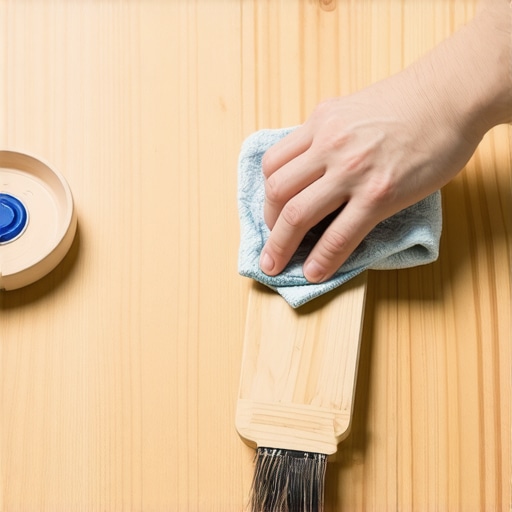
Use a microfiber cloth soaked in rubbing alcohol to thoroughly clean the scratched area, removing dirt, wax, and oil. Once clean, carefully evaluate the depth of the scratch. If it’s just surface-level, polishing might suffice; for deeper scratches, you’ll need to fill and blend the area. I once rushed this step and ended up highlighting the scratch even more with the wrong polish, so patience here is key.
Sand and Smooth the Surface
Gently sand the area with 2000 grit sandpaper, moving in a circular motion. Keep the sandpaper wet while working to prevent damaging the paint layers beneath. This step levels out the edges of the scratch. During my first attempt, I didn’t keep the surface wet and accidentally created an uneven patch, which I then polished, making the damage more noticeable. Proper sanding is crucial for a seamless repair.
Apply Primer and Fill Deep Scratches
If the scratch penetrates beyond the clear coat, apply a thin layer of self-etching primer to the area and let it dry. For the deepest gouges, use a car touch-up filler or putty, carefully pressed into the scratch. Smooth it out with a plastic spatula or similar tool. I vividly recall the first time I used filler; I overfilled, which required more sanding later, but it taught me to work in thin layers for better results.
Paint the Repaired Area
Match your car’s color code, which can usually be found on the driver’s door jamb or in your owner’s manual. Shake the touch-up paint thoroughly. Use light, multiple coats rather than one heavy one, allowing each to dry for at least 10 minutes. For my project, I applied three thin coats and noticed a significant improvement. Patience here prevents runs and uneven color patches.
Seal and Finish
Once the paint cures (check manufacturer recommendations, typically 24 hours), lightly sand the area again with wet 2000 grit sandpaper to smooth the transition. Then, apply a clear coat in multiple light layers, just like the paint. Allow it to dry fully before handling. I remember waiting extra time after the final clear coat, which paid off in a glossy, uniform finish. To preserve your work longer, consider applying a wax polish afterward.
Additional Tips for Flawless Results
Always test your color match on a hidden area before working on the visible side. If you’re unsure about matching, some auto parts stores offer free color matching services or downloadable color code charts. Also, remember that patience and gradual application trump rushing—spilling paint or skipping steps often leads to visible repair lines. For stubborn issues like persistent rust or paint mismatches, exploring professional advice can save headaches, but with careful execution, DIY deep scratch repairs can be effective and satisfying.
 While many car owners believe they know the basics of vehicle maintenance, there are several misconceptions that can lead to costly mistakes. For instance, a prevalent myth is that all transmission problems are obvious and require immediate professional attention. In reality, many issues stem from overlooked components like the hidden screens in your transmission system, which can become clogged and cause performance drops. Regularly inspecting such hidden parts can prevent major repairs later. For advanced car enthusiasts, understanding the nuanced differences between a simple tune-up and a full vehicle service is critical. The misconception that a tune-up fixes all engine problems ignores the importance of diagnosing specific issues, such as fouled spark plugs, which can be a sign of underlying oil leaks—more info on that can be found here [spark plugs fouled by oil](https://collisionfixer.com/4-signs-your-spark-plugs-are-fouled-by-oil). Additionally, many believe that all auto repairs are straightforward, but some common mistakes—like using generic replacement parts or ignoring subtle signs—can significantly reduce the longevity of your repairs.
How do you identify and avoid costly errors in sophisticated repair scenarios?
Mastering these nuances requires a detailed understanding of your vehicle’s systems and staying informed about hidden issues. For example, neglecting to address issues like the potential for your car to smell like rotten eggs can indicate catalytic converter problems that need expert intervention. Recognizing the subtle signs of transmission torque converter issues, such as irregular shifts or strange noises, can save you from expensive rebuilds. Remember, even experienced car owners can fall prey to these pitfalls if they overlook the intricacies involved. Ensuring you’re aware of these hidden nuances can vastly improve your DIY repair success rate. So, next time you approach a repair, consider consulting detailed guides or professional advice to navigate these complexities effectively. Have you ever fallen into this trap? Let me know in the comments.
Investing in Quality Equipment Pays Off
When it comes to maintaining your vehicle over time, having the right tools makes all the difference. I personally rely on a digital multimeter because it provides precise readings of voltage and current, which helps me diagnose electrical issues like faulty sensors or corroded connections. A high-quality jack and jack stands are also essentials; they offer stability and safety during repairs, reducing the risk of accidents. For ongoing transmission checks, I use a borescope to inspect the hidden-screen in your transmission that can clog and cause performance drops—further details on this can be found here. Investing in these tools early on keeps maintenance manageable and prevents minor problems from escalating.
Software and Diagnostic Equipment Streamline Repairs
Modern car maintenance increasingly depends on advanced diagnostic tools. I recommend an OBD-II scanner that not only reads engine codes but also provides live data on vehicle sensors, which aids in proactively identifying issues like fouled spark plugs—more on their signs can be explored here. Additionally, software like Torque Pro or BlueDriver apps connect seamlessly with smartphones, giving real-time insights. These tools are becoming increasingly affordable and user-friendly, making them indispensable for DIY enthusiasts aiming for precise, long-lasting repairs.
Consider Routine Maintenance as an Investment
Beyond tools, establishing a consistent maintenance schedule helps extend your vehicle’s lifespan. Regular oil changes, tire rotations, and fluid inspections prevent issues before they start. For example, checking your engine’s efficiency regularly can reveal early signs of problems like high idle caused by a sticky idle air control valve—details on spotting this are here. Keeping a maintenance log gives you an overview over time, ensuring that your car remains reliable and safe. As technology advances, integrating diagnostic tools with your maintenance routine can provide predictive insights, essentially acting as an early warning system against costly repairs.
How do I maintain vehicle care over time?
Establishing a regular check-up routine complemented by the right tools ensures you stay ahead of potential issues. When I noticed my transmission was starting to slip, I used a borescope to inspect the inside, preventing a full rebuild. Incorporating diagnostic software like BlueDriver helped me identify minor issues before they became major repairs. Remember, keeping an eye on things early allows smoother scaling of repairs and upgrades, such as upgrading your car’s suspension or transmission system, which will become more relevant as vehicles evolve toward smarter, connected systems. Never underestimate the value of preventive care—try out a comprehensive diagnostic scan today and experience the peace of mind it offers.
Throughout my journey of car DIY, I’ve discovered that the most valuable lessons often come from unexpected mistakes and discoveries. One of the hardest lessons I learned about fixing deep scratches was the importance of patience—rushing the process can make things worse, as I experienced firsthand when I hurried through sanding and ended up with uneven patches. Additionally, I realized that not all auto repair myths are false; understanding the intricacies of your vehicle, like the hidden screens in your transmission, can save you significant money and headaches. Another insight is that investing in quality diagnostic tools, such as an OBD-II scanner or a borescope, truly pays off, giving you the power to catch issues early, like a failing spark plug or a clogged transmission screen, before they escalate. Finally, I’ve learned that routine maintenance, combined with these tools, transforms your car care from reactive to proactive—saving time, money, and peace of mind in the long run.