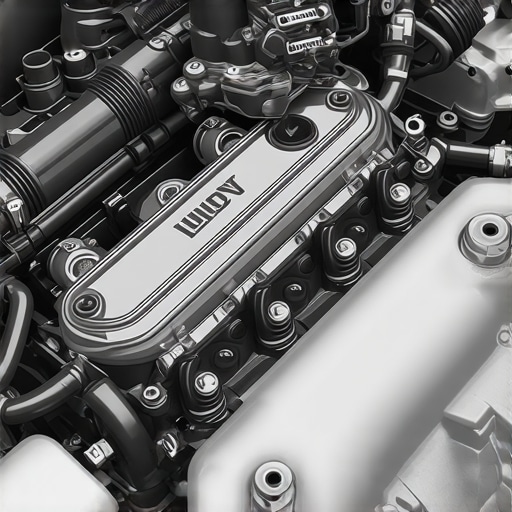
It was a chilly Sunday morning when I finally recognized the frustrating pattern. My car was idling rough, sputtering at stoplights, and I couldn’t figure out why everything else seemed fine. I had just finished a quick tune-up, expecting smooth sailing, but instead, I was greeted with that familiar, unsettling shake. That lightbulb moment hit me hard — a tiny vacuum leak was sabotaging my engine’s performance. If you’ve ever experienced a rough idle that just won’t quit, you’re not alone. Today, I want to share how I tackled that sneaky culprit and turned my engine back to its smooth, steady self.
How a Little Vacuum Leak Can Cause Big Problems
Imagine your engine as a breathing creature, drawing in air to mix with fuel. When even a tiny hole or crack in the vacuum line appears, it disrupts this delicate balance. The engine’s computer struggles to adjust the fuel mixture, causing that rough idle, stalling, or even poor acceleration. What’s wild is how something so minuscule can have such a noticeable impact — I’ve seen small leaks cause my car to run worse than a clunker.
The good news? You don’t need to be an expert mechanic to catch this culprit. In fact, I learned early on that ignoring these tiny leaks can lead to bigger, pricier issues down the line, like increased emissions or even engine damage. According to auto experts, small vacuum leaks are among the most overlooked causes of rough idles, yet they’re surprisingly easy to detect and fix.
Have you faced the frustration of your car hesitating or sputtering at idle? If so, this guide is exactly what you need. We’ll walk through how I identified my leak, the tools I used, and the simple steps that got my engine running like new. Trust me, it’s more doable than you think, and the payoff is a smoother drive and peace of mind.
Before diving into the step-by-step fixes, I’ll share a mistake I made early in my troubleshooting — overlooking the tiny hoses around the engine. I used to ignore these small, often overlooked lines, assuming they weren’t part of the problem. That was a big mistake. It’s essential to check every little vacuum hose, especially the ones hidden behind other components. For a thorough inspection, I highly recommend visiting a trusted resource like [CollisionFixer’s guide on spotting worn-out shocks](https://collisionfixer.com/how-to-tell-if-your-shocks-are-actually-worn-out), which emphasizes the importance of examining all parts thoroughly.
Now that you get the importance of these tiny leaks, let’s explore how to find and fix them. With a little patience and some basic tools, you can restore your engine’s smooth operation without a costly trip to the shop. Ready? Let’s go.
Locate the Suspect Hoses Carefully
Start by opening your engine bay and visually inspecting all vacuum hoses. I vividly recall my first attempt—using a flashlight to see the tiny hoses tucked behind manifold components. I found a cracked hose near the throttle body, which was causing my rough idle. Remember, these hoses can be as thin as a drinking straw but crucial for engine performance. Replacing a damaged hose is straightforward: disconnect the old one at both ends and attach the new, making sure the fittings are snug.
Spray With Carb Cleaner or Water for Tiny Leaks
This method was a game-changer for me. I sprayed carb cleaner around suspect areas while the engine was idling. If the engine RPMs increased slightly, it indicated a leak where the cleaner entered an unintended gap. Be cautious—avoiding open flames is critical here. If you prefer an even safer approach, light misting with water can sometimes reveal leaks as your engine reacts slowly. Remember, this step simply highlights leaks; it won’t fix them but directs you to where attention is needed.
Use a Smoke Machine to Confirm Leaks
Investing in a smoke machine can make leak detection much easier—think of it as blowing bubbles into a glass of water to see where air escapes. I borrowed one from a local auto parts store when my rough idle persisted after initial checks. I connected the smoke inlet to the intake manifold, sealed other openings, and powered it up. As smoke seeped out of tiny cracks in the vacuum lines, they became glaringly obvious. If you’re comfortable, renting or borrowing a smoke machine is a safe bet. Alternatively, some repair shops offer smoke testing, which guarantees rapid pinpointing of tiny leaks—saving you hours of guesswork.
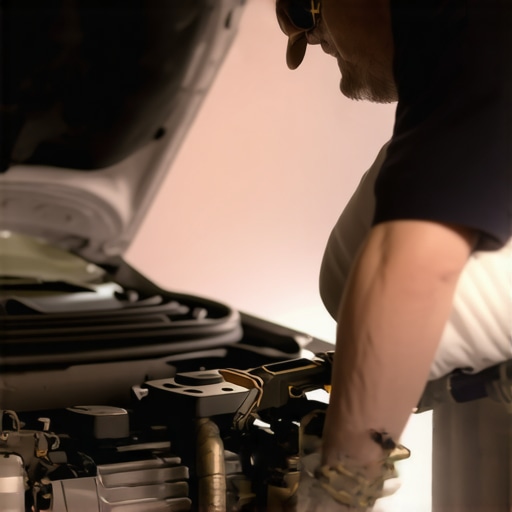
Image showing a mechanic using a smoke machine to detect vacuum leaks in a car engine.
Replace or Repair the Faulty Hoses
Once pinpointed, replacing cracked hoses is a quick job. Use a socket or screwdriver if clamps are present, and detach the faulty hose. Before installing the new one, compare its length and diameter hands-on to ensure a perfect fit. Reattach clamps tightly to prevent future leaks. For stubborn fittings, applying a small amount of vacuum-rated sealant can help secure connections but avoid overusing sticky substances that might cause issues later. After completing repairs, restart the engine and repeat the spray or smoke test to verify the fix. Doing this saved me from the guesswork, and my engine ran smoothly afterward, just like when I first bought the car.
Double-Check and Maintain Regularly
Leaky hoses aren’t always obvious—sometimes they develop micro cracks over time. Regular inspection, especially after harsh conditions or miles, can prevent unpleasant surprises. I now keep a maintenance log and check engine hoses every 10,000 miles. Also, visiting reputable resources like CollisionFixer’s auto service tips helps me stay ahead of possible issues—saving money and avoiding breakdowns. Remember, tiny leaks may seem insignificant, but they rob your engine of efficiency and can lead to costly repairs—so stay vigilant and proactive in your maintenance routine.Many drivers operate under misconceptions about transmission systems and auto repairs, often leading to costly mistakes. A common myth is that transmission fluid doesn’t need frequent changing; however, experts emphasize that regular fluid replacements can significantly extend your transmission’s lifespan, as detailed in [CollisionFixer’s guide](https://collisionfixer.com/how-transmission-overhauls-save-you-money-in-the-long-run). Another misunderstanding is that all transmission issues require complete overhauls; in fact, many problems are repairable with targeted part replacements if diagnosed correctly, avoiding unnecessary expenses.
A crucial nuance often overlooked is the importance of understanding your vehicle’s specific needs. For instance, some believe that transmission flushes are universally beneficial, but in certain cases, especially with high-mileage or untreated systems, they can do more harm than good by dislodging debris that might clog critical components. Consulting precise guidance from trusted auto experts helps prevent such pitfalls.
The ‘Oops’ factor comes into play when owners ignore warning signs or delay maintenance, assuming minor issues will resolve themselves. This attitude can lead to severe damage, such as total transmission failure, which is far more expensive to repair. Regular inspections, like checking for signs listed in [Top Signs Your Car Needs Repair](https://collisionfixer.com/top-signs-your-car-needs-expert-auto-repair-now), can save you big.
Advanced technicians also focus on the nuances of auto repair, such as the importance of fluid quality and proper diagnostic procedures. For example, using incorrect transmission fluid types can cause shifting problems, as discussed in [The Real Difference Between DOT 3 and DOT 4 Brake Fluid](https://collisionfixer.com/the-real-difference-between-dot-3-and-dot-4-brake-fluid), highlighting how subtle choices matter.
Make sure you avoid the trap of assuming cheap, quick fixes are sufficient. Investing in thorough diagnostics and understanding your vehicle’s specifications is key. Remember, routine maintenance like fluid changes and inspections can prevent major repairs, and exploring topics like [How Transmission Overhauls Save Money](https://collisionfixer.com/how-transmission-overhauls-save-you-money-in-the-long-run) provides valuable insights.
Benefit from continuous learning and avoid costly auto repair mistakes. Have you ever fallen into this trap? Let me know in the comments. Staying informed is your best defense against automotive errors.Maintaining your car’s transmission and doing reliable auto repairs requires the right equipment and software. As I’ve learned over years of DIY repairs, investing in quality tools not only speeds up the process but also ensures the longevity of your vehicle. One tool I highly recommend is a digital multimeter, which I personally use to check electrical connections and sensor outputs accurately. Unlike cheap models, my chosen multimeter offers auto-ranging capabilities, stable readings, and durability, making it indispensable for diagnosing complex systems like transmissions. For example, assessing the voltage output of sensors can prevent unnecessary replacements, saving you time and money.
Another must-have is a high-quality, cordless impact wrench. When it’s time to replace the transmission fluid or repair mounting bolts, a powerful impact wrench reduces manual effort and ensures clamps and bolts are tightened to factory specifications. I prefer models with brushless motors, offering longer battery life and consistent torque—crucial for jobs like replacing serpentine belts or removing stubborn transmission pan bolts.
For inspections, I rely heavily on a borescope camera. This tiny, flexible camera allows me to peer into engine bays and transmission housings without disassembly. It’s especially helpful for spotting micro-cracks or debris inside fluid passages. I’ve found that investing in a model with 4K resolution and adjustable lighting makes a huge difference. It’s a game-changer for early detection, aligning with what professionals use during detailed inspections.
Regarding software, I recommend diagnostic scanners that support OEM-specific protocols. My go-to device connects via Bluetooth to a dedicated app on my tablet, providing real-time data and error code explanations. This setup streamlines troubleshooting, especially when dealing with transmission shift issues or sensor malfunctions. Unlike generic OBD-II scan tools, these advanced scanners decode manufacturer-specific codes, which can be crucial for precise repair decisions.
Looking ahead, the trend in auto repair tools moves toward integrating AI-driven diagnostics and wireless data transmission. As technology advances, expect to see diagnostic tools that not only read codes but also predict failures before they happen. This proactive approach could save thousands by addressing problems early, much like automotive giants are increasingly adopting predictive maintenance strategies.
How do I keep my tools in top shape over time?
Regular calibration and cleaning are critical. I ensure my multimeter’s sensors are calibrated annually, and I wipe down impact wrench bits after each use to prevent corrosion. Proper storage in a dedicated toolbox prevents damage and keeps tools organized. Following manufacturers’ maintenance recommendations extends the lifespan of high-tech equipment, ensuring consistent performance when you need it most.
Don’t forget, the right tools can dramatically improve your repair quality and efficiency. If you’re serious about ongoing maintenance and saving money on long-term repairs, investing in a quality diagnostic scanner or impact wrench is worth every penny. Try out the latest wireless diagnostic adapters—they’re the future of auto repair, providing instant data analysis and reducing repair time significantly. Remember, thorough diagnostics using advanced tools can often uncover hidden issues before they turn costly. Ready to upgrade your toolkit? Visit your trusted auto parts supplier or contact professionals for recommendations on the best current models to future-proof your repairs. For more tips on maintaining your vehicle’s lifespan, check out [collisionfixer.com](https://collisionfixer.com/maximize-your-cars-lifespan-with-regular-tune-ups).
The Hidden Lessons I Wish I Knew About Engine Troubleshooting
One of the most eye-opening lessons I learned was that sometimes, the tiniest crack or hole in a vacuum line can cause massive engine performance issues. It’s easy to overlook these micro leaks, but they can sabotage your car’s smooth operation. My big takeaway? Never underestimate the power of thorough inspection and patience. I also realized that relying solely on visual clues isn’t enough—you need to get your hands dirty and use tools like spray testers and smoke machines to uncover hidden leaks. This journey taught me that persistent problems often hide in plain sight, and a methodical approach saves time and money in the long run.
Tools and Resources I Swear By When Fixing Vacuum Leaks
After much trial and error, I found several tools invaluable: a high-quality inspection flashlight to spot those elusive hoses, a spray bottle with carb cleaner to detect leaks with engine revs, and a portable smoke tester that made leaks glaringly obvious. For guidance, I trust auto repair expert resources for troubleshooting techniques, and I always keep a set of replacement hoses on hand. These resources, combined with the right tools, empower DIYers and save big bucks by avoiding unnecessary trips to the mechanic.
Take Charge and Keep Your Engine Running Smoothly
Your car’s health is in your hands. Regularly inspecting your vacuum hoses, listening for rough idling signs, and tackling small issues early can prevent costly engine repairs. Consider scheduling routine tune-ups—professional tune-ups extend your vehicle’s lifespan and keep it performing at its best. Don’t wait for your engine to give up; proactive maintenance and learning basic troubleshooting techniques can make every drive a smooth experience. The journey from suspicion to resolution isn’t just about fixing a leak—it’s about gaining confidence in your car care skills and enjoying peace of mind on the road.