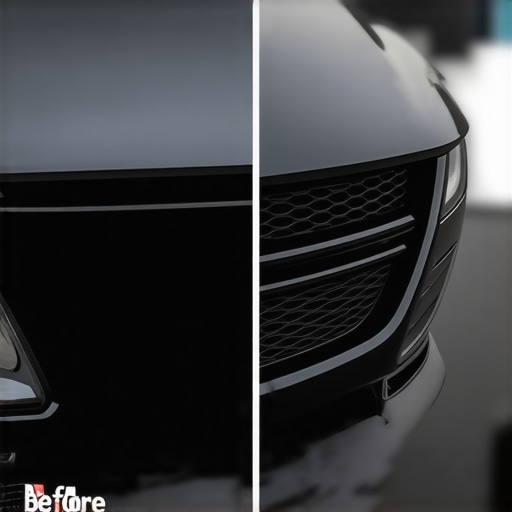
You know that sinking feeling when you glance at your car and see those dull, faded black trim pieces staring back at you? I’ve been there, and honestly, it was frustrating. I spent so much time and money trying different products, some promising miracle results but delivering disappointment instead. One day, as I was about to give up and maybe even consider repainting, I had a lightbulb moment. What if I could restore that tired plastic without all the messy, costly paint jobs? And guess what? I discovered a surprisingly simple method that works wonders and keeps your car looking sharp.
A Wake-Up Call for Dull Car Trim
Owning a vehicle means keeping up with its appearance—especially those shiny black accents that frame your windows and highlight your style. When these trim pieces fade to a dull gray or develop that chalky residue, it not only cheapens your car’s look but also makes you feel like you’re neglecting it. I used to spend weekends trying out every product on the shelf, hoping for that perfect shine. But nothing really stuck. Then I realized that fading isn’t just a cosmetic issue—it’s often caused by UV rays breaking down the plastic’s surface, leading to oxidation. That opened my eyes to a better approach, one that involves restoring the surface without harsh chemicals or paint.
But how do you do it? That’s exactly what I’m here to share, based on my own journey from frustration to pride in my car’s appearance. Restoring black trim doesn’t have to mean expensive visits to the body shop. Instead, I’ll walk you through a practical, proven method to bring back that sleek, deep-black look with minimal fuss. And don’t worry—if you’re skeptical, I’ll also cover common pitfalls and mistakes to avoid. So, if you’ve faced the disappointment of faded trim and are wondering if there’s a better way, keep reading. Your car’s stylish new look might be just a few simple steps away.
Will This Really Work for My Car’s Faded Trim?
One mistake I made early on was assuming all black plastics respond the same way. Turns out, some plastics require different treatment. It’s vital to identify the type of plastic and its condition before diving into any restoration process. This way, you avoid wasting time and money on products that won’t deliver results. For instance, I learned that using too abrasive a method can actually worsen the fading, stripping away more plastic surface. Instead, gentle cleaning combined with the right restore formulas can make a significant difference.
Before I discovered this approach, I also overlooked how crucial proper cleaning is as a prep step. Skipping that step meant the restoration products couldn’t bond properly, leading to disappointing results. If you want your trim to shine like new, it’s worth paying attention to every detail in the process.
Ready to get your car looking fresh again? Let’s explore the exact steps I used to restore my faded black trim and make it pop. But first, you might be wondering—**is all the hype about restoring plastic trim really justified?** Well, I’ll be honest: it’s more than just a quick fix. It’s a budget-friendly way to boost your car’s appearance and retain that sleek look longer. Keep reading, and you’ll see how simple this process can be—and how it might just surprise you.
Preparing Your Workspace and Gathering Supplies
Start by parkings your car in a shaded, well-ventilated area to prevent your restoration efforts from being compromised by direct sunlight. Gather essential supplies: a mild plastic cleaner, a soft-bristled brush, microfiber cloths, automotive plastic restorer or trim dye, a clean spray bottle with water, and gloves to protect your skin. I once attempted to restore my faded trim on a scorching afternoon, which led to uneven application and a disappointing outcome. Ensuring proper workspace setup is crucial for even results.
Cleaning the Faded Trim Thoroughly
Clean the trim using a plastic-safe cleaner to remove dirt, grease, and chalky residue. Use a soft brush to scrub gently—think of it like cleaning tiles with a toothbrush to reach every nook. I remember one time I skipped this step, and the restorer didn’t adhere well, resulting in a patchy look. Rinse with clean water and wipe dry with a microfiber cloth. Proper cleaning provides a fresh canvas, critical for good adhesion of the dye or restorer.
Dealing with Stubborn Stains and Residue
If your trim has stubborn stains or oxidation, apply a dedicated plastic polish or cleaner with a bit more elbow grease. For example, I used a gentle abrasive pad on a particularly chalky area—being careful not to scratch—before re-cleaning. Avoid harsh chemicals that can damage plastic; stick to products designed for automotive plastics. This extra step helps lift years of grime, making your restoration more effective.
Applying the Restorer or Dye for a Deep, Black Finish
After the surface is clean and dry, evenly spray or dab the plastic restorer or dye onto the trim. Use a microfiber cloth or sponge for better control, working in small sections to prevent streaks. I once chose to spray directly from the bottle, which caused uneven patches, so I switched to dabbing with a cloth—much like applying shoe polish. Work in smooth, overlapping motions, similar to painting a wall—success depends on consistent coverage. Let it set according to the product instructions.
Sealing and Protecting Your New Look
Once the dye or restorer has cured, consider applying a protective layer, such as a UV-resistant gloss or sealant, to enhance durability. This step is like adding a clear topcoat on painted furniture—it keeps your work looking fresh longer. I found that a simple spray sealant not only protected my work but also added a subtle shine, making the trim pop. Regular maintenance using gentle cleaning will prolong the restoration’s lifespan.
Common Pitfalls and How to Avoid Them
A mistake many make is rushing through cleaning or over-applying product, leading to streaks or uneven color. Think of it like tuning a transmission: precision and patience make all the difference. Don’t forget to wear gloves and test products on a small area first to ensure compatibility. If streaks appear, buff gently with a clean microfiber. Also, avoid applying in direct sunlight, which can cause the product to dry too quickly and result in blotchy patches. Patience and meticulous application are your best allies in achieving a professional finish.
Regular Upkeep to Keep Your Trim Looking Sharp
Maintain the restored look by regular gentle cleaning and periodic reapplication of protectant. Think of it like tuning up your engine—routine care ensures longevity. Check out our tune-up tips for more advice on car maintenance. With consistent care, your car’s black trim can look brand new for years, elevating your vehicle’s overall appearance and value.
Many car owners believe that all auto repairs are straightforward and that any mechanic can fix their vehicle quickly and cheaply. However, this misconception can lead to costly mistakes and incomplete fixes. As an automotive enthusiast with years of experience, I’ve seen how this oversimplification often causes more harm than good. One of the biggest myths is that transmission repairs are always expensive and worth avoiding until breakdown—but in reality, early diagnosis and proper maintenance can prevent costly overhaul procedures, as emphasized in expert guides like how transmission overhauls save you money. Another misconception revolves around the idea that a ‘tune-up’ is just about changing spark plugs; in fact, a comprehensive tune-up also involves checking fluid levels, inspecting belts, and ensuring sensors are functioning correctly, all crucial for optimal performance maximize your car’s lifespan with regular tune-ups. One common trap many fall into during collision repairs is neglecting frame damage, which can compromise safety and lead to future issues—this is why expert assessment is key, as discussed in finding hidden frame damage.
Let’s tackle the question that even seasoned car owners often overlook: Why do so many people get it wrong about basic yet vital maintenance? The answer lies in understanding the nuances—small details that seem insignificant but, when ignored, can escalate into major problems. For example, using cheap transmission fluid might save money upfront but can lead to accelerated wear and eventual failure, a point backed by industry specialists why you should avoid low-quality fluids. Similarly, many believe that regular oil changes are enough—they also need to monitor fluid levels like brake, coolant, and power steering fluids, which play a significant role in vehicle safety and longevity.
Another hidden nuance is the importance of listening to your vehicle’s signals. Unusual noises or vibrations often indicate underlying issues—such as a squeaky clutch or a vibrating steering wheel—that require expert attention before they become serious problems. These signs are critical for early diagnosis and can save you hundreds or thousands of dollars, especially when caught early signs your car needs professional repair.
For the advanced reader, consider this: How does the design of modern sensors impact diagnostic accuracy, and what are the risks of relying solely on dashboard warning lights? As vehicle systems become more sophisticated, diagnostics require specialized equipment and knowledge. Failing to recognize the limits of generic scan tools can lead to misdiagnosis or missed issues—highlighted in technical reports on sensor functionality and fault detection. Staying informed and working with certified professionals ensures that you address the root cause rather than just treating the symptoms.
In conclusion, debunking these myths and understanding the subtle nuances of auto repair can dramatically improve your vehicle’s performance, safety, and lifespan. Remember, regular maintenance, honest assessments, and a skeptical view of generic advice are your best tools in keeping your car in top shape. Have you ever fallen into this trap? Let me know in the comments.
Keeping Your Car Running Smoothly with the Right Tools
Maintaining your vehicle over time requires more than just basic knowledge; it demands specific, high-quality tools that can handle the nuances of modern auto systems. Personally, I recommend investing in a professional-grade code scanner, such as the Autel MaxiSys. This device goes beyond generic OBD2 readers by providing deep diagnostics, live data, and advanced reset capabilities, making it invaluable for both DIY enthusiasts and professionals. Its ability to interpret complex fault codes helps prevent minor issues from escalating into costly repairs. Moreover, integrating a compression tester into your toolkit allows you to perform quick engine health assessments, especially useful before embarking on long trips or after a collision. Combining these tools ensures you can identify problems early, saving not only money but also extending your vehicle’s lifespan.
As vehicles incorporate more electronic components, staying updated with software and firmware is crucial. Regularly updating your diagnostic tools and software ensures compatibility with the latest vehicle models, reducing diagnostic errors. For example, Bi-directional scan tools can command a vehicle’s systems to test actuators or sensors directly, offering deeper insights into hidden issues. This proactive approach aligns with industry trends leaning toward connected diagnostics and predictive maintenance, which future-proof your investment and vehicle reliability.
How do I maintain tools and diagnostics equipment over time?
To keep your diagnostic tools performing optimally, store them in a clean, dry environment, and regularly calibrate sensors and scales as recommended by the manufacturer. Periodic firmware updates are essential to ensure compatibility with new vehicle systems, especially with the rapid evolution of automotive technology. Think of it as tuning your transmission: consistent, precise adjustments keep everything operating smoothly and prevent unexpected breakdowns. Incorporate routine checks for calibration and software updates — it may seem trivial, but neglecting this can lead to inaccurate diagnostics and missed warning signs, ultimately costing more in repairs. Additionally, consider subscribing to professional training or online courses to stay current with diagnostic protocols and software innovations. With the right tools and regular maintenance, you can confidently troubleshoot and address issues before they turn into expensive problems, ensuring your vehicle remains dependable for years to come. Looking ahead, I predict that the integration of AI-powered diagnostic systems will become standard, making tools smarter and more intuitive—stay ahead of the curve by investing now in high-quality equipment and software updates.When I first started restoring my faded car trim, I thought quick fixes and cheap products would do the job. But the real lesson was patience and attention to detail—taking the time to clean thoroughly and using quality products made all the difference. I learned that understanding your car’s materials and treating them gently can restore their beauty without costly repainting, saving you time and money in the process. This experience taught me that true auto care combines science with a personal touch, leading to more satisfying results than any store-bought miracle. If you’re ready to transform your vehicle and extend its life, embrace the process with patience and the right knowledge, and you’ll be amazed at what even a basic restoration can achieve.