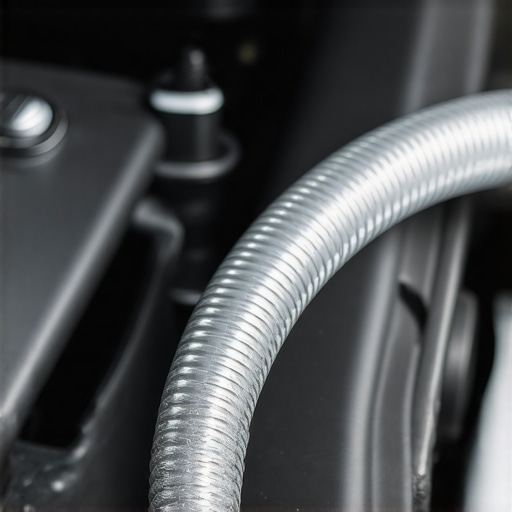
Ever been in the middle of a hot summer day, cruising down the highway, only to notice your engine sputtering or idling rough as a gravel road? I’ve been there too. One day, after a particularly frustrating drive, I realized that my engine’s uneven idle was eating away at my nerves and my wallet. That lightbulb moment led me down a rabbit hole of auto repair tricks—little fixes that cost less than a fancy coffee but can restore your engine’s smoothness like nothing else.
Why a Simple Vacuum Line Can Save Your Day (and Your Car)
So, what’s the culprit? Believe it or not, a tiny vacuum hose—often just a few dollars’ worth of rubber tubing—can be a game-changer. It’s like the unsung hero of engine performance. When this vacuum line gets cracked, loose, or clogged, it causes leaks that mess with your engine’s air-fuel mixture. That, in turn, leads to rough idling, stalls, and surprisingly, increased fuel consumption. I found out the hard way early in my DIY adventures that ignoring this little part could turn a simple tune-up into an expensive repair.
Is This Really Worth the Hype?
I get it—seeing a small rubber hose on a parts diagram might seem insignificant. I made my mistake early on by overlooking these tiny leaks, thinking they couldn’t possibly matter. But as I learned, even a break in this small hose can make your engine behave as if it’s fighting itself. According to automotive experts, vacuum leaks are among the leading causes of poor engine performance and can be easily diagnosed and fixed without breaking the bank. You can see why addressing this could be the smartest move before heading to the repair shop for pricier fixes.
Are you noticing your engine idles rough or stalls unexpectedly? If so, you might be facing a vacuum leak problem too. Keep reading—I’m about to guide you through the low-cost, high-impact fix that I wish I’d discovered years earlier. Trust me, this simple maintenance step can keep your engine purring like new and save you from unnecessary expenses. And if you’re curious about other vital tips, don’t forget to check out our comprehensive guide on maximizing your car’s lifespan with regular tune-ups.
Identify the Vacuum Leak Quickly and Effectively
Start your fix by locating the vaccum hoses running from your intake manifold to various engine components. Use a simple soapy water solution and spray it around the vacuum lines while the engine idles; watch for bubbles indicating leaks. Remember, small cracks are often enough to cause big issues, so be thorough. I once spent an hour inspecting hoses on a 2005 sedan, only to find a tiny crack near a clip—replacing it completely restored the engine’s smooth idle, saving me a costly repair.
Remove and Inspect the Suspect Vacuum Line
Disconnect the Hose Carefully
Using a flat-head screwdriver or pliers, gently detach the vacuum hose from its connector. Be cautious—if the hose is brittle or cracked, it’ll need replacement. Don’t just yank; twist gently to avoid damaging fittings. I once broke a plastic fitting by pulling too hard, leading to a more complex fix. So, take your time and handle parts delicately, especially if they’re old.
Check for Damage and Clogs
Hold the hose up to the light and inspect for cracks, tears, or blockages. If the hose appears dry and brittle, replace it. Clogged hoses can mimick leaks, so blow through them gently or use compressed air to clear debris, ensuring unrestricted airflow. I recommend replacing aged hoses at regular intervals, as per the [vehicle’s maintenance schedule](https://collisionfixer.com/maximize-your-cars-lifespan-with-regular-tune-ups), to prevent future issues.
Replace or Repair Vacuum Lines for Long-Term Performance
Match Parts Correctly
Buy a replacement hose that matches the original in diameter and length. Automotive parts stores often categorize hoses by vehicle make and model, but bringing the old hose can help ensure a perfect fit. Installing a mismatched hose can cause leaks or poor sealing, which defeats the purpose of your repair.
Properly Connect and Secure the Hose
Attach the new hose onto the fittings firmly, using clamps if necessary to prevent slipping. Make sure the connection is airtight—no gaps or loose fittings. After fitting, double-check all connections by gently pulling on the hose. I’ve seen inexperienced DIYers forget clamps, which led to recurring leaks and frustrating drives, emphasizing the need for secure fittings.
Test the Engine After Repair to Confirm Success
Start the engine and let it idle. Use the soapy water spray again to confirm no more bubbles form around the connections. Observe engine performance for smoother idling and acceleration. If symptoms persist, revisit the hoses or inspect related components like the PCV valve or vacuum reservoirs. This quick check solidifies your repair and helps prevent future breakdowns, aligning with advice from [auto experts](https://collisionfixer.com/top-signs-your-car-needs-expert-auto-repair-now). Remember, addressing vacuum leaks early keeps your engine running at peak performance and prolongs its lifespan.
Many car owners operate under misconceptions that can lead to costly mistakes down the road. One common myth is that a quick oil change or filter replacement suffices to keep a vehicle in top shape. While these are essential, the nuance lies in understanding the broader scope of proper maintenance, such as monitoring transmission health or addressing subtle signs of wear that often go unnoticed. Automotive experts emphasize that regular comprehensive check-ups, including transmission fluid analysis and brake system assessment, can prevent minor issues from escalating into major repairs. For instance, neglecting early warning signs like irregular shifting or brake pulsation might seem insignificant but often indicate underlying problems that, if addressed promptly, save hundreds of dollars and extend your vehicle’s longevity. Moreover, many believe that high-mileage vehicles require drastically different care, but recent studies suggest that tailored, consistent maintenance—rather than drastic interventions—can keep even older engines running smoothly. Watch out for the trap of delaying these subtle interventions; they are often the difference between a well-maintained car and one destined for premature replacement. Curious about how to spot these warning signs early? Check out our guide on [maximizing your car’s lifespan with regular tune-ups](https://collisionfixer.com/maximize-your-cars-lifespan-with-regular-tune-ups). When it comes to auto repair, understanding these nuances not only enhances safety but also offers significant cost savings. Think of your vehicle as a living system—you need to listen carefully to its signals. Have you ever fallen into this trap? Let me know in the comments, and stay proactive to keep your ride smooth and reliable.
Maintaining your vehicle’s health is an ongoing journey that demands the right tools and a strategic approach. Over the years, I’ve come to rely on specific equipment that not only streamlines repairs but also ensures long-term reliability. Investing in high-quality tools might seem costly at first, but their durability and precision pay off by preventing future breakdowns and saving you money. For example, my trusted digital multimeter has become indispensable for diagnosing electrical issues swiftly. It provides accurate voltage readings, helping me identify faulty alternators or failing sensors without guesswork. Similarly, a reliable torque wrench guarantees that bolts are tightened to manufacturer specifications, preventing over-tightening or loosening over time, which can cause serious damage.
Why I Prefer This Particular Socket Set
When it comes to removing stubborn bolts during transmission repairs or collision fixes, my deep socket set has never let me down. I choose one with a ratchet that offers smooth operation and a quick-release mechanism—features that save time and reduce frustration. The set’s durability means I can tackle rusted components without worrying about stripping or breakage. Such precise tools contribute significantly to consistent work quality, which translates into better performance and safety for your vehicle over the long haul.
Preparing for Future Challenges
Looking ahead, I believe the trend in automotive maintenance will increasingly rely on advanced diagnostic software that connects to your vehicle’s OBD-II port via Bluetooth. These programs can interpret complex error codes and even suggest specific fixes, making DIY repairs more accessible than ever. Pairing these digital tools with your physical equipment creates a comprehensive maintenance system, ensuring your vehicle remains in top shape. Regularly updating your diagnostic software and learning its features can help you catch issues early, often before they evolve into costly repairs. Incorporate a quality scan tool into your toolkit now—it’s a game-changer for proactive maintenance, and many models are surprisingly affordable.
How do I maintain my tools over time?
Proper tool maintenance is crucial for longevity. Clean and lubricate moving parts after each use, store them in a dedicated toolbox to prevent damage, and periodically check for wear or corrosion. For electrical tools, replace worn cables immediately to avoid malfunction or safety hazards. I also recommend labeling your toolsets according to their specific functions—this not only saves time but also helps in quickly identifying the right instrument during urgent repairs. Remember, well-maintained tools perform more accurately and last longer, making your DIY auto repairs more efficient and reliable.
Regarding long-term vehicle health, it’s wise to stay informed about the latest repair techniques and tools. For instance, learning how to properly overhaul your transmission can prevent expensive service visits; you can find detailed guidance in this comprehensive article. Trying out a high-quality torque wrench or diagnostic scanner today will empower you to handle many common issues without professional intervention, saving you money and giving you peace of mind. Keep your tools in top shape, stay updated on tech advances, and your vehicle will thank you in years to come.
The Hardest Lesson I Learned About Car Service and DIY Repairs
My journey into auto repair taught me that even small, overlooked components like vacuum lines can have outsized effects on engine performance. The first time I ignored a tiny crack in a vacuum hose, I paid the price with a rough idle and wasted hours trying to troubleshoot. That experience underscored for me that paying attention to details, no matter how minor they seem, is crucial for effective vehicle maintenance.
Breaking My Myths About Auto Repairs and Costly Mistakes
One misconception I held early on was that only professional mechanics could handle complex fixes. Turns out, with proper guidance and quality tools, many repairs—such as replacing worn vacuum lines or inspecting for leaks—can be DIY successes. This realization saved me hundreds and made me more confident in maintaining my vehicle, showing that knowledge truly is power when it comes to auto care.
Lessons that Changed My Approach to Vehicle Care
I learned that regular inspections and proactive maintenance prevent small problems from snowballing into expensive repairs. For example, inspecting hoses and connections periodically can detect cracks or clogs early. These lightbulb moments revolutionized my maintenance routine, making me more proactive and less reactive to costly surprises—saving money and extending my vehicle’s lifespan.
My Essential Toolkit for Car Repair Success
I found that a reliable digital multimeter is essential for diagnosing electrical issues—saving time and guesswork. A high-quality torque wrench ensures bolts are tightened to perfect specifications, preventing future looseness or damage. Additionally, a good set of deep sockets makes removing stubborn components easier and safer. These tools have become my trusted partners in auto repair, elevating my DIY game and ensuring long-term safety.
The Final Push—Your Turn to Take Control of Your Vehicle
Remember, honest, small steps in maintaining your car can lead to significant savings and a more reliable ride. Don’t wait for symptoms to worsen—start inspecting and addressing issues early. Our comprehensive guide on maximizing your car’s lifespan with regular tune-ups offers valuable insights to keep your vehicle running smoothly. Now’s the time to take action—your car will thank you for it.
Have you ever faced a tiny leak that caused big headaches? Share your experiences below, and let’s learn together how small fixes can make a big difference!