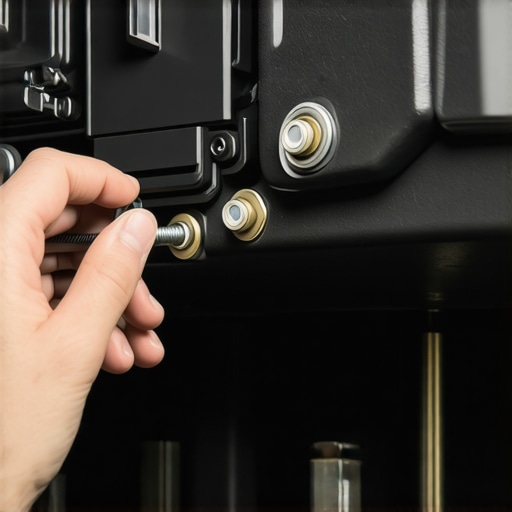
I remember a mornings just like this—driving down the street when suddenly, an irritating rattle started echoing from my dashboard. It was like my car had developed a tiny drum set in there, and I initially dismissed it as a minor quirk. But as weeks went by, that noise grew louder, more persistent, and honestly, pretty distracting. It wasn’t until I finally took a closer look that I discovered a simple, overlooked fix that made all the difference.
Why Tiny Hidden Bolts Can Cause Big Noise Problems
If you’re like me, you’ve probably spent hours pouring over troubleshooting guides, trying to identify the source of that pesky dashboard rattle. Turns out, many of these noises stem from something surprisingly simple—a loose bolt hiding somewhere in the dashboard assembly. These bolts can easily come loose over time due to vibrations, temperature changes, or normal wear and tear. And the worst part? They’re often tucked away, making them easy to overlook.
What really struck me early on was realizing that securing these little bolts doesn’t require fancy tools or professional expertise. In fact, a basic socket set and a little patience are all you need to silence that unwanted noise. But here’s the key: you have to be vigilant about identifying which bolt is causing the problem and knowing where to look. I learned this the hard way, making the mistake of blindly tightening every bolt I could find, which sometimes worsened the problem or caused new issues. This mistake is quite common among DIY enthusiasts, but trust me, knowing where to focus your efforts makes all the difference.
Many car owners underestimate the importance of these tiny fasteners. According to automotive experts, loose interior bolts not only cause noise but can also lead to rattles that mask more serious issues. Plus, fixing this yourself is a money-saver—you won’t need to visit a mechanic, and it’s surprisingly straightforward once you know what to do. Curious if your dashboard rattle is caused by one of these hidden bolts? Keep reading, because I’ll be walking you through each step to identify and tighten those sneaky fasteners.
If you’re tired of that nagging noise stealing your peace of mind, or simply want to avoid unnecessary trips to the shop, this guide is just what you need. Have you noticed your dashboard making strange noises lately? If so, you’re not alone, and I’ve been there too. Let’s dig into how to pinpoint these hidden loose bolts and put an end to the racket once and for all.
Is Tightening Hidden Bolts Really Worth the Fuss?
Initially, I was skeptical. I thought, “It can’t be that simple.” But after a few quick adjustments, that irritating rattle was gone. Now, before you dismiss this as trivial or dismissive of complex issues, I urge you to consider how many minor annoyances like this are actually easy to fix on your own, saving both time and money. One early mistake I made was assuming that all dashboard rattles required expensive repairs, which led me down unnecessary rabbit holes. Knowing where common problem spots are can help you avoid that frustrating cycle.
If you feel overwhelmed or unsure where to start, don’t worry. I’ve been there, and I’ll guide you through the proven steps to identify those elusive loose bolts and keep your car running quiet and smooth. Ready to reclaim your driving experience? Let’s jump into the details.
Locate the Loose Bolts systematically
Start by opening your dashboard and gently prying back the panels using a plastic trim removal tool to avoid damage. Use a flashlight to scan for bolts that seem out of place or are visibly loose. Remember, not all bolts are obvious; some hide behind clips or under covers.
In my experience, using a mirror on a stick helps spot bolts tucked away in hard-to-see spots. Once you’ve identified a suspect, compare its position with your vehicle’s service manual or online diagrams to confirm its location. This initial step prevents unnecessary tightening and speeds up your troubleshooting process.
Prepare your tools for a secure fix
Equip yourself with a socket set matching your car’s bolt sizes—commonly 8mm, 10mm, or 12mm. Ensure your ratchet is in good condition to prevent slipping. For stubborn bolts, a short extension bar offers better leverage and access to tight spaces. I once struggled with a recessed bolt, but attaching a flexible extension made all the difference.
Apply controlled tightening to avoid damage
Carefully insert the socket onto the bolt and turn clockwise. Use a torque wrench if available, setting it to the manufacturer’s recommended torque specification—over-tightening can crack plastic clips or threads, while under-tightening leaves the source of noise unresolved. I made the mistake of overtightening a bolt, which cracked a plastic housing, but learned the importance of accurate torque through experience.
Test the repair by assessing the noise
After tightening a bolt, start the engine and listen closely. If the rattle diminishes or disappears, you’ve likely found and fixed the culprit. If not, repeat the process with other suspect bolts. Patience is key; sometimes, multiple bolts contribute to the noise, and tightening a few makes a significant difference.
Document your fixes to prevent future problems
Make a quick note of the bolts you tightened and their locations. Regular inspections—say, every 10,000 miles—can help catch loose bolts before they cause further issues. Remember, loose bolts aren’t exclusive to dashboards; they can also impact your transmission or other critical components, so stay vigilant.
If you encounter bolts that refuse to tighten or keep coming loose, consider visiting professionals who can secure them with thread lock compounds or reassemble the component properly. For complex repairs involving the transmission or other vital systems, check the benefits of comprehensive overhauls by visiting this guide.
Many car owners believe that the industry’s advice is straightforward—that simply trusting your mechanic, sticking with basic tune-ups, or following brand recommendations suffices. But in my experience, this leads to a common misconception: that all auto repairs are created equal. In reality, the nuances of collision repair, transmission servicing, and regular tune-ups reveal a complex landscape where misconceptions can cost you time and money. For instance, many assume that a quick oil change or generic transmission service guarantees optimal performance, yet overlooking specific issues like micro-cracks in aluminum wheels or improper fluid mixing can undermine these efforts. Research by automotive experts indicates that neglecting such details often results in premature wear and costly repairs down the line.
One trap I’ve seen many fall into involves treating all auto shops as interchangeable—believing that the cheapest or most conveniently located option is always the best. However, quality is deeply tied to the shop’s expertise, especially with complex systems like transmissions or aluminum frame repairs. A common myth is that synthetic oils or aftermarket parts automatically improve longevity; in contrast, sometimes these can introduce issues like leaks or bad sensor readings if not chosen or installed correctly. That’s why understanding the specific requirements of your vehicle, as detailed in authoritative guides, is crucial for making informed decisions.
Advanced problems like micro-crack detection in aluminum wheels can challenge even seasoned technicians, yet many shop owners rely on visual inspections alone, risking missed damages that compromise safety. For example, recent studies highlight that non-invasive techniques, such as ultrasonic testing, can reveal micro-cracks invisible to the naked eye, preventing catastrophic failures later. Always inquire whether your mechanic employs such advanced diagnostics, especially after accidents or like in these from this detailed guide.
As an aftermarket enthusiast and industry insider, I challenge the misconception that every service or repair is straightforward. True mastery involves understanding the subtle differences—from properly mixing transmission fluids to the importance of using the right torque specifications to avoid plastic housing damage. Regularly educating yourself about these nuances ensures your vehicle stays reliable. For comprehensive insights on specific repairs, don’t forget to explore how transmission overhauls can save money in the long run.
In conclusion, being vigilant about the intricacies of auto repair and trusting only qualified, knowledgeable technicians is key to long-term vehicle health. Avoid the trap of oversimplified solutions and ensure your repairs address the root causes—sometimes hidden beneath layers of assumptions. Have you ever fallen into this trap? Let me know in the comments.
Maintaining Your Auto Repair Tools for Long-Term Success
Investing in high-quality, durable tools is vital for ongoing vehicle maintenance, especially when dealing with components like transmissions or transmission-related repairs. I personally prefer a digital torque wrench, such as the CDI Torque 1503, because it provides precise torque settings—crucial when tightening sensitive parts like plastic clips or aluminum components. Regular calibration of these tools ensures consistent accuracy and prevents over-tightening or stripping fasteners, which can lead to costly repairs down the line.
Beyond manual tools, modern diagnostic software like OBD-II scanners such as the BlueDriver Plus allows me to identify hidden issues early, like micro-cracks in aluminum wheels after a crash—referenced in this guide. These devices have become an essential part of my maintenance routine, ensuring that my vehicle’s electronic systems and transmission health are always monitored for optimal performance.
Streamlining Repairs with the Right Methods
Developing a methodical approach, such as systematically checking suspect bolts, saves time and reduces frustration. For example, when inspecting the transmission cooling system, I follow a step-by-step procedure outlined in authoritative tech guides, maximizing the longevity of the repair and preventing future leaks or failures. Remember, applying controlled torque according to the manufacturer’s specifications—often listed in the vehicle’s service manual—is crucial. Using a torque wrench set to these specs avoids damaging plastic housings or threads, notably in sensitive areas like the transmission or engine components.
Another tip involves regularly testing your repairs, such as verifying the success of a transmission fluid refresh (learn more about this process). Conducting these assessments helps you catch any issues early, especially with complex systems that may not show obvious signs immediately after service.
What’s the Future of Car Maintenance Equipment?
Looking ahead, advancements like augmented reality (AR) overlays for repair guidance and AI-driven diagnostic systems are poised to revolutionize car maintenance. These innovations will provide real-time, precise instructions right in your field of view, making DIY repairs more accessible and reliable. As the industry moves toward more integrated digital tools, mastering current software and hardware will set you apart as a proactive car owner.
How do I keep my car’s transmission in top shape over time?
Consistent maintenance involves not only regular fluid changes but also paying close attention to shifting behaviors—such as hunting for gears or shuddering on steep inclines. Adapting your inspection routines, like listening for unusual noises or testing with a multimeter (here’s how), can extend your transmission’s lifespan. Don’t forget to schedule professional overhauls when needed; detailed info can be found in this guide.
Lessons That Changed My Perspective on Auto Repairs
- One of the most eye-opening moments was realizing that many dashboard rattles are caused by tiny, overlooked bolts—sometimes a simple tightening can restore peace to your drive. This taught me the importance of inspecting components methodically rather than jumping to costly solutions.
- I learned that understanding your vehicle’s common problem areas empowers you to troubleshoot confidently. Knowing where to look saves time and prevents unnecessary visits to the mechanic, which often cost more than the actual fix.
- Investing in quality tools, like a calibrated torque wrench, turned out to be a game-changer. Precise tightening prevents damage to sensitive parts and extends the lifespan of your repairs, reinforcing that good tools make good repairs.
- Recognizing the value of advanced diagnostic tools encouraged me to stay proactive. Regularly scanning for hidden issues, like micro-cracks in aluminum wheels, can prevent major failures later—an insight I highly recommend for fellow enthusiasts.
- The biggest lesson was understanding that auto repair is both an art and a science. Combining technical knowledge with a patient, systematic approach yields reliable, long-term results, transforming a daunting chore into a satisfying craft.
Tools and Resources That Keep Me Ahead of the Curve
- BlueDriver Plus OBD-II Scanner: This device offers comprehensive diagnostics, helping me detect hidden issues early. Trustworthy because it’s user-friendly and provides detailed reports, it’s become essential for maintaining my vehicle’s health.
- Service Manuals (like Haynes and Chilton): These guides deliver invaluable insights into specific models, ensuring I follow manufacturer-recommended procedures. Their accuracy and clarity make DIY repairs more manageable.
- Trusted Auto Repair Websites: Websites that offer detailed tutorials and diagrams, such as CollisionFixer, provide the guidance I need for complex repairs or preventive maintenance, keeping me informed and prepared.
- Quality Tools (Torque Wrenches, Plastic Pry Tools): Investing in durable, calibrated tools ensures my repairs are precise, preventing damage and extending my vehicle’s lifespan. They’re worth every penny for peace of mind and efficiency.
Your Next Move Starts Today
Applying these lessons and utilizing trusted tools can empower you to take control of your vehicle’s maintenance. Remember, every small fix is a step toward greater confidence and savings. The more you learn and implement, the more connected you’ll feel to your car—and the better your driving experience will be. Why not start today? Share your own auto repair wins or questions below, and let’s keep driving forward together.
Feeling inspired? If you’re ready to dive deeper into vehicle maintenance or need personalized advice, don’t hesitate to reach out. Exploring our guides, like this comprehensive overview on transmission overhauls, can equip you with knowledge to make informed decisions and extend your car’s life.