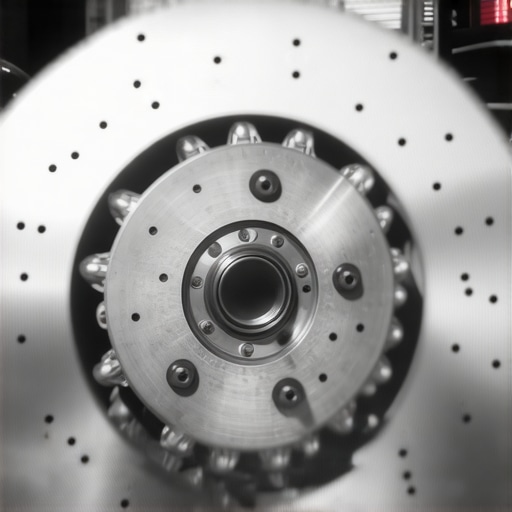
It was a sticky, humid Tuesday morning in the middle of July. I walked out to my sedan with my coffee in one hand and my keys in the other, ready to start the day. But as I approached the driver’s side, something caught my eye that made my stomach drop. Those shiny, silver brake rotors I had installed just a few months ago looked like they’d been fished out of the Atlantic Ocean. A thick, gritty layer of orange rust had formed over the surface, seemingly out of thin air. It felt like a personal insult. I’ve spent years maintaining my own vehicles, but that morning, I felt like a complete novice. I realized then that no matter how much you spend on regular tune ups, the environment is always working against you.
Your driveway is a breeding ground for surface oxidation
That orange tint isn’t just an eyesore; it’s a sign of how vulnerable raw cast iron is to the elements. I remember one specific mistake I made early on—I tried to use a generic silicone spray to ‘protect’ the metal. Let me tell you, that was the scariest drive to the grocery store I’ve ever had. I had zero stopping power because I had essentially lubricated the one thing that needs friction. It was a clear sign that I needed to stop guessing and actually look into car service tips for safe driving. [IMAGE_PLACEHOLDER] Today, I’m going to show you the safe, effective ways to keep those rotors gleaming without compromising your safety. We’re going to look at why this happens so fast and what products actually work to create a barrier against that overnight moisture.
Is fighting rotor rust actually worth the effort?
You might be skeptical. After all, doesn’t the rust just wipe off the first time you hit the brakes? While that’s partially true, that constant cycle of rusting and scraping can lead to uneven wear and that annoying morning chirp. It’s often the secret reason why people need to stop their brakes from squealing every time they back out of the driveway. If you ignore it long enough, you’ll start seeing the top signs your car needs expert auto repair much sooner than you’d like. According to materials science experts at Corrosionpedia, the porous nature of cast iron makes it an ideal candidate for rapid atmospheric corrosion, especially when salt or high humidity is involved. It’s a constant battle, but it’s one you can win with the right approach. I’ve seen neighbors use everything from expensive car covers to crazy DIY chemicals. Some things work, and some are just plain dangerous. The trick is understanding that your rotors are basically raw metal exposed to a hungry atmosphere. If you live in a coastal area, this isn’t just a “maybe” problem; it’s an every-single-night problem. I want to save you the heartache of seeing your beautiful wheels ruined by orange dust. Have you ever walked out to your car and been shocked by how fast those rotors turned orange?
Get Rid of the Orange Before It Pits the Metal
The first time I tried to tackle rotor rust, I went at it with a wire brush and a bucket of soapy water. It was a disaster. I ended up with orange-tinted slush all over my driveway and rotors that looked even worse an hour later. The key is to understand that cast iron is like a dry sponge; it holds onto moisture. To truly clear the surface, you need a high-quality brake cleaner that evaporates instantly. If you find your wheel is physically bonded to the rotor during this process, you are likely dealing with a [stuck wheel from a rusty hub](https://collisionfixer.com/the-secret-to-removing-a-stuck-wheel-from-a-rusty-hub), which is the extreme version of what happens when you let moisture sit. Once the wheel is off, spray the rotor liberally and use a lint-free shop rag. You aren’t just cleaning; you’re prepping a surgical surface.
Why brake cleaner is your best friend
Unlike generic degreasers, brake cleaner leaves zero residue. I once made the mistake of using a household ‘all-purpose’ cleaner, and the leftover film caused my [brakes to feel spongy](https://collisionfixer.com/why-your-brakes-still-feel-spongy-after-a-full-suffolk-county-brake-service) for a week because the pads couldn’t bite into the metal properly.
Shield Your Rotors Without Losing Your Stopping Power
Now, for the actual protection. You can’t just paint the whole thing. The area where the brake pad makes contact—the friction ring—must stay raw metal. However, the ‘hat’ or the hub of the rotor is fair game. I highly recommend using a high-heat zinc-rich spray. This creates a sacrificial layer that the rust attacks instead of your iron. It’s similar to [how to clean battery terminals so they never corrode again](https://collisionfixer.com/how-to-clean-battery-terminals-so-they-never-corrode-again); you are creating a chemical barrier that stops the oxidation cycle in its tracks. I remember working on an old SUV where the rotors were so pitted they actually caused the [car to pull to one side](https://collisionfixer.com/why-your-car-pulls-to-one-side-only-when-you-hit-the-brakes) because the friction was uneven across the axle.
The trick to masking the friction surface
When I spray the hubs, I use a piece of cardboard cut into a circle or even just painter’s tape to cover the friction ring. It feels tedious, but it’s the difference between a professional look and a dangerous DIY fail. For the friction surface itself, if you aren’t going to be driving for a few weeks, there are specialized ‘rotor shield’ sprays that are designed to be burned off the very first time you tap the brake pedal. They act like a temporary raincoat for your brakes, keeping the humidity out while the car sits in the garage. This prevents that terrifying ‘clunk’ you hear when your pads have actually rusted to the rotors overnight.There is a massive trap I see DIYers fall into when they start obsessing over rotor appearance. Everyone says ceramic pads are the ultimate upgrade because they don’t produce that ugly black dust. In my experience, if you live in a high-humidity area and your car sits outside, switching to high-end ceramics can actually make your rust problem worse. Ceramics don’t have the same abrasive ‘scrubbing’ power as semi-metallic pads. This means that orange layer of oxidation doesn’t get cleared off effectively on your first few stops. If that rust isn’t cleared, it begins to pit the metal, which is one of the top signs your car needs expert auto repair before the rotors are permanently scarred.
Stop Chasing the Best Pad and Look at Your Environment
Choosing the wrong pad for your climate is a nuance that even some ‘pro’ shops miss. While ceramics are great for heat dissipation and clean wheels, semi-metallics are often the unsung heroes for daily drivers in damp climates because they keep the rotor surface cleaner through friction alone. If you’ve already noticed that your pedal feels soft, you might be wondering why your brakes still feel spongy even after you’ve cleaned everything. Often, it’s because the pad material hasn’t properly ‘bedded’ into the rotor surface. 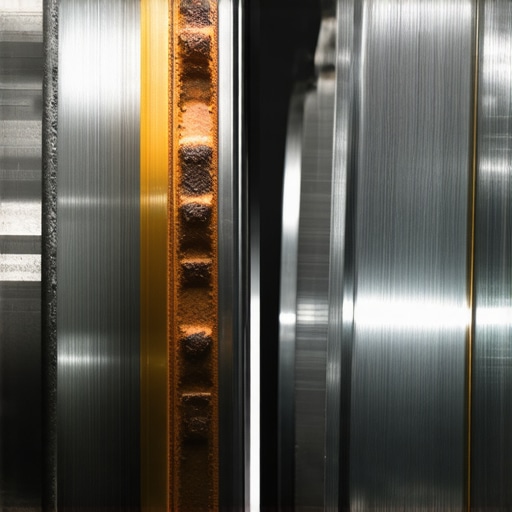 According to technical studies by SAE International (the Society of Automotive Engineers), the performance of a braking system relies heavily on the ‘transfer layer’—a microscopic film of pad material that must be evenly distributed across the rotor. When rust interferes with this layer, you get uneven friction, which leads to that rhythmic thumping or vibration.
Is your brake vibration actually a hidden transmission shudder?
This is the ultimate ‘expert level’ mistake. I’ve seen people replace perfectly good rotors three times because they felt a vibration while slowing down, only to realize the issue was actually coming from the drivetrain. For instance, why your transmission shifts better when it’s hot can sometimes be a clue; if the shudder only happens when the car is cold, it might be a torque converter lock-up issue rather than a warped rotor. This is where understanding how transmission overhauls save you money becomes vital—stopping you from throwing parts at a brake problem that doesn’t exist.
The Secret Life of Your Sliding Pins
Another trap is focusing solely on the rotor and ignoring the caliper sliding pins. If you don’t use a specific high-temp synthetic grease on those pins, they will seize. When they seize, one pad stays pressed against the rotor while the other pulls away. This creates massive heat, which accelerates rust on the ‘lazy’ side of the rotor. This uneven heat is a common reason why your steering wheel shakes at exactly 60 mph even when you aren’t touching the brake pedal. It’s all connected. If you want to maximize your car’s lifespan with regular tune ups, you have to look past the shiny parts and check the moving hardware. Have you ever fallen into this trap where you replaced the rotors but the vibration stayed? Let me know in the comments.
Stop Guessing and Use a Dial Indicator
Most people think their rotors are warped the moment they feel a pulse in the pedal, but often the metal is just seated poorly on a dirty hub. I always keep a magnetic base dial indicator in my toolbox for this exact reason. I use it to check the lateral runout every single time I install new parts. If you see more than a couple of thousandths of an inch of wobble while rotating the disc, you’re going to feel that through the chassis. This precision measurement is often the real reason why your car vibrates specifically at 45 mph even when you aren’t touching the brakes. This process takes an extra ten minutes, but it prevents that ‘pulsing’ feeling that drives most car owners crazy. I’ve found that even brand-new rotors can have slight imperfections from the factory, and catching them early saves you from an expensive second teardown later. 
The Future of Stopping involves Software and Salt
Looking toward the future, we’re seeing a massive shift in how we handle these maintenance issues. With the rise of electric vehicles and regenerative braking, the physical brake pads are used so infrequently that surface rust is becoming a bigger nightmare than it was in the 90s. Manufacturers are actually starting to develop ‘brake cleaning cycles’ within the car’s software to automatically apply the pads and scrub the rotors. Until that tech is standard on every driveway, you need to be proactive. If you want to maximize your car’s lifespan with regular tune ups, you have to include a physical inspection of those pads once a season, especially after the winter salt hits your region.
How do I keep my brakes healthy for years?
It usually comes down to two things: lubrication and proper torque. I never tighten my lug nuts without a calibrated torque wrench. If you unevenly torque those bolts, you are literally pulling the rotor out of shape, which leads to those top signs your car needs expert auto repair like pedal pulsation and steering shimmy. According to technical specialists at Brembo, lateral runout caused by improper wheel torque or a dirty hub face is the primary catalyst for Disc Thickness Variation (DTV) in modern lightweight vehicles. You should also treat your brake fluid with the same respect as your engine oil. Most people ignore it, but brake fluid is hygroscopic, meaning it absorbs water. This moisture rots the system from the inside out and can lead to a total failure of the ABS pump. Just as how transmission overhauls save you money by preventing total gear failure, a $100 fluid flush every few years can save you from a $2,000 repair bill down the line. Following essential car service tips for safe summer drives means checking the condition of that fluid before you head out on a long road trip. My best advice? Grab a dial indicator for your next brake job and stop guessing about the health of your hubs.
The Hardest Lesson I Learned While Chasing Perfect Brakes
After years of working on my own cars, the biggest lightbulb moment wasn’t about a specific brand of parts; it was realizing that laziness during the prep phase is what actually causes most failures. I used to think that just slapping on new pads was enough, but I learned the hard way that if you don’t meticulously clean the hub surface, you’re just inviting trouble. Even a tiny piece of rust trapped between the hub and the rotor can cause a microscopic tilt, leading to the exact reason why your car vibrates specifically at 45 mph later down the road. Another realization was that the environment always wins unless you are proactive. Living in a humid climate means you aren’t just maintaining a car; you’re fighting a constant chemical war against oxidation. I’ve also learned to trust my ears more than my eyes. Sometimes a rotor looks fine, but a slight rhythmic scrape tells you that your sliding pins are starting to bind, which is one of the top signs your car needs expert auto repair before the heat ruins your new parts. Lastly, I’ve accepted that high-quality chemicals aren’t an ‘extra’ cost—they are an investment in not having to do the job twice.
Tools That Saved My Sanity and My Wallet
If you’re serious about keeping your brakes in top shape, you need more than just a socket set. My essential toolkit starts with a high-quality calibrated torque wrench. Guessing the tightness of your lug nuts is a recipe for warped rotors. I also swear by 3M Copper Anti-Seize, but only for the specific contact points where the pad ears meet the bracket; never let it touch the friction surface. For diagnostic peace of mind, the magnetic dial indicator I mentioned earlier is non-negotiable for checking runout. I also recommend keeping a digital copy of your specific vehicle’s service manual from a source like AllData or Haynes. These manuals provide the exact torque specs and essential car service tips for safe summer drives that are unique to your make and model. [IMAGE_PLACEHOLDER] Having the right documentation ensures you aren’t just guessing while you’re under the wheel well.
Master Your Own Maintenance Journey
Taking care of your brakes is about more than just aesthetics; it’s about the confidence you feel when you press that pedal and know exactly how the car will react. Don’t be intimidated by a little surface rust or a complicated-looking caliper. With the right approach and a commitment to maximize your car’s lifespan with regular tune ups, you can keep your vehicle performing like it just rolled off the showroom floor. You have the tools, the knowledge, and the plan to stop that orange oxidation before it even starts. Your car represents your freedom, and keeping its most vital safety system in peak condition is the best way to protect that freedom for years to come. Have you ever found a ‘surprise’ like a seized pin or a stuck rotor during a routine pad swap? Let me know in the comments below!