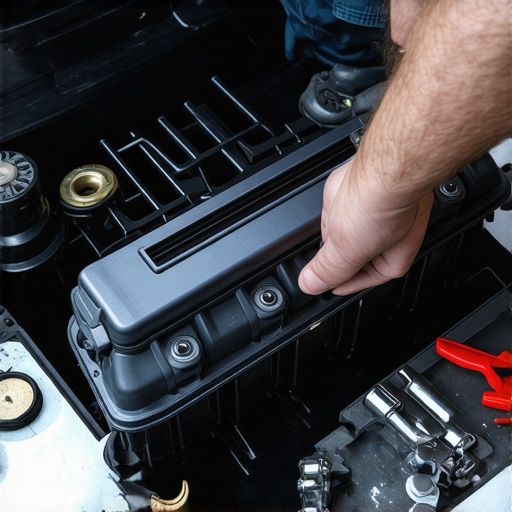
I vividly remember the first time I drove with that annoying rattling noise coming from underneath my car. At first, I thought it was just a loose bolt or maybe some debris caught in the wheel well. But after a few miles, I realized it was that dreaded heat shield—an often overlooked part that protects your car from excessive engine heat. That persistent rattle became a constant distraction and, honestly, a little embarrassing, especially when friends were in the car. It was a wake-up call that automotive issues often sneak up on us, and sometimes, a simple fix is all we need to get back to a quieter, safer ride.
Why Your Heat Shield Rattle Can Be a Big Deal
Despite sounding minor, a rattling heat shield can lead to more serious problems if ignored. It may cause additional vibrations that stress surrounding components, or in worst cases, break loose and fly off while you’re driving—posing a safety hazard for you and others on the road. Plus, that noise can be super annoying, making every trip feel like a test of patience. And here’s a little honesty: I initially tried ignoring it, hoping it would disappear on its own. Spoiler alert: it didn’t. This early mistake taught me that tackling issues like this promptly saves money and sleepless nights. For example, I learned that securing loose heat shields doesn’t require a mechanic’s visit, just some handy tools and a bit of know-how. If you’re tired of the noise and want to avoid costly repairs down the line, then read on. I’m going to share exactly how I fixed my heat shield—from my personal experience to proven techniques—so you don’t have to go through the hassle of a mechanic.
Is Fixing Your Heat Shield Actually Worth the Effort?
When I first considered fixing the heat shield myself, I was skeptical. Would it last? Would I cause more damage? I made the mistake early on of rushing into a DIY repair without proper research—trust me, that almost made things worse. But after understanding the common causes of heat shield rattles, I realized this is a common issue many car owners face. Not every fix needs professional involvement, especially when the problem is loose or improperly secured shields. It’s all about knowing the right steps, tools, and safety precautions. Interestingly, according to a study by the National Highway Traffic Safety Administration, neglecting minor repairs can sometimes lead to significant safety risks—so it’s smart to address those rattles early.
Are you facing the same frustration with that constant, nerve-grinding noise? If so, you’re in the right place. In the sections ahead, I’ll guide you through my tried-and-true methods to silence that rattle—saving you time, money, and headaches—and get your car running smoothly and quietly again. Ready to take matters into your own hands? Let’s get started and make that heat shield behave.
Remove the Old Heat Shield Securely
First, locate the heat shield underneath your vehicle, typically over the exhaust system. Use a flashlight if needed. Grab a socket wrench set, preferably with a ratchet to make the job easier. Carefully loosen and remove the bolts or screws holding the heat shield in place. I remember the time I did this on a rainy afternoon, and my hands got a bit greasy, but persistence paid off, and I managed to free the rattling shield without damaging surrounding parts.
Assess the Damage and Decide on Fixes
Once removed, examine whether the heat shield is cracked, rusted, or just loose. If rust is present, lightly sand the area and apply a rust converter or primer to prevent future corrosion. If the shield is bent or warped, gently reshape it by hand or with pliers. From my experience, a warped shield can still be fixed with some patience, preventing the need for a costly replacement.
Secure the Heat Shield Back in Place
Before reattaching, clean the contact points with a wire brush to ensure good metal-to-metal contact. You can use high-temperature silicone sealant or exhaust wrap to prevent future rattling. Position the shield correctly and tighten the bolts incrementally to avoid warping it further. I once used rubberized washers underneath the bolts for extra vibration damping, which significantly reduced noise. This hose clamp fix is a simple alternative if bolts are stripped.
Use Hose Clamps for a Quick Fix
If the bolts are beyond saving, a quick and effective method is to use heavy-duty hose clamps to secure the shield against the exhaust pipe. Wrap the clamp around the shield and tighten until snug. It’s a temporary fix but quite effective—especially when you’re trying to silence the noise until a proper repair can be made. I used this method when I was pressed for time before a road trip, and it held up well.
Test and Confirm the Repair
Start your engine and listen carefully beneath the car. Walk around and tap parts of the heat shield lightly with a rubber mallet or screwdrivers handle. If the rattling stops and the shield remains steady, you’re good. If it still rattles, re-tighten or reposition until it stays quiet. In my case, simple tightening made a noticeable difference, and I drove home peacefully, free of the annoying noise.
Prevent Future Rattles
Regular inspections can save you from unexpected noise and potential damage. Every 10,000 miles, briefly check under your car for loose components. Using video tutorials or expert advice from sites like this resource can keep your vehicle in top shape. By staying proactive, you’ll avoid the worst-case scenario—losing a shield on the highway, which can pose safety risks or lead to repairs that cost hundreds.
Many car owners operate under myths that can sabotage their vehicle’s longevity. For instance, a widespread misconception is that all auto repairs are best left to professionals. While trust in expert technicians is crucial, regular tune-ups and basic diagnostics can empower you to catch issues early, saving time and money. A common trap is believing that a high-priced repair always equals quality. In reality, some outdated repair practices persist because of vendor bias or lack of updated training. Moreover, many assume that car service intervals are overly aggressive; however, modern vehicles often benefit from more frequent inspections, especially about transmission health, to prevent costly overhaul costs later. Think skipping these checks is harmless? Not necessarily — neglect can lead to catastrophic failures, as detailed in studies from automotive safety experts.
The Hidden Wisdom Behind Advanced Diagnostics
For advanced drivers, understanding nuances like the importance of precise transmission fluid levels can be a game-changer. Relying solely on visual inspection or time-based schedules can be misleading. Instead, employing advanced diagnostic tools ensures subtle shifts or slipping signs are caught early. Failing to do so might cause minor issues to snowball into complete transmission failure, an expensive ordeal. Beware of the trap where many neglect the significance of rust-proofing or structural inspections, believing they only matter after visible damage appears. Ignoring these early warning signs often results in irreversible structural damage, which is much costlier to repair. This is especially critical when considering hidden rust that can threaten your vehicle’s integrity. Let me ask: Have you ever fallen into this trap? Let me know in the comments. Being proactive with your car’s care, especially regarding essential systems like the transmission, can extend your vehicle’s lifespan significantly. Regular, thorough inspections and understanding the real reasons behind warning signs lie at the heart of smart maintenance, avoiding costly surprises—think of it as your best insurance against unexpected breakdowns. Keep an eye on signs like unusual vibrations, delayed shifts, or fluid discoloration, and consult automotive experts when in doubt. Remember, knowledgeable car owners are better prepared to handle the complexities of modern automotive technology, ensuring safety and peace of mind.When it comes to keeping your vehicle running smoothly, investing in the right tools and software can make a world of difference. I personally rely on a combination of high-quality diagnostic machines and precise hand tools that save time and improve the quality of repairs. For example, I swear by the Autel MaxiDiag Elite series; their scanners provide comprehensive diagnostics, including reading transmission error codes, which are crucial when tackling issues like transmission slippage or unexpected noises. These devices connect easily to your car’s OBD-II port and give real-time data, enabling you to pinpoint problems before they escalate. Using such diagnostic tools allows me to identify whether a minor issue like slow acceleration is rooted in a sensor malfunction or something more complex—saving me from unnecessary part replacements.
How do I maintain my tools over time?
Proper care extends your tools’ lifespan and ensures consistent performance. Keep diagnostic scanners and electronic equipment away from high humidity and extreme temperatures, and regularly update their firmware using manufacturer’s software—which can often be done via USB or Wi-Fi. For hand tools like socket sets or pliers, I always wipe them down after each use and store them in a dry, organized toolbox to prevent rust. Investing in quality equipment is especially important when working on critical components such as transmissions or collision repairs, where precise measurements and durable tools can prevent costly mistakes. Looking ahead, I predict that the integration of smarter diagnostic systems and AI-powered software will become standard in auto repair—making it even easier for DIY enthusiasts and pros alike to diagnose and fix issues quickly.
Make Your Repairs Count with the Right Equipment
From advanced scanners to specialized hand tools, the right gear empowers you to take control of your vehicle’s health. For instance, paying attention to details like the correct torque for transmission pan bolts can prevent leaks and prolong component life—view detailed guidance on this at https://collisionfixer.com/the-10-gasket-fix-for-a-leaking-transmission-pan. Remember, tools aren’t just about fixing things—they’re about preserving your car’s value and safety over time. If you’re ready to elevate your auto repair game, I highly recommend trying a diagnostic scanner like the Autel MaxiDiag Elite. It’s a game-changer for those who want to go beyond basic checks and get to the root of persistent issues.Over time, I realized that the smallest repair mistakes, like ignoring a loose heat shield, can snowball into major safety and cost issues. One lesson I learned the hard way is that patience in diagnosing the root cause pays off—rushing can lead to damaging expensive components. Additionally, investing in quality tools and diagnostic devices has transformed my DIY approach, saving me money and giving me confidence on the road. Lastly, proactive maintenance and regular inspections often reveal tiny issues before they turn into roadside emergencies, emphasizing the importance of staying vigilant with your vehicle’s health.