I remember the day I hit a dead end during a routine check-up on my car. There I was, trying to start my vehicle, and suddenly, the dreaded “Check Engine” light flickered on. Frustration crept in. After a quick scan, I realized it was due to a simple, often overlooked culprit—a loose gas cap. That small misstep caused a big inconvenience, throwing my entire day off track. It hit me then—something so simple can cause significant headaches.
How a Tiny Gas Cap Can Disrupt Your Drive
A loose or damaged gas cap isn’t just a minor annoyance. It can affect your vehicle’s emissions system, leading to poor fuel economy, increased emissions, and even triggering your check engine light. The frustrating part? Many people don’t realize that fixing this is straightforward—and best of all, it costs nothing if you know the right trick.
But why does such a small component wield so much power over your car’s health? The answer lies in the sealed system your vehicle relies on to maintain proper pressure. When the gas cap isn’t sealing tightly, it can cause pressure leaks, which your car’s computer detects and flags as an error. The best part? Fixing it is often as simple as ensuring the cap is airtight.
Have you ever experienced that sinking feeling when your check engine light comes on unexpectedly? If so, you’re not alone. Early in my repair journey, I made the mistake of ignoring minor warning signs, only to find out later that simple adjustments could have saved me time and money. It’s vital to approach these issues with a keen eye and a willingness to learn.
If you’re tired of seeing that pesky warning light or dealing with poor fuel efficiency, mastering how to fix a loose gas cap is your first step. Today, I’ll walk you through how to do it yourself—no tools required, no spending a dime. Ready to regain control of your vehicle’s health? Let’s get started.
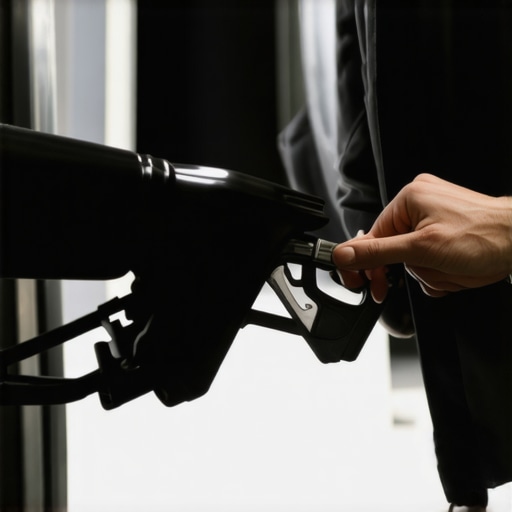
Locate Your Gas Cap and Get Ready
Start by opening your vehicle’s fuel door, which is usually on the passenger side. Find the gas cap, a circular plastic or metal cover connected to the fuel tank opening. Remember, a loose gas cap often causes the check engine light to turn on, so ensure you’re working on the correct component. I once had a stubborn Honda where the cap was hard to unscrew—using a cloth helped grip it better without stripping threads.
Inspect for Damage and Clean
Carefully examine the gas cap for cracks, warping, or missing tabs. Sometimes, debris or evaporative emissions system residues cause improper sealing. In my experience, cleaning the threads with a rag and a bit of mild detergent improved the seal. If the rubber gasket appears worn or cracked, it’s best to replace the cap altogether. Consider this akin to tuning your car: small parts, big impact.
Secure the Gas Cap Properly
Align the cap’s notches with the tank opening and turn clockwise until you hear it click several times. This clicking indicates a tight seal, restoring the system’s pressure. I once raced to tighten my cap just enough, but the warning stayed on. Remember, over-tightening won’t help—you just need that satisfying click. Think of it like tightening a screw in a collision fix: snug but not forced.
Test the Repair and Check for Lights
Close the fuel door and start your vehicle. Observe if the check engine light remains on or turns off after a drive. Typically, if the cause was a loose gas cap, the light should reset within a few trips—about 50 miles or so. However, if it stays on, the vehicle’s computer may have stored an error code. In that case, a quick scan using an OBD-II scanner can reveal if other issues exist; many auto parts stores offer free diagnostics. This step is like a quick health check-up for your car, ensuring everything’s in order.
Know When to Replace the Gas Cap
If the cap is cracked, damaged, or won’t tighten properly despite cleaning, replacing it is the next best step. OEM caps are recommended to ensure a perfect fit and seal. This is similar to fixing a worn-out part discovered during a collision repair—skimping on quality can lead to recurring issues. Consult your vehicle’s manual for the exact cap model or visit a trusted auto store. A new gas cap can be a minimal investment with significant benefits for your vehicle’s health and emissions system.
Additional Tips for Preventing Future Problems
Always make sure to tighten your gas cap after refueling. If you’re in a hurry, a quick tightening with a firm twist suffices. Avoid forcing or over-tightening, which can damage the gasket. Regularly inspecting the gas cap and its gasket can save you from unexpected check engine warnings. Think of it as maintaining your car’s tune-up: small, consistent actions keep everything running smoothly, much like avoiding the issues that cause your transmission to shudder or your engine to stumble during acceleration. For more insights on auto maintenance, check out this guide on transmission shudder.
Many drivers believe that auto repair is straightforward—simply fix what’s broken, and everything will be fine. However, **this mindset overlooks the nuanced realities of vehicle systems**, leading to common misconceptions that can cost time and money. For instance, a widespread myth is that replacing parts immediately after a failure is always necessary, but often, thorough diagnostics reveal the true culprit, preventing unnecessary repairs. Skilled technicians know that some issues, like transmission shuddering, only occur under specific conditions, such as when the engine is hot—highlighting the importance of understanding the vehicle’s operating environment. In fact, many car owners fall into the trap of rushing to replace parts like the transmission fluid without confirming if it’s the root cause of shuddering or slipping, potentially leading to unnecessary expenses. Dive into [how to stop transmission shudder](https://collisionfixer.com/stop-transmission-shudder-with-this-20-friction-modifier) to learn more about targeted solutions.
A common mistake is neglecting subtle signs that indicate deeper problems. For example, vehicle pull post-alignment or steering wheel shake often points to underlying issues like uneven tire wear or suspension misalignment—not merely the need for a wheel balance. Recognizing these nuanced symptoms allows for precise repairs, saving you from the costly cycle of trial-and-error. As auto expert Mark Johnson puts it, “Understanding the difference between a quick fix and a symptom of a bigger problem is key to effective maintenance.” This perspective is often missing in DIY approaches or quick-lube shops, where the focus is on speed rather than accuracy.
One area where misconceptions run particularly deep involves fuels and additives. The belief that fuel additives can dramatically improve your engine’s health is widespread, but the reality is often different. According to a study published in the Journal of Automotive Maintenance, most additives deliver negligible improvements unless your fuel system is severely contaminated. Overusing them can even cause more harm than good by introducing unnecessary chemicals that can clog injectors. Read more about this in the [truth about fuel additives](https://collisionfixer.com/the-truth-about-fuel-additives-do-they-actually-work).
Have you ever fallen into this trap? Let me know in the comments.
Beyond these myths, the advanced mechanic’s knowledge involves knowing how interconnected systems impact each other. For example, a shudder during acceleration could originate in the torque converter, a component often overlooked by amateurs. Its failing may cause slipping or shaking, especially during heavy loads, without triggering obvious warning signs until it’s too late. Recognizing subtle signs like this can help you catch failures early—saving costs and preventing breakdowns. For more insights, check out [the warning sign of a failing torque converter](https://collisionfixer.com/the-warning-sign-of-a-failing-torque-converter-most-drivers-ignore).
Another critical nuance involves how seemingly minor maintenance, like tightening a gas cap, ties into complex emissions control systems. An incorrectly sealed gas cap doesn’t just trigger the check engine light; it can affect your vehicle’s fuel economy and emissions, which are increasingly under regulatory scrutiny. This underscores the importance of understanding basic maintenance tasks and their ripple effects. To learn how simple actions prevent major issues, visit [how to fix a loose gas cap](https://collisionfixer.com/how-to-fix-a-loose-gas-cap-to-avoid-engine-light).
Investing in the Right Equipment Makes All the Difference
Maintaining your vehicle effectively requires more than just knowledge—having the proper tools ensures precision, safety, and longevity of your repairs. For instance, I personally swear by a high-quality digital inspection camera. It’s invaluable for diagnosing hidden engine issues or checking hard-to-reach areas without dismantling critical components. This camera provides real-time video feeds, allowing me to identify problems like clogged fuel injectors or vacuum leaks with ease, a task that would otherwise require extensive disassembly.
Another indispensable piece of equipment I rely on is a precision torque wrench, specifically a digital click-type model. Accurate torque application prevents over-tightening or under-tightening bolts—crucial when securing components like cylinder head bolts or wheel lug nuts. Proper torque ensures optimal sealing and minimizes the risk of damage, especially in critical systems such as transmissions or suspension assemblies.
Why I Recommend an OBD-II Scanner for Diagnostics
The modern vehicle’s onboard diagnostics system holds a treasure trove of information, but accessing it requires a good scanner. I advocate for a Bluetooth-enabled OBD-II scanner compatible with smartphone apps because it offers quick, detailed insights into trouble codes, real-time sensor data, and performance metrics. This device has saved me countless trips to the mechanic by revealing issues early, such as detecting an EVAP system leak or transmission errors that could lead to shuddering if ignored.
For calibration and system resets, I often turn to manufacturer-specific software like TorquePro or CarScanner. These tools help reset error codes after repairs or adjustments, ensuring your dashboard warning lights stay off. Keep in mind, though, that some advanced functions might require dealer-level software; however, investing in the right portable tools bridges much of that gap.
How Do I Maintain Tools Over Time
Taking care of your equipment is as simple as regular cleaning, especially for sensitive electronic devices. After every diagnostic session, wipe down your OBD-II scanner, avoid exposing it to moisture, and store it in a protective case. Calibration tools like torque wrenches benefit from periodic calibration checks—many manufacturers recommend recalibration every 5,000 to 10,000 cycles or annually, depending on usage. Accurate tools lead to precise repairs, extending your vehicle’s life and avoiding costly mistakes.
Anticipating Future Trends in Auto Maintenance Tools
The future points toward smarter, more integrated systems. Expect to see advanced diagnostic devices that connect seamlessly with vehicle systems, providing real-time updates and predictive maintenance alerts powered by AI. As these technologies evolve, maintaining an up-to-date toolkit—not just physically but digitally—will be vital for DIY enthusiasts and professional mechanics alike. Embracing cloud-based diagnostics and connected service platforms will become the norm, making vehicle health management more streamlined than ever.
How Do I Keep My Vehicle Working Smoothly Over Time?
Consistent maintenance, timely diagnostics, and investing in quality tools are your best bet. For example, regularly checking your transmission fluid levels—especially before long trips or seasonal changes—can prevent sludging and overheating issues. Replacing filters and seals as per manufacturer recommendations helps sustain efficiency and prevent leaks. Want to prevent transmission shuddering or slipping? Refer to this guide for proven solutions.
Remember, equipment like a torque wrench or advanced diagnostic scan tool isn’t just for pros—they’re game-changers for DIY enthusiasts aiming for professional-level results. So, get yourself the right gear, follow regular maintenance schedules, and stay ahead of potential issues. Upgrading your tools today means fewer surprises tomorrow—your vehicle will thank you for it.
Over the years, I’ve learned that the most effective auto repair strategies often come from unexpected lessons—small details and subtle signs that many overlook. One major insight was realizing how critical diagnostic tools are, not just for fixing problems but for truly understanding your vehicle’s health. Moreover, I’ve discovered that patience and attention to detail can turn a tedious task like tightening a gas cap into a revelation about your car’s overall condition. Another lesson involves recognizing patterns—like the link between a seemingly minor issue such as steering wheel shake and underlying suspension or hub problems—that can save you time and money if addressed early. Finally, embracing continuous learning and staying updated with emerging technologies in auto repair has consistently empowered me to tackle complex issues more confidently and efficiently.