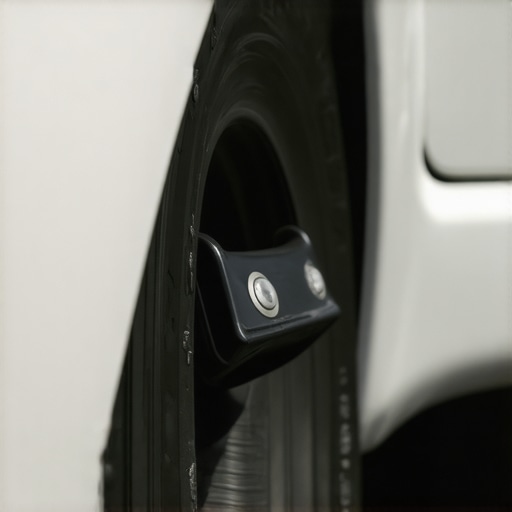
I stood there in the pouring rain, looking at my front bumper as it hung off the frame like a loose tooth. It was embarrassing. My neighbor even asked if I’d been in a hit-and-run, which, honestly, stung more than the actual car damage. I did what most of us do when we’re desperate: I grabbed a roll of duct tape. Big mistake. Not only did it look like a DIY disaster, but it also stripped a layer of clear coat when I finally peeled it off. If you’ve been putting off a necessary car service because you fear a massive bill, stay with me. I discovered that the ‘broken’ bumper was actually just a victim of a brittle, ten-dollar plastic retainer clip that had finally given up the ghost. Today, we’re going to tighten up that body line and stop the rattling for good. You don’t need a degree in engineering, just a little patience and a flathead screwdriver.
Fix Your Bumper Gap Without the Body Shop Tax
The first time I tried to fix a loose body panel, I went way overboard. I bought industrial-strength epoxy and thought I could just ‘weld’ the plastic together. It was a mess. It didn’t hold, and it made it impossible to ever take the bumper off correctly again. This is a common trap. When we see a gap in our car’s bodywork, we assume the worst. We think about checking if the frame is straight or worrying about structural integrity. But more often than not, it’s just the mounting points. These plastic clips, or ‘retainers,’ are designed to break during a minor impact to protect the more expensive components. It’s a sacrificial system. If you’ve ever had a loose side mirror or a flapping wheel well liner, you’ve dealt with these plastic fasteners before. They are the glue holding the modern automotive world together, even if they feel like toys.
Is a Cheap Clip Actually Going to Stay Put?
It sounds too good to be true, right? How can a piece of plastic that costs less than a latte hold a massive bumper cover in place at 70 mph? The secret isn’t in the strength of one clip, but in the way they work together. According to the American Chemistry Council, nearly 50% of a vehicle’s volume is now plastic, specifically to reduce weight and improve fuel efficiency. These clips are engineered to snap into place and create a tension-based seal. However, heat, road salt, and vibration eventually turn them brittle. When one goes, the weight shifts to the others, and suddenly you have a sag. I’ve seen people spend hundreds on a full auto repair when all they needed was a bag of clips. If you’ve ever noticed your sensors aren’t working right after a bumper repair, it’s often because the bumper isn’t sitting flush against the frame. Have you ever tried to ‘zip-tie’ a car part back together, only to have it fail a week later? I’d love to hear your best (or worst) temporary car fix stories in the comments below.
Spot the Culprits Hiding Under Your Wheel Well
To fix a sagging bumper, you need to get your eyes on the fasteners that are usually tucked away behind the plastic wheel well liner. Start by turning your steering wheel all the way to one side to give yourself room to work. You don’t even need to jack up the car. I remember trying to fix the bumper on my first hatchback with superglue on a humid Tuesday. The glue dried on my fingers before it even touched the plastic, leaving a white, crusty mess while the bumper still flapped in the wind. The moment I bought a dedicated trim removal tool and a box of assorted clips, everything changed. It felt like solving a puzzle rather than fighting a losing battle. You are looking for missing, broken, or loose plastic push-pins. If you see a hole where a plastic head should be, you’ve found your source of the rattle. The same logic applies if you need to fix a loose side mirror in five minutes; it is usually just a fastener that has given up under pressure.
Popping Plastic Without Snapping the Tabs
Once you locate the broken retainers, use a flathead screwdriver or a forked trim tool to pop the center pin out. These clips work like an anchor in drywall; the center pin expands the base to lock it into the frame. If you just yank on the bumper, you will tear the plastic tab on the bumper itself, and then you are looking at a much more expensive auto repair bill. If the bumper has a slight crease from the impact that broke the clip, you might want to pop out a dent using a plunger while the bumper is loose. This gives you the leverage to push from the back side, which is far more effective than trying to pull from the front. Replace the broken clip with a fresh one by pushing the base into the hole first, then clicking the center pin flush. It should feel solid, with no wiggle room. This simple attention to detail is as vital for your car’s health as any regular tune ups you perform under the hood.
When a Simple Clip Is Not Enough for the Job
Sometimes, the plastic bracket that the bumper clicks into is what actually snapped. This bracket is a long strip of plastic bolted to the metal fender. If the clips are fine but the bumper still wont stay tucked in, you likely need a new bumper bracket. This is still a DIY job, requiring only a 10mm socket. However, if you replace the clips and the bracket but the lines still don’t match up, it is time to check if your frame is straight. A minor impact can sometimes nudge the metal mounting points just enough to keep things from ever sitting perfectly flush. Keeping these body lines tight is not just about aesthetics. Proper alignment ensures that modern safety features stay calibrated, especially considering why your sensors aren’t working after a bumper repair often traces back to the bumper sitting at a slight angle. If you find yourself frequently dealing with interior cabin noises as well, you might be surprised to find the 10 dollar clip that stops your window from rattling works on the exact same principle as these bumper fasteners.
It is easy to think that if the engine is running and the bumper is straight, you are in the clear. But here is where most people get it wrong: they treat car maintenance like a reaction rather than a strategy. Everyone tells you to change your oil religiously, but in my experience, the biggest silent killer of modern vehicles isn’t just friction—it is electrical corrosion and neglected grounding. The Car Care Council reports that 80 percent of vehicles fail at least one component of their inspection, and many of these issues are electrical gremlins that start small. If you aren’t checking your battery terminals or learning how to diagnose a bad ground wire in minutes, you are leaving your car’s computer system vulnerable to erratic behavior that looks like a major mechanical failure. Most drivers wait for a light on the dash, but by then, the damage is already done. Have you ever fallen into this trap? Let me know in the comments.
Don’t ignore the typewriter under your hood
One of the biggest traps for DIYers and casual owners alike is the ‘Oops’ factor of sound. We tend to think a small noise is just ‘character’ for an older car, but that is a dangerous assumption. If you notice why your engine taps like a typewriter, it is rarely just an old machine being noisy; it is often a sign of oil starvation or lifter failure. Ignoring that specific rhythmic tap is the fastest way to turn a simple regular tune up into a five-thousand-dollar engine swap. Experience has taught me that the smallest noises are usually the most expensive ones to ignore.
Why your transmission acts up only when it’s pouring outside
It sounds like an old wives’ tale, but there is a very real technical reason your transmission shifts late when it’s raining. Water intrusion into a cracked or degraded wiring harness can cause signals to cross, effectively tricking the Transmission Control Module into thinking the vehicle is under a massive load. While many shops might immediately suggest transmission overhauls to solve the shifting issue, a seasoned technician knows to check the external electrical integrity first. You have to learn to distinguish between the top signs your car needs expert auto repair now and when it is simply a ten-cent electrical short triggered by moisture. Before the seasons change, always review your essential car service tips for safe summer drives, because heat and humidity will expose every shortcut you took during the winter months.
Stop Guessing and Start Reading the Real Data
If you’re tired of throwing parts at a problem, you need to stop acting like a parts-changer and start acting like a technician. I remember spending a whole weekend swapping coils on my old sedan because it felt ‘jumpy’ at idle. I wasted eighty bucks and two afternoons. If I had just plugged in a decent OBD2 scanner, I would have seen the fuel trim was through the roof, indicating a vacuum leak rather than a spark issue. Learning how to read live data to find a misfire is the single biggest upgrade you can give your DIY game. It’s the difference between heart surgery and just poking a wound with a stick. For under fifty dollars, you can get a Bluetooth dongle that talks to your phone, giving you more info than a master tech had twenty years ago. I use mine every time I hear a hiccup, and it has saved me thousands in unnecessary auto repair costs. It’s about taking control of the narrative your car is trying to tell you through its sensors.
How do I maintain my electrical health over time?
Consistency is boring, but it’s the only way to avoid a dead car in the winter or a confusing dash display. Every six months, I pull my battery cables and do a deep clean. This isn’t just about wiping the dust off with a rag. You need to know how to clean battery terminals so they never corrode again using a dedicated wire brush and a bit of dielectric grease to seal out the moisture. While you’re there, grab the 15 dollar tool to find a short circuit in your dash—a simple circuit tester. I keep one in my glovebox because it’s a literal lifesaver when your radio suddenly dies or your dash lights start to flicker at idle. These small, inexpensive tools provide a level of certainty that no ‘visual inspection’ can ever match. It ensures that your regular tune ups actually address the invisible issues before they become terminal.
Don’t Let a Bad Ground Ghost Your Car
I’ve seen enthusiasts rebuild entire engines only for the car to refuse to start because of a single rusty frame bolt. According to the Bosch Automotive Handbook, a voltage drop of even 0.5V across a ground connection can cause a computer-controlled engine to stumble, shift poorly, or fail entirely. This is why you must learn how to diagnose a bad ground wire in minutes. It’s the ultimate ‘pro’ move that separates the amateurs from the people who actually keep their high-mileage cars on the road for decades. Looking ahead, we’re moving toward an era where your car will predict its own failures via ‘Digital Twins’—complex software models that mirror your physical vehicle’s health in real-time. But until that tech is standard in every used car on the market, your hands and a basic multimeter are your best defense against the scrap heap. This weekend, I want you to open your hood and find the main ground wire connecting your engine block to the frame. Clean the contact point, tighten the bolt, and see if those weird idle vibrations don’t just vanish. It’s the best zero-dollar maintenance you’ll ever perform, and it builds a foundation for long-term reliability that no fancy additive can replace.
What I Learned from a Decade of Greasy Knuckles
The most expensive mistake any driver can make is assuming every rattle requires a mortgage. After years of tinkering, I realized that modern cars are essentially modular systems where the smallest part often causes the biggest headache. One major myth I had to unlearn was that a rough-running engine always meant a mechanical failure; often, it is just a sensor getting bad data because of a dirty connection. Don’t let the fear of a massive bill keep you from basic car service tasks. If you hear a rhythmic sound, do not ignore it—understanding why your engine taps like a typewriter early on can literally save your vehicle from a total engine swap. Most importantly, I learned that electrical gremlins are frequently just bad connections. Before you let a shop replace an expensive alternator, take five minutes to learn how to diagnose a bad ground wire in minutes. It is the closest thing to a magic fix I have ever found.
My Essential Gear for Keeping Any Beater on the Road
You do not need a professional hydraulic lift to perform professional-grade work. My first recommendation is a Bluetooth OBD2 scanner. It turned me from a parts-swapper into a real technician, especially when learning how to read live data to find a misfire before the spark plug even completely fails. Second, never underestimate the 15 dollar tool to find a short circuit in your dash; it has saved me dozens of hours chasing ghosts in the wiring harness. Finally, a high-quality digital multimeter is non-negotiable. These tools allow you to verify the physical reality of what is happening under the hood, rather than guessing based on outdated forum posts. #IMAGE_PLACEHOLDER_E#
Step Out of the Waiting Room and into the Garage
Taking ownership of your vehicle’s health is incredibly empowering and saves you from the hidden shop tax. When you stop waiting for components to fail and start to maximize your cars lifespan with regular tune ups, the vehicle starts to feel like a reliable asset rather than a financial liability. Of course, every DIYer needs to know their limits—recognizing the top signs your car needs expert auto repair now is just as important as knowing how to turn a wrench. But for the small stuff—the clips, the grounds, the sensors—you are more than capable of handling it yourself. Your car will thank you with another hundred thousand miles of smooth driving. Have you ever fixed a major-sounding problem with a simple ten-cent part? I want to hear your biggest DIY wins in the comments below!