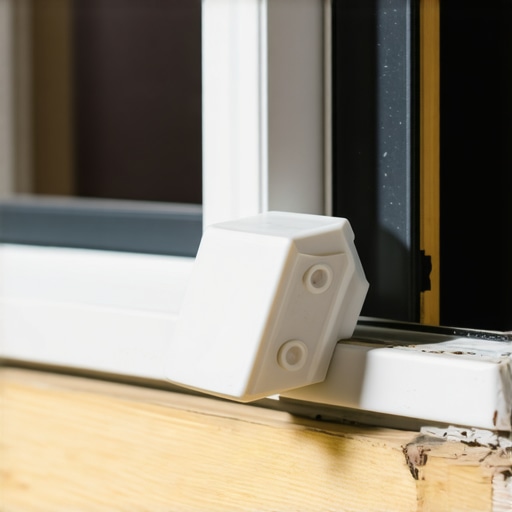
I was halfway through a six-hour drive when it started. *Tap. Tap-tap. Taaaaap.* Every time I hit a bridge expansion joint or a slight seam in the asphalt, my driver-side window sounded like a woodpecker was trying to break into the cabin. It is that persistent, high-pitched vibration that makes you want to turn the radio up until your ears bleed just to drown it out. I have been there—white-knuckling the steering wheel while trying to jam my elbow against the door panel just to find five seconds of silence. In my early days of DIY work, I actually tried shoving a piece of folded-up cardboard into the weatherstripping. Not only did it look like trash, but it eventually fell into the bottom of the door, where it probably stayed for years. I even tried a ‘pro’ trick I saw online using silicone spray, which only succeeded in making my glass perpetually greasy without solving the noise. We often focus on the big stuff, like whether we need expert auto repair for a transmission, but these small cabin noises are what actually ruin a great road trip. Today, I am showing you the simple, ten-dollar solution that finally killed the noise in my daily driver and saved my sanity.
Why You Should Not Ignore That Constant Tapping
It is easy to tell yourself that a little noise does not matter as long as the car starts every morning. However, cabin noise is not just a minor annoyance; it is a sneaky drain on your mental energy and focus. According to the National Center for Biotechnology Information, consistent exposure to vehicle vibration and noise contributes to significantly higher levels of driver fatigue and stress over long distances. If you have already figured out how to stop a dashboard rattle, you know how much of a relief a quiet cabin can be for your nerves. This window issue is usually caused by a tiny plastic guide clip that has either cracked or simply lost its tension over a decade of rolling up and down. It is a common failure point that many people mistake for a dying regulator motor, leading them to spend hundreds on parts they do not need. Have you ever found yourself physically holding your window in place just to get some peace and quiet? I would love to hear your ‘quick fix’ horror stories in the comments. We have all tried the tape, the wedges, and the prayers.
Can a Ten-Dollar Piece of Plastic Actually Fix This?
You might be skeptical. I certainly was when I first ordered the part. After all, when we think of door repairs, we usually envision expensive glass assemblies or complex cable systems that require a trip to a specialist. But much like finding a fix for a squeaky car door hinge, the solution is often hidden in the smallest, cheapest components that the manufacturers used to keep things lightweight. This is not about a full car tune up; it is about restoring the tight tolerances your car had when it first rolled off the lot. In my experience, skipping these small fixes leads to bigger headaches down the road, like a window that eventually falls off its track entirely during a rainstorm. Below, I have included a visual of where this pesky clip hides inside the door. [image_placeholder] I am going to walk you through exactly how this clip works and why you do not need a professional shop or specialized tools to get your quiet ride back.
Getting the Door Panel Off Without Cursing
Removing a door panel can feel like you are trying to solve a puzzle box where the stakes are ‘expensive broken plastic.’ Most cars follow a predictable pattern: a screw behind the interior door handle, one or two inside the armrest pull-pocket, and a series of perimeter clips. If you have ever looked into how to fix a car door that wont lock with the remote, you are already halfway there. Start by prying the master window switch upward with a plastic trim tool. Metal screwdrivers are the enemy here; they will gouge your leather or plastic before you can say ‘oops.’ Once the switches are unplugged, remove the hidden screws. I remember my first time doing this on an old sedan—I missed a screw hidden behind a tiny plastic beauty cap and ended up snapping the entire handle bezel. It was a twenty-dollar mistake that taught me to always feel for resistance. If you have to yank, you probably missed a fastener. Gently pull the panel toward you starting from the bottom corner, and you will hear those satisfying pops as the clips release. In my early days, I would have taken this to a shop for a full car service just to find the source, but doing it yourself is much more rewarding.
Pinpointing the Plastic Culprit
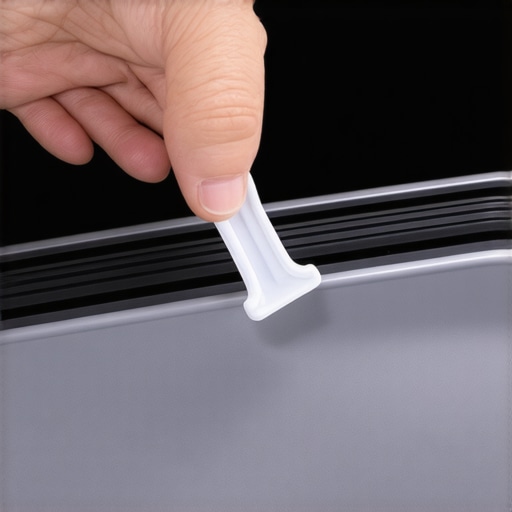
With the panel off and the vapor barrier—that thin sheet of plastic—peeled back halfway, you can finally see the guts of the door. Plug your window switch back in temporarily and cycle the glass up and down. You are looking for the vertical metal track. Attached to the glass or the regulator is a small plastic guide or slider clip. When these wear out, they create a gap between the glass and the track. This tiny gap allows the window to vibrate against the metal, creating that rhythmic tapping. It is a much more localized sound than when a rattling passenger seat vibrates against the floor bolts. If the noise reminds you of the way your engine taps like a typewriter when it is low on oil, you have found your problem. In my case, the clip was actually in two pieces, sitting at the bottom of the door shell. It was so simple, yet it had been driving me crazy for months.
Slide Click and Enjoy the Silence
Replacing the clip is like sliding a credit card into a reader—it should be smooth. Clean the metal track first with a bit of degreaser to remove old, gritty gunk. This is a mini version of the care a pro gives during a full expert auto repair session or a routine tune up. Apply a small dab of white lithium grease to the new clip. Snap the clip onto the window regulator arm or the glass edge (depending on your model) and then guide it back into the vertical rail. I once tried to ‘cheat’ this step by using a zip-tie to tighten a loose clip instead of buying a new one. All I got for my effort was a horrific grinding sound that echoed through the cabin like a cheese grater on a megaphone. Buy the ten-dollar part; it saves you from the embarrassment of a DIY fix gone wrong. Before you button everything back up, roll the window up and down five times. No taps? No rattles? No grease streaks? Then you are ready to press the panel back on and finally enjoy a highway drive without the woodpecker in your door.
While that ten-dollar clip is a lifesaver, there is a mindset trap that most DIYers—and even some pros—fall into: the ‘more is better’ fallacy. We often think that if a little lubricant is good, a whole tube of lithium grease is better. Everyone says to coat the tracks until they are slick, but in my experience, this is exactly how you kill a window motor prematurely. Thick grease in a door cavity acts like a magnet for road grit, pollen, and even tiny shards of window tint. Eventually, it turns into a thick grinding paste that eats through those brand-new plastic guides you just installed. According to research by SAE International, particulate contamination in lubricants can accelerate mechanical wear by up to 300% in sliding contact scenarios. This is the ‘Oops’ factor that turns a simple ten-minute job into a recurring nightmare. 
Stop Drowning Your Door Parts in Grease
If you are tempted to spray everything in sight during an expert auto repair session, remember that modern plastics are often designed to be ‘self-lubricating.’ A light film is all you need. Using the wrong product, like a heavy chassis grease, can actually swell the rubber seals and make the motor work harder, eventually leading to a burnout. This same level of nuance applies when you are trying to maximize your cars lifespan with regular tune ups. It is not just about replacing parts; it is about maintaining the specific tolerances the engineers intended. Have you ever fallen into this ‘over-maintenance’ trap? Let me know in the comments.
Does your transmission actually need a full rebuild?
This is the ultimate question for any high-mileage driver. Many owners panic when they feel a slight shudder or a late shift, assuming a four-figure bill is inevitable. However, sophisticated diagnostics often reveal that a simple fluid flush or a new solenoid is the real cure. Understanding how to tell if a transmission shop is lying about a rebuild is critical for your wallet. Before you agree to how transmission overhauls save you money in the long run, make sure you have ruled out electrical ghosts. A weak battery or a corroded ground strap can cause the computer to send ‘garbage’ data to the transmission, making it act like it is dying when it is actually just confused.
Why a Modern Tune Up is More Than Spark Plugs
The term ‘tune-up’ is a bit of a relic from the days of carburetors, but in the modern era, it represents a deep dive into your cars software and sensors. Most people get it wrong by thinking a bottle of mystery fluid will fix their problems. I always tell people to be wary of the truth about high mileage oil additives; they are often a Band-Aid for a bullet wound. A real car service involves checking fuel trims and oxygen sensor response times. If your car feels sluggish, it is likely a vacuum leak or a dirty mass airflow sensor rather than a mechanical failure. By focusing on these hidden nuances, you transition from someone who just ‘fixes’ things to someone who truly understands the machine.
Stop Guessing and Start Measuring with a Multimeter
If you want to move beyond simple plastic clips and truly master your vehicle’s health, you need to stop relying on your ears alone. I spent years chasing ‘ghosts’ in my dashboard before I invested in a decent digital multimeter. This isn’t just for electricians; it is the most powerful tool in your arsenal when you need to how to find a parasitic battery drain with a simple multimeter. According to the Bosch Automotive Handbook (11th Edition), even a 0.5-ohm resistance in a ground circuit can cause logic-level sensors to report false failures, leading you to replace parts that aren’t actually broken. When I’m performing essential car service, I use my meter to check the voltage drop across the battery terminals while the car is under load. It’s the difference between knowing your alternator is dying and just guessing based on a flickering headlight. Owning a multimeter allows you to verify every repair, ensuring that your expert auto repair efforts are actually solving the root cause rather than just masking a symptom.
The One Grease That Actually Protects Rubber
Earlier, I mentioned how lithium grease can be a disaster for window tracks, but there is one product I swear by: Shin-Etsu Silicone Grease. It was originally formulated for Honda window seals, and it is the only thing that doesn’t turn into a sticky mess. Unlike petroleum-based lubes that cause rubber to swell and crack, this stuff keeps weatherstripping supple and quiet. If you have already applied the 3 fix for a squeaky car door hinge, adding a light coating of this silicone to your window channels is the natural next step. It creates a hydrophobic barrier that prevents ice from sticking in the winter and stops the ‘squeak-and-drag’ motion that burns out window motors. I keep a tube in my glovebox for any interior plastic-on-plastic rub. It is the secret weapon for anyone trying to maximize your cars lifespan with regular tune ups without spending a fortune on professional detailing products.

How do I maintain these results for another decade?
The key to a long-term quiet cabin isn’t a one-time fix; it is about consistency. Every six months, I do a ‘walk-around’ where I check the torque on my door hinge bolts and the integrity of my window seals. If you notice your engine taps like a typewriter, it might be time for more than just a cabin fix. You should be looking at the overall vibration of the vehicle. High vibration from worn motor mounts or imbalanced tires will eventually rattle loose every clip you just installed. I recommend keeping a log of when you perform these checks. A car that is regularly inspected for loose fasteners and dry seals will always feel tighter and more expensive than one that only sees a mechanic when something breaks. It’s the difference between a high-mileage survivor and a ‘beater’ that sounds like a box of nails.
The Future of DIY Diagnostics is in Your Pocket
I predict that within the next five years, we won’t even need to open the door panel to find a rattle. We are already seeing the rise of acoustic diagnostic apps that use your smartphone’s high-fidelity microphone to perform a fast-fourier transform (FFT) analysis of cabin noise. This technology can isolate specific frequencies to tell you exactly which component is vibrating—whether it’s a window regulator or a loose heat shield. This shift toward ‘predictive maintenance’ means DIYers will have the same level of data as a factory-level shop. Until then, my best advice is to grab a basic multimeter and test your battery’s resting voltage tonight. It is the easiest way to start your journey into precision car care and avoid being one of those people who pays for an expert auto repair they didn’t actually need.
The Costly Mistake of Thinking Every Noise is a Broken Part
After years of working on my own vehicles, I have realized that the most expensive repairs are often the ones we misdiagnose. We often fall into the ‘parts cannon’ trap, replacing an entire window regulator when a $10 plastic clip would have sufficed. It is vital to learn how to diagnose a bad wheel bearing by sound alone or differentiate between a door rattle and a suspension knock. This diagnostic skill is what allows you to how to spot an honest mechanic in yuma before you drop your keys, because you will already know the scope of the problem before you even walk in the door.
- Trust your hands more than your wallet: If you can stop a noise by simply pressing on a door panel, it is likely a loose fastener or a worn clip, not a mechanical failure.
- Avoid the ‘Universal’ fix: Generic duct tape or thick chassis grease often create more mess than they solve in the long run.
- The peace of mind is worth the effort: A quiet cabin reduces driver fatigue more than any high-end premium sound system ever could.
The Items That Keep My Car Out of the Shop
Building a reliable vehicle does not require a warehouse full of heavy machinery, but a few key additions to your glovebox will pay for themselves in one weekend. Beyond the multimeter, I highly recommend a set of nylon trim removal tools. They are the only way to perform an essential car service on your interior without leaving permanent scars on the plastic. I also suggest keeping a digital copy of your car’s factory service manual on your phone. When you are trying to maximize your cars lifespan with regular tune ups, having the exact clip locations saves hours of frustration. These resources turn a stressful breakdown into a manageable afternoon project. [image_placeholder]
Take Back Control of Your Cabin Comfort
There is a unique kind of satisfaction that comes from fixing a problem yourself, especially one that has been grating on your nerves for months. You do not need to be a master technician to keep your car feeling like new; you just need the willingness to look behind the panel and the curiosity to find the root cause. Whether you are dealing with a minor rattle or deciding how transmission overhauls save you money in the long run, taking an active role in your vehicle’s care is the best way to ensure it stays on the road. If you hit a wall, you can always look for expert auto repair professionals for advice, but try the ten-dollar fix first. You might just surprise yourself with what you can accomplish.
Have you ever spent hours chasing a rattle only to find it was something incredibly simple like a loose coin or a seatbelt buckle? Let me know your most frustrating cabin noise stories in the comments below!