
The sun was setting over the highway, and there I was, cruising at 60 mph, when I heard it. A low, rhythmic thrum-thrum-thrum that seemed to vibrate right through the floorboards. At first, I thought my tires were just getting old, but the sound didn’t match the road surface. I actually ignored it for two weeks, assuming I just needed to maximize my car’s lifespan with regular tune-ups. That was my first big mistake. By the time I finally pulled into a shop, the heat generated by that failing bearing had practically welded parts together. It turned what should have been a simple fix into a massive expert auto repair bill. I don’t want that for you.
Stop Guessing and Start Listening to Your Car
You don’t need a degree in mechanical engineering or a thousand-dollar diagnostic tool to figure this out. Your ears are the best tools in the garage. Most people panic when they hear a new noise, thinking their transmission is shifting early or that their engine is about to explode. But a wheel bearing has a very specific ‘voice.’ It’s a growl, a hum, or a chirp that changes perfectly in sync with your vehicle’s speed. Today, I am going to show you exactly how to isolate that sound so you can drive with confidence again.
Is it actually possible to diagnose this without a mechanic?
I get it. You’re worried about misdiagnosing a bearing for something else, like a tire that only shakes at 65 mph. When I was starting out, I once replaced a perfectly good CV joint because I couldn’t tell the difference between a click and a grind. But here’s the secret: wheel bearings respond to weight transfer. According to the automotive experts at Popular Mechanics, a failing bearing will often change its pitch or disappear entirely when you gently swerve and shift the car’s weight from side to side. If the noise gets louder when you turn left, it’s usually the right-side bearing taking the load. Have you ever heard that mysterious ‘cyclone’ sound while driving and just turned up the radio to drown it out? Let me know, because I have definitely been there. Ignoring it won’t make it go away; it just makes the car service more expensive down the line. We are going to walk through the practical tests next.
Get Your Car in the Air Safely
Once you have narrowed down which side the noise is coming from with the swerve test, it is time to get the wheels off the pavement. You cannot accurately diagnose a wheel bearing while the weight of the vehicle is compressing the hub. I remember working on my old sedan, convinced the noise was just a suspension squeak over speed bumps. I shook the wheel at the 9 and 3 o’clock positions and felt nothing. I almost gave up until I tried the 12 and 6 o’clock positions. The wheel practically wobbled off in my hands. It taught me that a bearing can fail in one direction while feeling rock solid in another. 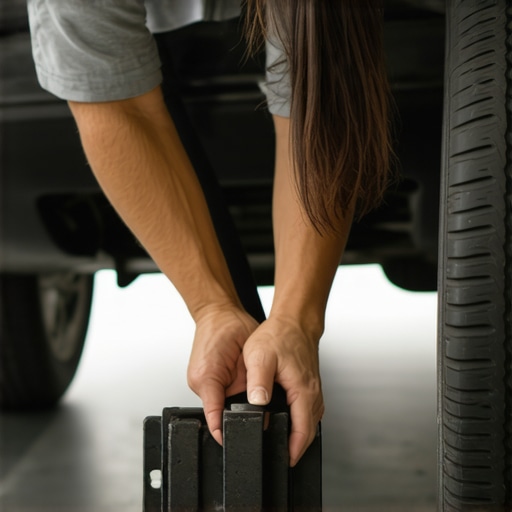
Wiggle the Tire to Detect Hidden Play
To do this correctly, use a floor jack to lift the suspect wheel. Grab the tire firmly at the very top and the very bottom. Try to rock it back and forth toward the engine and then toward you. A healthy bearing has zero ‘play.’ If you feel even a tiny click or movement, you are looking at a hub assembly that has lost its integrity. Be careful here; movement from side-to-side (9 and 3 o’clock) can sometimes be a loose tie rod or a reason why your steering feels loose after hitting a pothole. Movement at the vertical 12 and 6 o’clock positions almost always points directly to the bearing or signifies that you need to check if your ball joints are dangerously loose.
Listen Closely for the Tell-Tale Grumble
If the ‘wiggle’ test is inconclusive, the spin test is your tie-breaker. With the car safely on jack stands, spin the tire as fast as you can by hand. Put your other hand on the vehicle’s coil spring. Because the bearing is connected to the knuckle, a failing bearing will transmit a distinct vibration through the spring that feels like a rough, rhythmic grinding. If the wheel spins silently and the spring feels smooth, your noise might be a whistling noise at high speeds caused by wind or a tire issue like a tire that only shakes at 65 mph.
Distinguish Between Bearing Noise and CV Joint Clicking
It is incredibly easy to confuse a bad bearing with a failing CV joint. Think of it this way: a wheel bearing is a constant companion—it hums whether you are going straight or turning. A CV joint, however, usually only acts up when you are making sharp turns at low speeds, creating a mechanical ‘popping’ or clicking sound. Before you commit to a top-tier expert auto repair, take a moment to learn the secret to identifying a failing CV joint early. This simple distinction can save you from replacing the wrong part and wasting an entire Saturday. If you perform the simple test for blown shocks and find those are fine, but you still have that rhythmic growl, the bearing is your primary suspect.
Everyone tells you that if one wheel bearing goes, you absolutely must replace the opposite side immediately to maximize your car’s lifespan with regular tune-ups. I used to believe that too, but after twenty years of turning wrenches, I have realized that replacing bearings in pairs is often a waste of perfectly good parts. Unlike brakes or shocks, wheel bearings are independent components; one can hit a massive pothole and fail while the other stays pristine for another 50,000 miles. Don’t let a shop upsell you on an expensive expert auto repair you don’t actually need unless the other side is actually showing signs of play or noise.
Stop Killing Your New Bearings with the Torque Trap
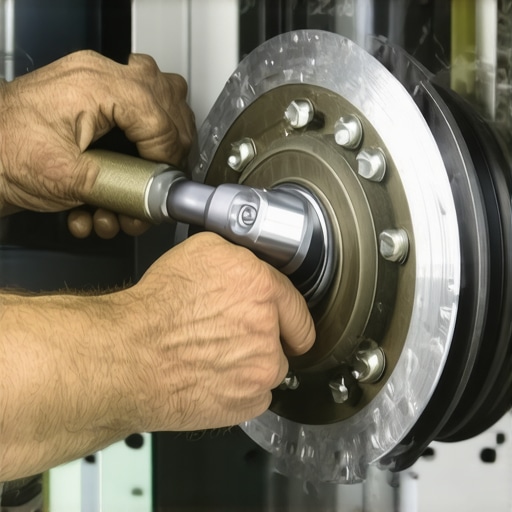
The single biggest mistake DIYers and even some ‘pros’ make is ignoring the specific torque specs for the axle nut. Many people assume that ‘tighter is better’ and blast the nut on with a heavy-duty impact wrench. This is a fatal error. Over-tightening crushes the internal races together, creating excessive heat and friction that will burn out a brand-new hub in months. Conversely, if it’s too loose, the bearing will have excessive play and fail just as fast. According to technical bulletins from the Car Care Council, improper torque is responsible for nearly 30% of premature hub assembly failures. You must use a calibrated torque wrench and follow the manufacturer’s specs to the letter if you want longevity for high-mileage engines and their related drivetrain parts.
Why Does the Same Bearing Keep Failing Every Year?
If you find yourself replacing the same hub assembly every 10,000 miles, the problem likely isn’t the part quality—it’s the mounting surface. Rust or debris on the steering knuckle can prevent the bearing from sitting perfectly flush. Even a microscopic tilt can cause ‘runout,’ leading to uneven wear and a return of that dreaded humming sound. In extreme cases, a persistent failure might even suggest you need to learn how to spot a bent frame without a measurement rack, as a tweaked chassis can put constant, lateral stress on a wheel hub that no amount of grease can fix. Similarly, don’t overlook the fluid conditions in your drivetrain; checking how to tell if your differential needs new fluid is a smart move if you’re already digging into the axle area.
Think Long-Term to Save Your Wallet
Just like understanding how transmission overhauls save you money in the long run, investing in high-quality bearings rather than the cheapest white-box parts is essential. Cheap bearings often use inferior seals that let moisture in at the first sign of rain, leading to internal corrosion. If you’re doing a full car service, take the extra ten minutes to clean the knuckle surface with a wire brush. It’s the difference between a job done and a job done right. Have you ever fallen into the trap of buying the cheapest part only to have it fail right after the warranty expired? Let me know in the comments, because I’ve definitely learned that lesson the hard way.
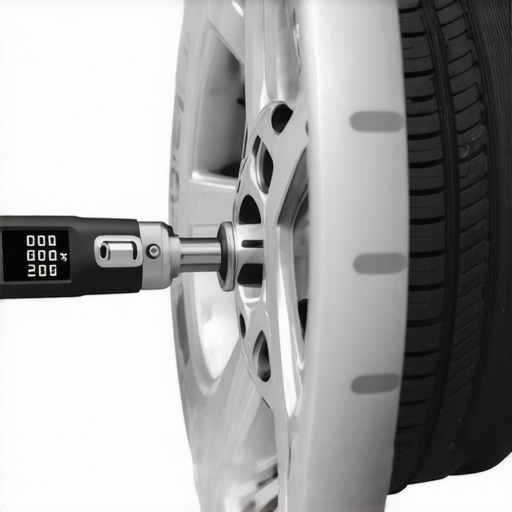
I didn’t truly respect the precision required for hub work until I snapped a Grade 8 bolt on a Saturday afternoon with no stores open. If you are serious about DIY and want to avoid an unplanned expert auto repair, you need to stop using that old pipe-extension trick for leverage. Instead, I highly recommend investing in a 1/2-inch drive digital torque wrench with an angle function. Brands like CDI Torque Products—the specialized manufacturer that produces many high-end tool truck versions—offer the accuracy necessary for modern hub nuts. Many of these nuts are ‘torque-to-yield,’ meaning you must tighten them to a specific foot-pound and then rotate them an additional 90 degrees. Without a digital angle gauge, you are just guessing, and guessing leads to premature failure.
How do I maintain my wheel hubs over the long haul?
Maintenance does not end once the new bearing is pressed in; it is about protecting the surrounding environment. I always apply a very thin layer of high-temp anti-seize to the mating surfaces—not the threads, but the flange—to prevent galvanic corrosion. This step is vital for safe summer drives where extreme road heat can effectively fuse the hub to the steering knuckle. Additionally, do not ignore the health of your related drivetrain fluids. If you drive a 4WD or RWD vehicle, you should check if your differential needs new fluid every 30,000 miles. Fresh lubricant reduces the lateral stress on your axles, which indirectly extends the life of your wheel bearings. According to the Timken Bearing Maintenance Manual, over 50% of bearing failures in heavy-use vehicles result from lubricant contamination or heat fatigue from nearby failing components.
The Future of Smart Hub Sensors and Diagnostics
I truly believe we are entering an era where the classic ‘hum-and-thrum’ diagnosis will eventually become a thing of the past. Newer electric vehicles and luxury sedans are beginning to integrate vibration-sensitive acoustic sensors directly into the hub assembly. These systems can detect microscopic pits in the bearing races months before the human ear can pick up a sound. For now, we still rely on our senses and physical tests, but keeping an eye on the longevity for high-mileage engines means being ready to embrace these digital diagnostics as they trickle down to the aftermarket. For those of us still turning wrenches on traditional setups, focusing on maximizing your car’s lifespan with regular tune-ups and inspections remains the gold standard. Next time you have your wheels off, I challenge you to take a wire brush to your ABS sensor ring; that simple five-minute cleaning can prevent a dozen future ‘ghost’ dashboard lights. If you find your car still feels a bit ‘off’ after a bearing swap, it might be time to look into how transmission overhauls save you money by resolving deeper drivetrain vibrations.
Lessons from the Shop Floor That You Won’t Find in a Manual
After years of wrestling with stubborn hubs, I’ve realized that the ‘textbook’ symptoms don’t always tell the whole story. Here are a few lightbulb moments that changed how I approach drivetrain issues:
- Listen for the change in tone: If the noise goes away when you drive over a smooth patch of fresh asphalt but returns on rougher roads, it might actually be your tires. However, a bearing growl is persistent regardless of the surface texture.
- The temperature check: After a long drive, safely use an infrared thermometer on the hub center. A failing bearing will run significantly hotter than its healthy counterpart.
- Don’t trust the box: I once spent three hours installing a ‘new’ part that was DOA. Check for smooth rotation by hand before you bolt everything together. This avoids a frustrating expert auto repair redo.
Tools and Resources for a Job Done Once
Success in the garage is 50% technique and 50% having the right gear. If you are serious about maintaining your vehicle, these are the items I personally rely on:
- Digital Torque Wrench: Accuracy is non-negotiable for axle nuts. Brands like CDI or Precision Instruments provide the reliability needed to maximize your car’s lifespan with regular tune-ups and hub replacements.
- High-Temp Anti-Seize: A small dab on the hub flange prevents the ‘welded’ metal-on-metal bond that makes future repairs a nightmare.
- Acoustic Stethoscopes: If you can’t isolate the sound, a $20 automotive stethoscope can help you pinpoint the growl directly at the knuckle while the car is safely supported.
#IMAGE_PLACE_HOLDER_E#
If you aren’t ready to tackle this yourself, knowing how to spot an honest mechanic in Yuma or checking the 5 red flags to watch for when choosing an Albuquerque mechanic can save you from a bad experience.
Taking Control of Your Quiet Ride
There is a unique sense of satisfaction that comes from silencing a noisy wheel bearing. It’s more than just a repair; it’s about restoring the harmony of your driving experience and ensuring your safety on the road. By paying attention to the subtle cues your car gives you and following the correct torque procedures, you avoid the trap of the ‘cheap’ fix that costs more in the long run. Whether you choose to do the work yourself or seek expert auto repair, you now have the knowledge to ensure the job is done right. If you have questions about your specific vehicle or need help, feel free to contact us for guidance.
Have you ever had a noise that you were 100% sure was a wheel bearing, only to find out it was something completely different? Let me know in the comments below!