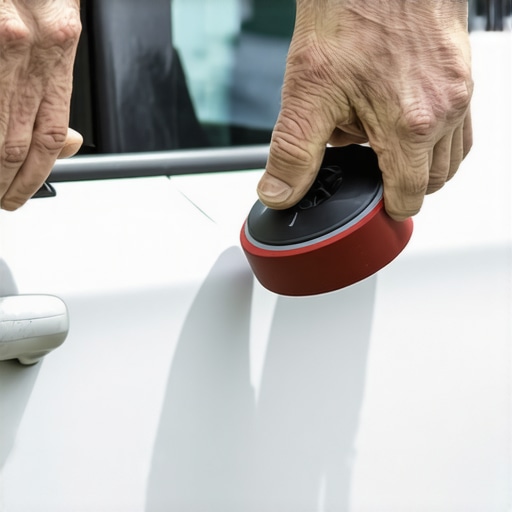
I was standing in the supermarket parking lot, staring at a fresh, ugly crater in my door like it was a personal insult. Some rogue shopping cart had clearly decided my car was a target. My heart sank, and my mind immediately went to the nightmare of insurance claims and expert auto repair bills. I even considered if it was finally time to just give up and look for cash for my car. I actually tried to pull the metal out with my bare hands first—big mistake. I ended up just making the area greasy and feeling pretty foolish. But then I remembered a trick my old neighbor used to swear by using nothing but a bathroom plunger. It sounds like a suburban legend, but I’m here to tell you that this little DIY miracle actually saved my weekend and my wallet. Today, we are going to solve the mystery of shallow dent removal so you can keep your car looking sharp without the body shop markup.
Stop Overpaying for Shallow Dings
The truth is, not every blemish requires a specialist and a four-figure invoice. While factory-level paint restoration is vital for deep gouges or structural damage, those annoying “poppable” dents are often surprisingly DIY-friendly. I’m going to walk you through exactly how to use suction to reclaim your car’s smooth lines. We aren’t just talking about a quick fix; we’re talking about a technique that respects your car’s integrity. I once spent three hours trying to buff out what I thought was a deep scratch, only to realize the light was hitting a shallow dent. If I had known then what I know now about essential car service and minor body maintenance, I would have saved myself a massive headache.
Does This Plunger Trick Actually Work?
You’re probably skeptical. I was too. When I first tried this years ago, I used a standard sink plunger on a bone-dry car door. I pumped and pulled until my arms ached, and absolutely nothing happened. I felt like a myth-buster who had just been thoroughly debunked. The secret, however, isn’t just the tool; it’s the seal and the temperature. According to various automotive materials scientists, the pressure differential created by a vacuum can exert significant force on a specific area, which is often more than enough to snap a dented panel back to its original “memory” shape. It’s essentially the same principle used by collision repair experts with much more expensive equipment. Have you ever looked at a dent in your driveway and felt that sinking feeling in your gut? If you’ve tried a “life hack” that failed miserably, let me know—I’ve likely been there too. Before you decide your car needs a complete tune up or a new door panel, let’s look at why this specific method is your best first line of defense. Now that you know why it works and why I once failed at it, let’s get into the nitty-gritty of the supplies you’ll need to do it right.
Prep the Surface for Maximum Suction
Before you even touch the plunger to the metal, you have to create a clean environment. Think of the car’s surface like a phone screen protector; any speck of dust or wax is going to ruin the seal. I remember the second time I tried this on my old sedan. I was so rushed I didn’t even wipe off the road salt. The plunger just slid across the door like a hockey puck, leaving a trail of scratches that made me wish I’d checked out the top signs your car needs expert auto repair now before I started. Grab some basic dish soap and warm water to strip away the wax. A squeaky-clean surface ensures that the rubber flange can actually grip the paint. If you’re working on a plastic bumper rather than a metal door, the physics are slightly different, and you might find the trick to popping out a plastic bumper dent with hot water more effective. Once the area is dry, apply a small amount of water or even a thin layer of petroleum jelly to the rim of the plunger. This creates an airtight gasket that prevents the vacuum from breaking mid-pull.
Heat is Your Best Friend
Metal has a ‘memory’ of its original shape, but when it’s cold, it’s stubborn. You need to make the panel more pliable. I usually use a hair dryer on a medium setting or carefully pour a kettle of hot water over the dented area. Don’t go overboard with a heat gun; you don’t want to reach the temperatures required for factory-level paint restoration unless you’re prepared for a much bigger project. The goal is to get the metal warm to the touch.
Pull Straight and Steady
Now comes the moment of truth. Center the plunger over the deepest part of the shallow ding. Push in slowly to exhaust the air, then pull toward yourself with a firm, even motion. Avoid jerky, violent movements—you aren’t trying to rip the door off its hinges. You want a consistent ‘pop.’ I once helped a friend with a dent in his truck bed, and we were so aggressive we actually pulled the metal out too far, creating a ‘high spot’ that looked like a tiny mountain. We should have been focused on a complete tune up of our technique first. If the dent doesn’t move on the first try, re-apply the heat and try again. It’s a game of patience, not power.
When the Plunger Just Isn’t Enough
Sometimes you’ll find that the suction breaks because the dent is on a body line or a curve. In those cases, a standard flat-bottom plunger won’t work. You’d need a specialized suction cup tool designed for automotive use. While you’re under the hood or near the car panels, it’s also a good time for a quick essential car service check. Look for loose trim or rattling components that might have been jarred by the impact. If the dent is near the edge of a door, check the alignment to ensure your locks still function properly, or you might find yourself searching for how to fix a car door that wont lock with the remote later that evening. The plunger method is a fantastic first line of defense, but knowing its limits is part of being a smart car owner.
While that plunger trick is a lifesaver for shallow dings, being a truly savvy car owner means knowing when the simple fix is a facade for a deeper issue. Most people think that if they follow the manual to the letter, their car will last forever. But here is where I disagree with the standard ‘dealership wisdom.’ Everyone says you should strictly follow the ‘lifetime’ service intervals for your gearbox, but in my experience, the truth about lifetime gearbox fluids is that they are designed for the lifetime of the warranty, not the lifetime of the vehicle. If you want to hit 300,000 miles, you need to be more proactive than the manufacturer suggests.
Don’t Fall for the Lifetime Fluid Myth
The biggest trap I see advanced DIYers and even some shops fall into is the belief that ‘sealed’ transmissions never need a look-over. This ‘set it and forget it’ mentality is exactly why we see so many premature failures. According to a study by the Car Care Council, neglected maintenance is a primary cause of major component failure in vehicles over five years old. To truly maximize your cars lifespan with regular tune ups, you have to look past the marketing. I’ve seen fluid that looked like burnt coffee at 80,000 miles in a ‘sealed’ unit. Ignoring this leads to a massive bill later, whereas knowing how transmission overhauls save you money in the long run can keep your car on the road for a decade longer than the average.
Is Your Electrical System Mimicking a Mechanical Failure?
Here is a nuanced problem that catches even the pros: the ‘phantom’ mechanical failure. I once spent a weekend trying to diagnose a ‘slipping’ transmission, only to find out it was a corroded wire. Before you panic and look for top signs your car needs expert auto repair now, check your grounds. There is a hidden ground strap that causes weird electrical ghosts, making your sensors send garbage data to the computer. This can cause erratic shifting or even engine stumbles that feel like a hardware death knell. Have you ever fallen into this trap of replacing a part only to find out a 50-cent wire was the culprit? Let me know in the comments.
The High Cost of Cheap Aftermarket Parts
The ‘Oops’ factor often comes down to the parts store bargain bin. We all love a deal, but the truth about cheap aftermarket brake pads and sensors is that they often lack the precise tolerances required by modern ECUs. A cheap sensor might fit the hole, but its resistance values could be just slightly off, triggering a check engine light that will haunt you for months. This is especially true for essential car service tasks where heat and vibration are constant. Don’t let a twenty-dollar savings turn into a two-thousand-dollar headache.
Cheap parts are a trap, but even good parts fail if you aren’t watching the data. That’s why I finally stopped playing the guessing game and invested in a proper bi-directional scan tool. Most people think a ten-dollar code reader is enough, but those only tell you the ‘what,’ not the ‘why.’ When I was chasing a rough idle last spring, my cheap reader said ‘Misfire Cyl 3.’ I swapped the coil, the plug, and the injector, but the light stayed on. It wasn’t until I used a tool that could look at live fuel trim data that I found the hidden vacuum leak that makes your car stall at stoplights. Specifically, looking at how the short-term fuel trims reacted to a propane torch test saved me another $400 in ‘parts cannon’ therapy.
The One Tool That Stopped My Guessing Game
How do I maintain my transmission for the long haul?
Maintaining a gearbox isn’t just about fluid; it’s about temperature management and software health. I always tell people to watch for 5 signs your transmission is silently overheating, because heat is the number one killer of clutches. According to the ZF Service Manual for the 8HP automatic transmission series (the TE-ML 11 technical documentation), the ‘lifetime’ fluid claim is actually conditional. They recommend a change every 62,000 to 93,000 miles if you do any high-speed driving or towing. If you skip this, you’ll eventually see why your transmission feels like its neutralizing at stoplights.
Listen Closely for These Mechanical Warnings
Your ears are often faster than the ECU. Before a bearing totally seizes, it will sing to you. I’ve avoided several roadside breakdowns just by knowing how to diagnose a bad wheel bearing by sound alone. If the hum changes when you veer slightly left or right on the highway, you’ve found your culprit. While you’re listening, keep an eye on the fluids. If you open your reservoir and see the reason your engine coolant looks like chocolate milk, stop driving immediately. That’s a head gasket or oil cooler failure that will liquidate your savings faster than a bad stock tip.
Invest in Prevention to Avoid the Scrap Yard
The trend in modern automotive engineering is toward ‘disposable’ components, but you can fight back with high-quality lubricants and frequent inspections. To truly maximize your cars lifespan with regular tune ups, you need to be the one who notices the small things, like a torn CV boot or a weeping water pump. If you ignore the basics, you’ll end up wondering how to get cash for a car without a title because the repair bill is higher than the vehicle’s value. I’ve found that the secret to longevity for high-mileage engines is simply consistency. In the future, as sensors become even more integrated, manual diagnostics might seem like a lost art, but the mechanical fundamentals won’t change. Try this tonight: grab a simple multimeter and check for how to find a parasitic battery drain by testing the voltage drop across your fuses while the car is off. It takes ten minutes and can save you from a dead battery on a Monday morning.
The Hardest Lesson I Learned About Garage DIY
Years of skinning my knuckles has taught me that the ‘easy fix’ is often the most technical. When you’re trying to pull a dent or perform an essential car service, your biggest enemy isn’t the car—it’s your own impatience. I used to rush every job, thinking speed was a sign of skill. Now, I know that taking ten minutes to clean a surface or test a ground strap saves three hours of frustration later. If you notice top signs your car needs expert auto repair now, don’t panic immediately; verify the simple stuff first. Another truth? The ‘lifetime’ marketing you see on modern vehicles is a trap. If you want your car to survive, you have to be more diligent than the manufacturer requires, especially when it comes to how transmission overhauls save you money in the long run by avoiding them through proactive care.
My Private Arsenal for Preventing Mechanical Death
You don’t need a professional shop for every task, but you do need the right data. I always keep a bi-directional scan tool in my glovebox; it’s the only way to find things like the hidden vacuum leak that makes your car stall at stoplights without tearing the engine apart. I also swear by high-quality dielectric grease to combat the hidden ground wire that ruins your sensors. Finally, an infrared thermometer is the best way to verify 5 signs your transmission is silently overheating before you are stranded. These tools are the bridges between guessing and actually knowing your car’s internal health.
Take the Keys Back from the Dealership
The first time you successfully pop a dent or fix a rough idle yourself, something changes. You stop being a passenger in your car’s life and start being its caretaker. Whether you are performing a regular tune up or diving into more complex auto repair, remember that every expert started exactly where you are now—with a tool in their hand and a bit of uncertainty. At collisionfixer, we believe knowledge is the best tool in your box. Don’t let a small ding or a weird noise intimidate you into overpaying. You have the tools, the techniques, and now the mindset to keep your ride on the road for the long haul. Have you ever found a ‘simple’ fix that actually worked, or did it turn into a weekend-long project? Let me know below!