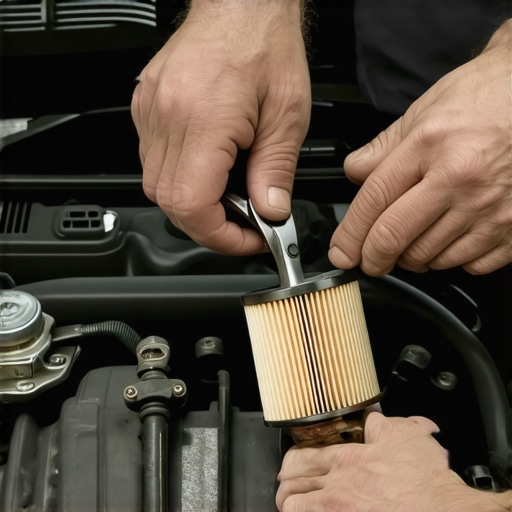
It was a typical Saturday morning, and I was ready to give my car a quick oil change. But as I reached for the oil filter, I immediately hit a frustrating snag. The stubborn thing wouldn’t budge, even after trying with my standard wrench. Sweat beaded on my forehead as I realized I was in over my head. We’ve all been there—stuck oil filters seem to have a mind of their own, refusing to cooperate no matter how much force we apply. That moment of helplessness was my lightbulb moment: you don’t always need fancy tools to get the job done.
Mastering the Art of Removing a Stuck Oil Filter Without Special Tools
Have you ever faced a similar struggle? That feeling of helplessness when your tried-and-true methods don’t work? Well, don’t worry. Today, I’m going to share my personal tips and tricks on how to remove a stubborn oil filter using simple household items and some clever techniques. These methods are not only cost-effective but also empower you to handle basic auto repairs confidently, saving you time and money.
Is It Really Worth Fighting That Hard? Common Concerns About DIY Oil Filter Removal
I admit, my first instinct was to buy an expensive oil filter removal tool. But guess what? Early on, I made the mistake of rushing out to buy the most expensive one, only to find it didn’t fit my car’s filter. That wasted money and time. After some research and trial-and-error, I discovered that patience and creativity often trump specialized equipment. If you’re skeptical about tackling this on your own, you’re not alone. Many worry about damaging the filter or causing leaks. Rest assured, with the right approach, you can remove even the most stubborn filters safely.
According to automotive expert advice, using the wrong tools or excessive force can compromise the seal or fracture the filter, leading to costly repairs. A typical mistake I made early on was abusing the filter with pliers, which almost crushed it. Recognizing these pitfalls is key to doing the job right.
In the upcoming sections, I’ll walk you through several proven strategies I’ve personally tested, from improvised tools to gentle leverage techniques. Whether your filter is just a bit stubborn or refuses to turn at all, these methods will help you conquer the challenge without the need for specialty gadgets. Ready to reclaim your weekend? Let’s get started and finally get that oil filter off—safely and easily.
Apply Gentle Leverage with a Jar Lid or Flat Tool
Once you’ve identified that your oil filter won’t turn despite multiple attempts, try using a sturdy flat object like a wide jar lid or a sturdy piece of cardboard. Insert it between the filter and your wrench, then gently twist. I once used an old jar lid in my garage, and with slow, steady pressure, the filter loosened without any damage. Remember, the key here is patience, not brute force. This technique acts like a lever, amplifying your turning force without risking cracks or leaks.
Secure a Rope or Strap Around the Filter for Better Grip
If a wrench alone isn’t enough, wrapping a strong nylon rope or tow strap around the filter can give you additional grip. Loop it tightly around the filter body, then hold and turn using your hands or a wrench. I applied this method when my filter was fused tight after a cold snap. The rope prevented slipping and gave me the extra leverage needed to break the seal. Be cautious to avoid gouging the filter surface or applying uneven tension.
Use Hot Water to Expand the Filter and Loosen
Heating the filter slightly can help break the seal caused by thermal contraction. Carefully pour hot water over the filter housing or run the engine to warm the area for a few minutes. During my last oil change, I carefully poured hot water over the filter housing, which softened the old gasket and made turning much easier. Has your filter become a stubborn obstacle? Consider this method, but avoid boiling water to prevent damage to surrounding components.
Tap Gently for Micro-Loosening
Sometimes, a few light taps around the base of the filter can help loosen it. Use a plastic hammer or the handle of a screwdriver to tap gently. This dislodges any residual adhesives or debris holding the filter tight. I tried this on a stubborn filter with a plastic mallet, and within a few taps, I heard it move slightly. Always keep the taps light; heavy blows can crack the filter or housing.
Use Penetrating Oil or WD-40 for Stubborn Seals
If the gasket has become fused to the filter housing, applying a penetrating oil like WD-40 around the seal can help. Spray a small amount on the gasket edge and let it sit for 10-15 minutes. This loosens the seal and makes turning much easier. I once faced a completely stuck filter after a cold night, and after applying WD-40, I was able to remove it without force. Avoid excessive spraying to prevent oil from entering the engine oil system.
Practice Safety and Patience During Removal
Remember, safety comes first. Wear gloves to avoid contact with hot surfaces or oil spills. Secure your vehicle properly on a level surface, and use wheel chocks if necessary. Patience pays off; rushing can cause damage or leaks. By approaching stubborn filters with these methods, you’ll save money and avoid the need for specialized tools. This also emphasizes the importance of regular maintenance to prevent gaskets from fusing, which you can learn more about in regular tune-ups.Many car owners operate under misconceptions about vehicle maintenance, often leading to costly mistakes. A common myth is that all auto repairs are straightforward and manageable without expert knowledge. However, this oversimplifies the complexity of modern car systems. For example, assuming that a check engine light always indicates a simple fix can be misleading; sometimes, it signals serious issues like transmission problems, which require professional diagnosis. Misinterpreting diagnostics can cause further damage or safety risks.
How Can Advanced Diagnostics Prevent Costly Mistakes?
Modern diagnostic tools, backed by automotive experts, help identify underlying issues accurately, saving money and preventing damage. Relying solely on visual inspection or basic troubleshooting often misses subtle problems, especially in critical systems like transmissions or braking. According to studies from the Auto Care Association, up to 70% of vehicle failures stem from neglecting early signs or misdiagnosing issues, emphasizing the importance of expert evaluations. Furthermore, many people believe that cheap aftermarket parts are just as good as OEM components. In reality, inferior parts might wear faster or cause damage, particularly in sensitive systems like transmissions or collision repair components. For example, using low-quality brake pads may seem cost-effective but often results in squealing, uneven wear, or even brake failure, leading to safety hazards and higher costs in the long run. The key is understanding that auto repair is not just about fixing what’s broken but about maintaining optimal performance and safety. Regularly scheduled tune-ups, informed choices, and trusting specialists equipped with advanced tools are critical. Ignoring routine maintenance or relying on advice from unqualified sources can trap you into recurring problems or even dangerous situations. Don’t fall into the trap of thinking every repair is a DIY job; some issues require the nuanced understanding only trained technicians provide. Want to protect your investment? Learn to recognize the subtle signs of deterioration—like slipping transmissions or uneven tire wear—and consult reputable experts. For more insights on maintaining your vehicle’s longevity, visit our guide on maximizing your car’s lifespan. Remember, being informed helps you avoid costly surprises and keeps your vehicle running smoothly. Have you ever fallen into this trap? Let me know in the comments.
Investing in the Right Tools for Longevity
Maintaining your vehicle’s performance over the years requires more than just basic knowledge; it demands the right equipment and a disciplined approach. I personally recommend a high-quality digital multimeter like the Fluke 115. I’ve used this multimeter extensively for diagnosing electrical issues because of its precision and durability. Accurate readings help prevent misdiagnoses, saving time and costly repairs, especially when dealing with complex systems like transmission sensors or engine control units. Additionally, a reliable code reader, such as the Innova 3100j, allows you to interpret onboard diagnostics effectively, providing hints before problems escalate. When it comes to routine maintenance, I swear by a torque wrench like the Tekton 24335, which ensures bolts and nuts are tightened to manufacturer specifications—vital for aspects like suspension components, brake calipers, or transmission mounts. Proper torque prevents future issues and prolongs component lifespan. Embracing these tools in your garage not only streamlines repairs but empowers you to take control of your vehicle’s health.
Effective Methods for Long-Term Care
Beyond tools, establishing a maintenance routine is key. Regularly checking and replacing transmission fluid—a process I recommend doing with a quality synthetic, as outlined in this detailed guide—can drastically extend the lifespan of your transmission system. It’s also wise to routinely inspect hoses, belts, and seals for signs of wear, preventing unexpected failures. I find that maintaining a clean engine bay with degreasers like Gunk Engine Degreaser simplifies spotting leaks or corrosion early. For ongoing performance, I plan to adopt a cyclical schedule: oil changes every 5,000 miles using full synthetic oil, tire rotations, and brake inspections. As vehicle technology advances, integrating diagnostic software like OEM-specific scan tools will become even more crucial, offering real-time data directly from the vehicle’s ECU. Staying proactive will save you substantial money and frustration down the road.
Scaling Your Care Efforts and Preparing for the Future
As your vehicle ages or if you own multiple cars, scaling your maintenance efforts makes sense. Automating some processes—like scheduling annual inspections or using apps that track service history—can keep maintenance on track. I foresee a future where AI-driven diagnostics and predictive maintenance become mainstream, alerting you to issues before they manifest physically. Such innovations will further reduce repair costs and downtime. For now, embracing detailed record-keeping and investing in the proper tools is your best move. Remember, understanding and maintaining your car’s systems thoroughly can prevent costly failures. To stay ahead, consider consulting expert sources or visiting a trusted mechanic periodically. For instance, regular transmission flushes as recommended in this article can save thousands over the vehicle’s lifespan.
How do I keep my vehicle’s transmission in top shape over time?
Start by monitoring transmission fluid levels and quality regularly, replacing fluid with manufacturer-approved synthetic variants, and avoiding harsh driving habits that strain the system. Using a diagnostic scanner periodically can reveal early signs of wear, such as slipping or delayed shifts. Think about scheduling professional inspections—many issues are better diagnosed before they develop into costly failures. Embracing these habits will ensure your car remains reliable and safe for years to come. Ready to try one advanced technique? Use a digital multimeter to check sensor wiring and connections in your transmission system, as detailed in the expert guide. With proper tools and routine checks, you can maintain your vehicle’s health effectively.
Insider Wisdom: The Surprising Truths I Discovered About Basic Auto Repairs
- Sometimes, the simplest household items—like a sturdy jar lid or a piece of rope—can be your best allies in overcoming stubborn car parts, teaching me that patience and creativity often outperform specialized tools.
- Heating the area with hot water can be a game-changer for breaking stubborn seals, reminding me that gentle thermal expansion can do what brute force cannot, especially when you’re working without professional-grade equipment.
- The myth that all auto repairs require expensive gadgets is widespread; my experience proves that with careful techniques and a little ingenuity, you can handle many tasks safely and effectively, saving money while gaining confidence.
My Go-To Toolkit for Car Care and Why I Trust Them
- Digital Multimeter (like Fluke 115): Precision matters, and this tool helps diagnose electrical issues accurately, preventing misdiagnoses that can lead to costly mistakes. I rely on it for everything from sensor checks to wiring diagnostics.
- Code Reader (such as Innova 3100j): Interpreting onboard diagnostics quickly is vital. This device has saved me hours by providing clear insights into engine problems, guiding my repairs effectively.
- Torque Wrench (like Tekton 24335): Correctly tightening bolts is crucial for safety and longevity. Using a quality torque wrench ensures I meet manufacturer specs every time, which keeps my car running smoothly.
Stay Curious and Confident: Your Car Deserves It
Embarking on DIY auto repairs might seem daunting at first, but with the right mindset, patience, and tools, you can master many tasks that once felt out of reach. This approach not only saves money but also deepens your understanding of your vehicle’s inner workings, making you a more confident car owner. Remember, every challenge you overcome adds to your skillset and sense of independence. Ready to give that stubborn oil filter another shot or tackle your next maintenance with newfound confidence? Share your experiences or questions below—I’d love to hear your stories and help you along your journey!