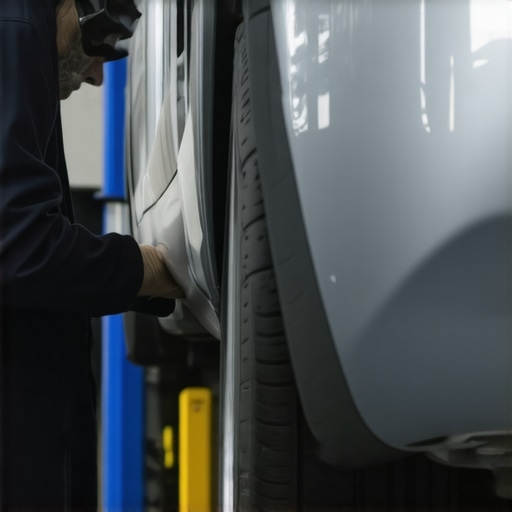
I remember the morning vividly. I pulled out of my driveway, and instead of a smooth ride, I felt an unexpected jolt. Turns out, I had grazed a low post, and my bumper was slightly misaligned—something I didn’t notice right away, but soon enough, it became painfully obvious. That tiny tap caused more than just a scratch; it threw off my car’s appearance and even raised concerns about potential underlying damage. Like many, I initially thought, “Should I just schedule a costly repair?” But after some research and trial-and-error, I discovered that realigning my bumper was a manageable DIY task.
Why Minor Collisions Can Lead to Big Realignment Issues—and Why You Should Care
A minor tap might seem insignificant, but it can subtly shift your bumper out of place, affecting your vehicle’s aerodynamics, safety, and overall look. Left uncorrected, this misalignment can cause uneven wear to your paint, create squeaks, or even expose hidden structural damage. According to a study by the Automobile Association, even small impacts can compromise the integrity of your car’s frame and body if not properly addressed (source). So, what seems like a minor inconvenience now could turn into a costly repair later. That’s why I decided to learn how to tackle this issue myself, saving time and money in the process. If you’ve faced this situation or worry about the long-term effects of a small bump, you’re in the right place. I’ll walk you through the practical, straightforward steps to realign your bumper at home.
Is DIY Bumper Realignment Worth the Hassle?
One common mistake I made early on was thinking I needed specialized tools or a mechanic’s touch. The truth is, with the right guidance, you can often fix minor misalignments yourself. But, a word of caution: rushing into the job without proper knowledge can worsen the problem or cause additional damage. If you’re hesitant, consider consulting an auto repair expert or visiting a trusted collision repair professional. Want to learn more about maintaining your car’s vital systems? Check out these tune-up tips to keep your vehicle running smoothly.
Now, let’s get into how you can realign that bump—quickly, cheaply, and effectively—so you can get back to enjoying your drive without that nagging visual defect. Ready to roll up your sleeves? Here are the step-by-step methods I’ve tested and trusted.
Secure the Vehicle and Prepare Your Workspace
Start by parking your car on a flat, level surface, engaging the parking brake, and turning off the engine. Gather your tools, including a tape measure, a ratchet set, plastic pry tools, a rubber mallet, and marker pens. Wearing gloves can protect your hands during the process. I once realized I forgot to loosen the clips before pulling the bumper, which caused a small crack—so double-check your tools and safety gear first.
Identify the Misalignment Points Precisely
Close inspection reveals specific areas where the bumper sits unevenly. Look for gaps between the bumper and fender edges, misaligned panels, or uneven gaps at mounting points. Use a paint pen or masking tape to mark these spots for reference. I remember marking the low corner of my bumper to ensure I applied pressure accurately during realignment.
Loosen Fasteners Without Removing Entirely
Locate all clips, bolts, and screws holding the bumper. Use the appropriate screwdriver or socket to loosen, but not remove, these fasteners. This step is similar to adjusting a bicycle chain—you’re creating slack to shift parts into proper position. I found that loosening all fasteners first prevents accidental snapping of clips, which is a common mistake.
Apply Gentle Pressure and Reposition the Bumper
With fasteners loosened, gently push or pull the bumper to align it with adjacent panels, matching your marked reference points. Use plastic pry tools to avoid scratching the paint. A rubber mallet can help tap bends into place softly. Remember the time I used a metal tool and ended up marring the paint—lessons learned: stick to plastic tools and gentle force.
Measure and Verify Alignment Carefully
Use a tape measure or a visual alignment method to check that gaps and edges are even on both sides. Measure from fixed points like door edges or wheel wells to ensure symmetry. Precision here matters—think of it like tuning a guitar string, where small adjustments yield harmonious results. I once spent extra time on this step and prevented an uneven appearance that would have made me regret the DIY effort.
Secure Fasteners and Finish the Job
Once satisfied with the alignment, tighten all clips, bolts, and screws to manufacturer specifications. Be cautious not to over-tighten, as this can crack the bumper or strip threads. After tightening, gently test the bumper’s stability by pushing at different points. I learned that after tightening, I needed to revisit some fasteners to fix slight shifts, so always double-check after initial securing.
Reattach Any Removed Components and Clean Up
If you removed fog lights or trims, reinstall them carefully. Wipe down the bumper and surrounding panels to remove fingerprints or grease. The satisfaction of a properly aligned bumper is worth the meticulous effort—like tuning a suspension for smooth handling. If at any point the misalignment persists or you feel unsure, contacting a professional through CollisionFixer can save you time and prevent damage.
Many car owners operate under misconceptions about vehicle maintenance, particularly when it comes to transmission and auto repairs. A common myth is that all services are purely mechanical fixes that don’t impact long-term health. In reality, neglecting nuanced details—such as the importance of regular tune-ups—can lead to costly breakdowns. For instance, many believe that checking fluid levels once a year suffices, but advanced diagnostics reveal that timely sensor calibration and fluid analysis prevent severe transmission issues, as highlighted in expert studies. An often-overlooked trap involves assuming that minor repairs, like surface scratches or small dents, don’t affect structural integrity. However, such superficial fixes can mask underlying frame misalignments that compromise safety, especially in collision repairs. This is why consulting a trusted professional through CollisionFixer can save you money and ensure proper restoration. Advanced automobile maintenance requires inspecting beyond visible wear—consider the nuances of sensor calibration to prevent surges or shifts, which many owners mistake for minor problems. For example, misdiagnosed fuel efficiency issues often stem from unnoticed transmission sensor faults that can only be distinguished with comprehensive diagnostic tools. Don’t fall into the trap of neglecting these intricate details; instead, educate yourself on the significance of routine, expert auto care. Regular tune-ups, for example, aren’t just about replacing parts—they’re an opportunity to catch hidden faults early. A good rule of thumb is to review your vehicle’s condition with professionals who understand that every component is interconnected. Studies suggest that neglecting advanced diagnostics can accelerate wear and lead to unexpected failures, costing thousands in repairs. Remember, the difference between a quick fix and a long-term solution often lies in addressing the underlying nuances. For instance, improper fluid levels or failing sensors may seem insignificant initially but can cause severe transmission damage if ignored. Always check service provider credentials and ask about the specifics of what they inspect; superficial service doesn’t suffice in today’s complex vehicles. To stay ahead, familiarize yourself with core maintenance practices and keep informed through trusted sources like these expert tips. Having a proactive approach means understanding the hidden nuances that prevent problems from escalating, saving time and money over your vehicle’s lifespan. Remember, routine maintenance isn’t just about replacing wear items but also about fine-tuning the electronic and mechanical symphony that keeps your car running smoothly. Have you ever fallen into this trap? Let me know in the comments.
Invest in Quality Diagnostic and Repair Equipment
Having the right tools is paramount for maintaining your vehicle’s longevity and ensuring efficient repairs. I personally rely on a high-quality automotive multimeter available at this comprehensive kit because it allows me to quickly identify electrical issues like sensor faults or wiring problems. Additionally, a reliable code scanner with automotive-specific software helps me interpret engine troubles accurately. Using a generic scanner often leads to ambiguous results; hence, opting for professional-grade equipment ensures precision. As automotive diagnostics evolve with onboard computers, investing in updated tools future-proofs your repair arsenal and minimizes guesswork.
Master the Use of Software and Diagnostic Protocols
Beyond physical tools, software plays a pivotal role in modern auto maintenance. I recommend leveraging diagnostic programs compatible with your vehicle’s make and model—many auto parts stores offer software subscriptions tailored for DIYers. Notably, these sensor diagnostic tools can pinpoint issues like MAF sensor malfunctions that directly affect fuel efficiency. Regularly updating your software ensures compatibility with new vehicle firmware, helping you stay ahead of potential problems before they escalate. It’s about combining hardware and software seamlessly, giving you a comprehensive understanding of your car’s health.
Scheduled Maintenance That Saves Big in the Long Run
While having tools is essential, knowing when and how to use them is equally critical. Scheduling regular tune-ups, such as replacing spark plugs, checking fluid levels, or calibrating sensors, minimizes the risk of unexpected breakdowns. I follow a detailed maintenance calendar inspired by these expert tips, which emphasizes proactive care. Performing preventive maintenance on transmission components, for instance, can extend their lifespan significantly, as discussed in this guide. Think of it as regularly servicing your car’s heart—your transmission—to keep everything running smoothly and avoid costly overhauls later.
Scaling Up: From DIY to Professional-Grade Repairs
As your confidence and skills grow, investing in advanced repair tools like engine hoists, hydraulic presses, and precise alignment equipment becomes beneficial. I personally recommend low-cost, yet effective, specialized repair kits that are suitable for home garages. According to industry expert Auto Repair Tech, mastering proper calibration techniques with these tools can emulate professional results—saving you thousands over time. Embracing this scale-up responsibility allows you to handle complex repairs confidently and safely, transforming your garage into a mini repair shop.
How do I maintain my auto repair tools over time?
Proper maintenance of your tools ensures longevity and reliable performance. Regularly clean electrical contact points, lubricate moving parts, and store tools in a dry environment to prevent corrosion. For precision instruments like scan tools or multimeters, periodically check calibration accuracy and perform test runs. I always keep a dedicated toolkit box, making sure to organize and check tools before each repair session. Maintaining your tools not only saves money by avoiding replacements but also guarantees accurate diagnostics and repairs, ultimately extending your vehicle’s lifespan. Want to get started? Try carefully calibrating your code scanner with a known good vehicle—it’s a quick and impactful way to boost your repair confidence.
Looking back, the smallest tweaks often teach us the biggest lessons—like how that minor bumper misalignment revealed underlying repair truths I hadn’t considered. The key takeaway? Even minor impacts can cascade into serious issues if neglected, emphasizing the importance of proactive, informed auto maintenance. Recognizing the fine line between DIY fixes and professional intervention can save you time, money, and peace of mind, reinforcing the value of understanding your vehicle beyond the surface. Investing in proper tools and learning precise techniques empowers you to maintain and extend your car’s lifespan, turning maintenance from a chore into a rewarding skill. The real wisdom lies in knowing when a simple adjustment suffices and when expert care is essential—an insight that transforms basic repairs into insurance for your vehicle’s future reliability.
Lessons From the Garage: Hard-Won Insights on Car Care
- Sometimes, less is more—especially with small misalignments. I’ve learned that rushing to fix a bumper without proper prep can make the problem worse, underscoring the importance of patience and proper technique.
- Your tools are your best allies. Investing in quality diagnostic and repair equipment has been a game-changer, allowing me to identify issues early and address them effectively. Trusted resources like these tools are worth every penny.
- Routine checks aren’t just for looks—they’re for safety. Regular maintenance, including sensor calibrations and fluid analysis, can prevent costly failures, echoing the importance of a proactive approach I wish I embraced sooner.
Your Garage, Your Auto Sanctuary
Building confidence in DIY repairs and understanding when to seek professional help transforms your relationship with your vehicle. Remember, every small fix is a step toward mastering your car’s health—so don’t shy away from learning and experimenting, but stay vigilant for complex issues. With the right mindset and resources, you’re well-equipped to handle both minor misalignments and major repairs, ensuring your car remains reliable for years to come. Curious to share your own repair stories or seek advice? Feel free to reach out here—your journey to automotive mastery starts today.
What’s Your Next Step in Car Care?
Have you ever underestimated the importance of minor repairs like bumper realignment? Share your experiences or questions below—I’d love to hear your story and help you navigate the next steps in keeping your vehicle in top shape.
,