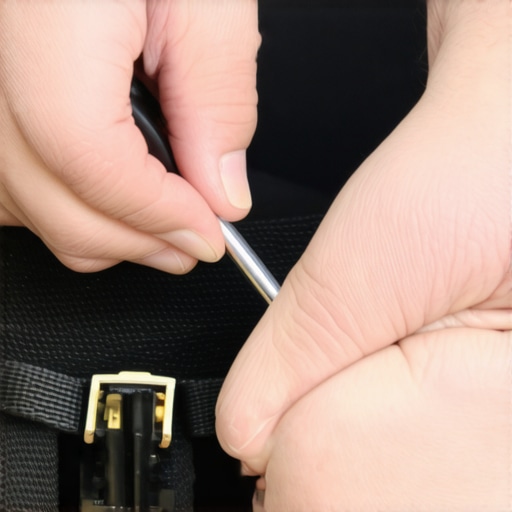
Ever had that sinking feeling when you reach for your seatbelt, only to find it jammed or stuck? I remember the first time it happened to me — I was rushing to get to work, and there it was, refusing to budge. Frustrating, right? I looked around, hoping for a quick fix, and realized I didn’t have any fancy tools on hand. But then it hit me: a simple screwdriver might be all I needed. That moment was a real eye-opener, and today I want to share how you can fix a stubborn seatbelt with just a screwdriver, saving you time and a potential trip to the repair shop.
Why a Stuck Seatbelt Can Be More Than Just Annoying
A jammed or stuck seatbelt isn’t just an inconvenience; it can be a safety concern. If your seatbelt won’t latch or stay tight, it compromises the protection it’s supposed to offer during an accident. Plus, many vehicle safety features are designed to be reliable and easy to use — when they’re not, it’s often due to simple mechanical issues that can be fixed with basic tools and a bit of know-how. Early on, I made the mistake of ignoring minor issues like this, thinking they could wait. But that led to a bigger headache when I finally needed my seatbelt most. Trust me, addressing these little problems ASAP is crucial for your safety and peace of mind.
Is Fixing a Stuck Seatbelt Really That Easy?
Absolutely! I used to think it required professional help or expensive repairs, but I’ve learned that with patience and the right approach, most seatbelt issues can be solved in a few minutes. My first attempt involved a bit of trial and error, but over time, I refined my method. Now, I can assist friends and family when their seatbelts are stubborn, all without spending a dime. Curious if you can do the same? Well, prepare to discover a simple, effective trick that’s saved me more than once. It’s not magic — just practical DIY car care at its best.
Are you facing a seatbelt that refuses to cooperate? Keep reading, and I’ll walk you through the step-by-step process. By the end, you’ll have the confidence to fix it yourself and get back on the road safely. Remember, tackling these small issues early not only prolongs your vehicle’s life but also keeps you safe — because a working seatbelt is a dependable safety tool, not a decorative accessory.
Locate the Seatbelt Mechanism and Gather Your Tools
Start by identifying where the seatbelt is jammed. Usually, it’s near the buckle or retractor, which is the spool that winds the belt. Wear gloves for grip and safety. Grab a Phillips screwdriver; I prefer a small size to avoid damaging surrounding plastic. I once tried a flat-head, but it slipped easily, making the fix messier.
Inspect the Seatbelt for Visible Obstructions
Pull the belt slowly to see if debris or fabric caught is blocking movement. Sometimes, grime or a small plastic piece can jam the reel. In my case, a tiny plastic piece from the trim fell into the reel, causing the blockage. Clear off any visible dirt gently with a cloth or compressed air. If it’s too jammed, proceed to disassemble the cover.
Remove the Seatbelt Cover to Access the Internal Components
Using your screwdriver, unscrew the plastic covers around the retractor. Look for screws securing the plastic casing; these often hide beneath fabric clips or plastic caps. Carefully pry off the cover, working slowly to avoid breaking clips. A quick tip: lubricate the clips with a bit of WD-40 if they’re stiff. Once exposed, check for tangled or bent metal parts.
Realign or Free Up the Reel
If the reel is bent or stuck, gently straighten it or free any tangled belt or spring. I once found the spring coil twisted, which prevented it from rewinding correctly. Carefully unwind the belt just enough to free the spring, then reassemble. Be cautious, as springs can pop out; wear safety glasses if you’re unsure.
Apply Light Lubrication and Test the Mechanism
Spray a light amount of lubricant like silicone spray onto the moving parts. Avoid getting it on the fabric. Work the mechanism manually to distribute the lubricant. I did this once after cleaning out a plastic shard, and it restored smooth function. Reassemble the cover, secure all screws tightly, and test the seatbelt by pulling and retracting it several times.
Reassemble and Confirm Functionality
Put the plastic covers back in place and tighten all screws firmly. Pull the seatbelt to ensure it moves freely without catching. Sometimes, I’ve had to repeat the process if the belt still jams. For persistent issues, consider visiting a professional, but many times, this DIY fix suffices for minor jams.
Regular maintenance helps, like cleaning debris from the retractor area and inspecting for signs of wear. Remember, a properly functioning seatbelt isn’t just a legal requirement; it’s vital for your safety. Handling these small mechanical hiccups yourself can save you time and money, and keep you safe on every trip.
When it comes to auto repair and vehicle maintenance, there’s a lot of misinformation floating around. Many car owners buy into misconceptions that can lead them to costly mistakes, especially when working on crucial systems like transmissions or engine tune-ups. Let’s explore the deeper nuances behind some popular beliefs and reveal common pitfalls that even seasoned DIYers often miss.
Does Regular Oil Change Guarantee a Long-Lasting Engine?
While adhering to the manufacturer-recommended oil change intervals is essential, relying solely on this can be misleading. Modern engines and synthetic oils can last longer, and neglecting other vital maintenance like coolant checks or air filter replacements could still lead to engine trouble. A comprehensive tune-up strategy, like the ones discussed here, ensures optimal performance and longevity. Beware the myth that only oil matters; ignoring other fluids and filters may cause unseen damage over time.
Why Transmissions Often Get Overshadowed in Maintenance
Many believe that transmissions are maintenance-free or only need attention when slipping occurs. However, this mindset ignores the intricacies of transmission health. Regular fluids and filter replacements are critical, but many overlook the benefits of a complete overhaul when subtle signs emerge, as detailed here. Missing early symptoms of impending failure can lead to catastrophic transmission problems, often costing thousands to repair. The key lies in understanding that preventive measures and early diagnostics save money in the long run.
The Hidden Danger of Skipping Professional Diagnostics
Some DIY enthusiasts assume that auto diagnostics tools are unnecessary or only for professionals. However, many nuanced issues, especially relating to sensor malfunctions or electrical glitches, are invisible to the naked eye. Advanced diagnostics, like the specialized scanners, can reveal deep-seated problems before they escalate. Relying solely on intuition or visual inspection risks overlooking critical faults that could compromise safety or lead to expensive repairs later.
What Advanced Mistakes Do Even Skilled Mechanics Sometimes Make?
Even experienced technicians can fall prey to common pitfalls, such as improper torque settings or neglecting to replace worn gaskets during repairs. A study published in the Journal of Automotive Engineering emphasizes that precision and attention to detail significantly impact repair durability and vehicle safety (source: SAE International). Overlooking these finer points can lead to recurring issues, especially regarding complex systems like the transmission or suspension. Therefore, continuous education and awareness of subtle technical nuances are vital. Have you ever fallen into this trap? Let me know in the comments. Understanding these hidden nuances ensures you’re not just following myths but making informed decisions that preserve your vehicle’s health and safety. Regularly consult trusted resources or professionals to stay ahead of common misconceptions, and remember, road safety hinges on proper maintenance rather than quick fixes.Maintaining your vehicle’s health over the long term requires more than just occasional oil changes; it demands the right tools, proper methods, and a proactive mindset. Personally, I’ve found that investing in certain equipment and honing specific techniques not only extends your car’s lifespan but also enhances your confidence behind the wheel. One of my favorite tools is a digital multimeter, which I use to track battery health and electrical issues precisely. Unlike generic testers, a quality multimeter allows me to measure voltage, current, and resistance with pinpoint accuracy, which is crucial when diagnosing complex electrical symptoms.
Another indispensable device is an OBD-II scanner, especially the advanced ones like the 12-Tool Scanner. I prefer models that offer real-time data streaming and code-specific explanations because it helps me identify issues before they escalate. Regularly updating the scanner’s firmware ensures compatibility with new vehicle models and software updates, keeping me ahead of potential problems.
Beyond tools, mastering proper maintenance techniques is vital. For example, periodic transmission fluid flushes can save you thousands in future repairs, as discussed in this guide. I schedule these flushes based on mileage and driving conditions, using manufacturer-approved fluids and always double-checking the torque on drain plugs. Also, inspecting the transmission cooler and lines for leaks prevents overheating, a common cause of transmission failure.
Looking ahead, I predict that diagnostics will become even more sophisticated with the integration of AI-driven tools and remote monitoring. As vehicle systems grow increasingly complex, having reliable diagnostic software that can interpret data trends over time will be essential for early problem detection.
How do I maintain my vehicle’s transmission over time? Consistent oil changes, using high-quality fluids, and scheduling regular inspections are key. Staying informed about signs of impending issues, like delayed shifts or strange noises, allows me to address concerns before they lead to costly repairs. The more proactive you are, the better your car’s performance and longevity.
If you’re serious about keeping your vehicle in top shape, I highly recommend trying out an advanced diagnostic tool like the 12-Tool Scanner. It’s a game-changer for DIY enthusiasts looking to understand their car’s health deeply. Remember, investing in the right tools and techniques today can save you a lot of money and hassle tomorrow. For more detailed tips, check out this resource and start building your maintenance arsenal now.
The Hardest Lesson I Learned About Auto Repair, Car Service, and Tune-Ups
One of my biggest realizations was that mastering even simple DIY fixes requires patience and understanding of your vehicle’s unique quirks. Early mistakes, like forcing a stuck belt or ignoring subtle warning signs, taught me to observe more carefully and respect the complexity beneath the surface. This experience underscored that being meticulous and learning from each misstep ultimately makes you a more confident and capable car owner.
3 Myths About Auto Repairs That Hold You Back
There’s a common misconception that only professionals can handle transmission overhauls or major repairs. Another myth is that regular oil changes alone guarantee vehicle longevity, which isn’t entirely true—other maintenance steps matter too. Recognizing these myths helped me adopt a more comprehensive approach to car care, incorporating diagnostics and preventive measures from trusted sources like regular tune-ups.
What Experts Won’t Tell You About Better Car Maintenance
Many seasoned mechanics know the importance of detailed inspections and using quality tools, but they often keep certain tricks to themselves—like the benefits of advanced diagnostic scanners such as the 12-Tool Scanner. These devices can reveal hidden issues early, saving you money and avoiding breakdowns. Embracing such insights has transformed my approach, helping me anticipate problems before they become costly repairs.
Common Mistakes Even Skilled DIYers Make (And How to Avoid Them)
One mistake I learned the hard way was neglecting to replace worn gaskets during a transmission fluid change, which led to leaks. It’s easy to overlook small details, but paying attention to torque specifications and the condition of seals makes a significant difference. Ensuring I follow detailed guides like proper overhaul procedures has helped me maintain my car’s performance longer and with fewer surprises.
My Essential Toolkit for Auto Maintenance and Diagnostics
Investing in quality tools has been a game-changer. My go-to is a digital multimeter, which I use for battery and electrical diagnostics, and an advanced OBD-II scanner, such as the 12-Tool Scanner, that provides real-time data. These tools not only empower me to troubleshoot effectively but also make me feel more in control of my vehicle’s health. Keeping updated with firmware ensures compatibility with new models, making these investments future-proof.
Don’t Wait — Take Action Today to Protect Your Ride
Your car is more than just transportation; it’s a trusted companion that deserves your attention and care. By understanding the nuances of auto repair and maintenance, you can extend its lifespan and ensure safety. Don’t let misconceptions hold you back—equip yourself with the right knowledge and tools today. Remember, regular maintenance isn’t just a chore—it’s an act of love towards your vehicle and yourself.
What’s the first small step you’ll take today to improve your vehicle’s performance? Share your plans below and let’s keep the conversation going!