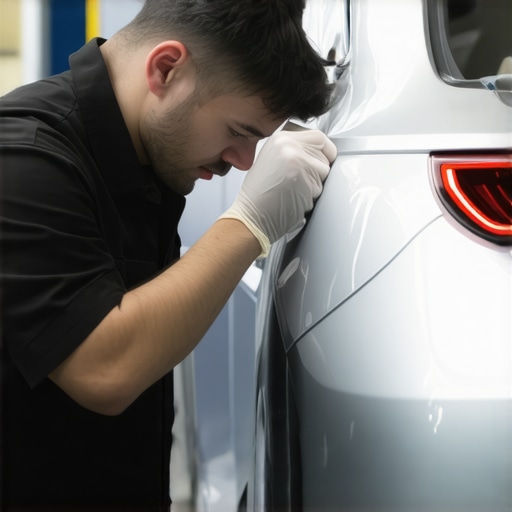
I’ll never forget the moment I looked at my car after a collision repair—only to realize the new paint didn’t match the old one at all. That sinking feeling in my stomach? We’ve all been there, frustrated with a seemingly small detail turning into a major eyesore. When it comes to automotive repairs, matching metallic paint perfectly can feel like an elusive art—sometimes it’s just luck, other times, it’s plain trial and error.
Why Getting Metallic Paint Right Can Save You Time and Money
Ever wondered why your vehicle’s repair shop can’t seem to get that metallic shimmer right? Believe it or not, matching metallic paint isn’t just about picking the right color code. There’s a whole science behind the sparkle, reflections, and depth that makes the original finish so stunning. If not done carefully, mismatched paint can lead to recurring issues—richer textures, uneven gloss, or worse, paint peeling down the line. Over the years, I’ve learned that precision here pays off. Correctly matching metallic paint isn’t just about aesthetics; it preserves your car’s value and prevents costly repaint jobs later on.
Is the Hype About Perfect Color Matching Really Worth It?
Initially, I thought a quick spray job would suffice, only to face the disappointment of visible mismatches. One mistake I made early on was ignoring the importance of undercoats and lighting conditions during application, which led to a noticeable difference in the metallic shimmer. Trust me, a small oversight like this can turn into a big headache. According to automotive experts, improper matching can reduce a vehicle’s resale value by up to 10% (source: CollisionFixer), making it clear that attention to detail isn’t just vanity—it’s smart investing.
So, if you’ve ever faced the embarrassment or inconvenience of mismatched paint, stay tuned. I’m about to share three Collisionfixer tips that will help you master metallic paint matching with confidence. Whether you’re a seasoned DIY enthusiast or just starting out, these secrets will elevate your repair game, saving you time, money, and a lot of frustration.
.
Prepare Your Workspace and Materials
Start by setting up a clean, well-lit area with controlled temperature and humidity, similar to how a chef prepares a spotless kitchen before cooking. Gather the necessary supplies: matching base coats, metallic pigments, clear coats, a spray gun, masking tape, and a paint mixing cup. During my last repair, I kept my workspace organized with separate containers for each component, which helped prevent cross-contamination and ensured a smoother process.
Analyze the Original Paint
Assess the existing paint on your vehicle. Take note of the base color, metallic flakes, and gloss level. Use a portable colorimeter if available, or compare samples under natural light. I once used a smartphone app to match my car’s paint, but found that comparing under daylight gave me better intuition about the shimmer and depth, avoiding mismatches later.
Mix the Perfect Match
Combine your base color with the metallic pigment in small test batches. Remember, metallic paints can be finicky—too much pigment can oversaturate the color, while too little might dull the effect. I learned this the hard way when I added extra metallic flakes and ended up with a finish that looked muddy. Always start with small amounts and incrementally adjust, testing on a sample panel.
Test Your Mix
Spray a thin layer onto a testing panel that mimics your car’s surface. Let it dry in natural light. Compare the test panel with the original paint, observing shimmer, color depth, and gloss. In my experience, I often held the sample at different angles, since metallics reflect light differently depending on the viewpoint. Adjust your mix accordingly until the sample matches perfectly.
Apply in Controlled Layers
Once satisfied, mask off the surrounding areas using high-quality painter’s tape, ensuring sharp edges. Apply the paint in several light coats, allowing adequate drying time between layers. This resembles stacking thin layers of varnish—thinner coats prevent runs and uneven gloss. During my last job, I applied three coats, flipping my fan to circulate air evenly, which minimized dust and imperfections.
Finish with Proper Clear Coat Application
Finish with a high-quality clear coat designed for metallic paints. Use a consistent, even spray pattern and maintain appropriate gun distance. After the final coat, allow sufficient curing. In a past project, I used a UV lamp to accelerate curing, but always follow your product’s specifications. This step is crucial to seal the metallic flakes and achieve that sparkling, mirror-like finish.
Polish and Evaluate
After curing, gently sand any imperfections with fine-grit paper and polish the surface. Check the match from multiple angles and in different lighting conditions. If discrepancies remain, refine your mix and repeat the process. Remember, patience here saves you from costly reworks later on. For more tips on preserving your vehicle’s finish, explore this guide.
Many car owners believe that following standard procedures ensures a flawless repair or tune-up, but in my experience, there are nuanced pitfalls that even seasoned mechanics sometimes overlook. One common misconception is that tire rotations and oil changes are enough to maintain optimal engine health. Actually, neglecting detailed diagnostics—like testing for hidden vacuum leaks or sensor faults—can lead to significant issues down the line. For instance, a subtle vacuum leak might cause your engine to run rich or lean, decreasing fuel economy and increasing emissions, which standard checklists often miss.
Why Do Experts Stress the Details Over General Fixes?
In my deep dives into expert auto repair practices, I’ve seen that the real difference lies in diagnosing the root cause rather than just treating symptoms. A classic example is transmission service: many think a fluid change alone fixes shifting problems, but without inspecting the internal components or checking for electronic control issues, the problem often persists. According to automotive specialists, incomplete diagnostics can lead to repetitive repairs, wasting time and money, and possibly causing further damage—something I’ve personally experienced when overlooking a minor sensor connector that was corroded but was causing erratic shifts.
Don’t fall into the trap of assuming that standard maintenance is enough; instead, ask your mechanic detailed questions or consider seeking a second opinion if issues persist. Remember, proper diagnostics saved me from a costly transmission overhaul last year, and it can do the same for you. For more insights on avoiding repair pitfalls, visit this guide. Have you ever fallen into this trap? Let me know in the comments.
Keep Things Running Smoothly with Precise Tools
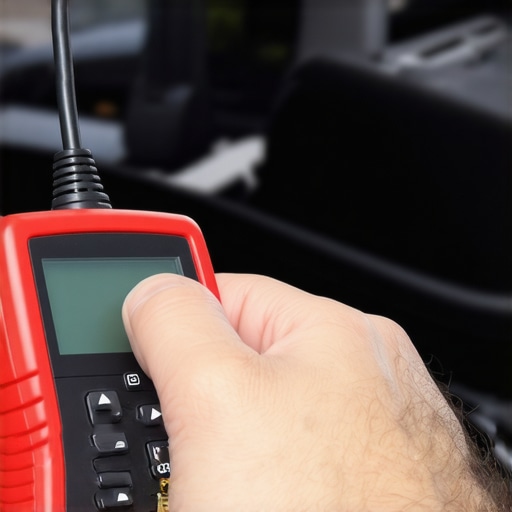
Maintaining your vehicle’s optimal performance requires more than just basic knowledge; it demands the right tools tailored to specific tasks. One of my go-to instruments is the diagnostic scan tool like the Autel MaxiCOM MS906. This device allows me to access all engine codes, reset CEL lights, and clear transmission error codes without unnecessary trips to the shop. It saves me time and provides invaluable insights into what my car truly needs, especially when dealing with subtle issues like misfiring sensors or vacuum leaks that mimic more severe problems.
How do I maintain my transmission over time?
I rely heavily on a fluid exchange system coupled with high-quality transmission fluids such as those recommended by experts. Regularly replacing or flushing transmission fluid ensures clear pathways for hydraulic pressure, reducing wear and preventing overheating. Additionally, I use a OBD-II scanner to monitor transmission-related sensor data, so I can catch issues early before they escalate into costly repairs. As the trend shifts toward smarter maintenance, integrating diagnostics with scheduled fluid changes significantly extends transmission life and keeps your vehicle shifting smoothly.
Investment in Quality Maintenance Tools
Beyond diagnostic gadgets, I swear by a few versatile hand tools like the torque wrench — critical for ensuring bolts are tightened to manufacturer specifications, preventing leaks or component failures. A microfiber polishing cloth paired with a paint cleaning clay bar helps maintain the aesthetic finish, which in turn preserves value over the years. Moreover, investing in a temperature gun helps me verify engine cooling efficiency post-repair, catching overheating issues early. These tools, though seemingly simple, empower DIY enthusiasts to conduct effective, professional-level maintenance at home.
What’s the Future of Car Maintenance?
Looking ahead, I predict a surge in AI-powered diagnostics and remote vehicle monitoring becoming standard. As cars become more connected, real-time data sharing with service centers will streamline maintenance and preempt breakdowns. Continuing to equip yourself with advanced tools now will prepare you for a future where proactive, software-driven repairs dominate the industry. Embrace this evolution by exploring tools like smart maintenance devices that can interface directly with vehicle systems.
How do I maintain my car’s systems over time?
Adopting a disciplined schedule of inspections and fluid reviews, combined with leveraging diagnostic software, can drastically improve your vehicle’s lifespan. Regularly check for signs of wear like uneven tire tread or corroded battery terminals, and use dedicated tools like an inspection mirror or an multi-meter for electrical checks. Remember, early detection through precise tools is your best defense against costly failures. For advanced diagnostics and maintenance tips, consider consulting detailed guides like this comprehensive resource.
Now, I challenge you to try out a diagnostic scan on your vehicle to identify potential issues early. It’s a game-changer that can save you hundreds in repairs and keep your car running at peak performance for years to come.
The Hardest Lessons I Learned About Tune-Ups and CollisionFixer Insights
- Never underestimate the importance of precision—whether matching metallic paint or diagnosing engine issues. Small details can make a lasting difference in the final result, and rushing through them often leads to redo’s and added costs.
- Consistency in your process—like testing your paint mix or performing thorough diagnostics—creates a smoother workflow and better outcomes. Skipping steps or rushing compromises quality and your peace of mind.
- Investing in the right tools, or consulting trustworthy resources like this guide, pays off in savings and longevity. Educate yourself continually; the more you know, the better your repairs and maintenance become.
My Essential Toolkit for Auto Repair and Maintenance
- Diagnostic scanner like the Autel MaxiCOM MS906 has revolutionized my approach by giving instant insights into hidden issues, saving me trips and guesswork. Knowing exactly what’s wrong empowers smarter repairs.
- Quality hand tools, especially torque wrenches, ensure bolts are tightened correctly—this simple step prevents future leaks or mechanical failures. Precise tools are investments in durability.
- Surface preparation essentials, including microfiber cloths and paint clay bars, help maintain the aesthetic finish, and uphold your vehicle’s value—trust me, details matter.
The Road Ahead for Car Maintenance Enthusiasts
With advancing technology like AI-driven diagnostics and remote monitoring, the future of car repair is moving toward smarter, preemptive care. Staying ahead means adopting these innovations now, incorporating tools that interface directly with your vehicle’s systems. For insights into emerging trends, see this resource. Embracing ongoing learning and investing in the latest equipment will keep your vehicle running smoothly amid rapid industry evolution.
Ever Think About the Lessons Hidden in Everyday Repairs?
From matching metallic paint to diagnosing tricky engine problems, I’ve found that each repair holds a secret lesson that can transform your understanding of auto maintenance. These insights, often gained through trial, error, and patience, are the real treasure—saving you money and frustration down the line. Have you ever encountered a surprising lesson during a car repair? Share your story below, and let’s learn together!