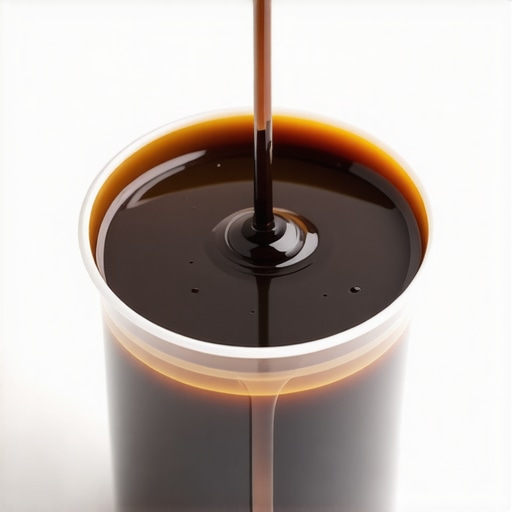
Ever been halfway through a drive when your brake pedal feels oddly stiff, or maybe you notice a strange, dark color in your brake fluid reservoir? That moment of confusion can quickly turn into concern, especially if you’re not sure what it means. I remember the first time I saw my brake fluid resembling a cup of coffee—initially thinking it was just dirt or sludge—but soon realizing that it was a sign something deeper was going on. That lightbulb moment changed how I approach vehicle maintenance forever.
Why Is My Brake Fluid Dark and Coffee-Colored?
Dark, murky brake fluid isn’t just unsightly; it’s a telltale sign that moisture has contaminated the system, or the fluid has been in use far too long. Brake fluid is hygroscopic, meaning it absorbs moisture from the air over time. This absorbed moisture not only lowers the fluid’s boiling point, leading to diminished braking performance, but also causes corrosion inside brake lines and components. The dark coloration is a visual cue that the fluid has oxidized and is losing its effectiveness, which could compromise your safety.
According to vehicle safety experts, neglecting this issue can lead to brake failure, especially during emergency stops. A study by the National Highway Traffic Safety Administration (NHTSA) highlights that brake problems account for a significant portion of vehicle collisions, many of which could be prevented with timely maintenance. Regularly checking and replacing your brake fluid is a simple but crucial step toward ensuring safe braking performance.
What Usually Goes Wrong When Brake Fluid Turns Coffee Color?
Early mistakes I made included waiting too long before flushing my brake system, assuming a quick top-up would suffice. Trust me, that was a costly misconception. Just topping off contaminated brake fluid only masks the problem temporarily; the existing moisture and debris are still lurking inside, gradually damaging your brake components.
If you’ve ever pushed your brake pedal and felt it going all the way to the floor or noticed a spongy response, it’s a clear indicator that your brake fluid needs immediate attention. Ignoring these signs can lead to hefty repairs down the line, including replacing master cylinders or brake lines. I learned this the hard way—don’t make the same mistake.
For a more comprehensive understanding of warning signs, check out our article on [top signs your car needs expert auto repair now](https://collisionfixer.com/top-signs-your-car-needs-expert-auto-repair-now). The key takeaway is that early detection and maintenance are your best defense.
Are you experiencing similar issues with your brake fluid or braking performance? Stay tuned as I walk you through practical steps on how to assess, flush, and maintain your brake system properly. Because when it comes to safety, a little preventative care goes a long way.
Prepare Your Workspace and Gather Necessary Tools
Start by parking your car on a level surface and engaging the parking brake. You’ll need fresh brake fluid, a container to catch old fluid, a wrench set, clear tubing, and protective gloves. I remember my first brake flush; I made sure to wear gloves because brake fluid is corrosive. Having everything ready prevents interruptions once you begin.
Loosen the Brake Bleeder Valve
Locate the brake calipers or wheel cylinders and identify the bleeder screws. Using the appropriate wrench, carefully loosen the bleeder screw about a quarter turn. Don’t remove it completely; just enough to allow fluid to escape when you apply pressure. I once over-tightened and stripped the threads—lesson learned: go slow and gentle.
Attach Tubing and Position Catch Container
Connect clear tubing to the bleeder screw and submerge the other end into your container filled with a small amount of brake fluid. This prevents air from re-entering and keeps the process clean. During my first attempt, I forgot this step and ended up creating a mess, which was frustrating but a good learning experience.
Fill the Master Cylinder and Pump the Brake Pedal
Prior to starting, ensure the master cylinder is topped off with new brake fluid. Have an assistant gently press the brake pedal several times to build pressure. This pushes old fluid toward the caliper and out the bleeder screw. I found that having someone else press the pedal allowed me to focus on opening and closing the bleeder valve properly.
Open the Bleeder and Collect Old Fluid
With the pedal pressed, open the bleeder screw slightly to release fluid and air. Observe the clear tubing for bubbles and dark fluid. Once the flow becomes clear and free of air, close the bleeder screw. Repeat this process—pedal, open, close—until fresh brake fluid emerges, indicating the system is flushed. Be cautious not to let the master cylinder run empty; top it off as needed.
Repeat for All Wheels
Proceed to each wheel in turn, starting with the wheel farthest from the master cylinder—usually the passenger rear—then moving to the driver rear, passenger front, and driver front. During my second auto repair, following this sequence prevented residual air from residing in the system, ensuring optimal brake performance.
Check Brake Pedal Firmness and Fluid Level
Once all wheels are done, pump the brake pedal to ensure a firm feel. Inspect the master cylinder reservoir; it should remain at the maximum level. If the pedal feels spongy or soft, repeat the bleeding process. Regularly checking your brake fluid with a sight glass or dipstick can alert you before issues become serious—don’t wait for warning lights to turn on.
Dispose of Old Brake Fluid Safely
Never pour used brake fluid down the drain or onto the ground. Collect it in a sealed container and take it to a recycling facility or authorized disposal site. Proper disposal prevents environmental contamination and adheres to local regulations. I learned this the hard way when I initially thought I could pour it into the trash—kenneling a fine for improper waste.
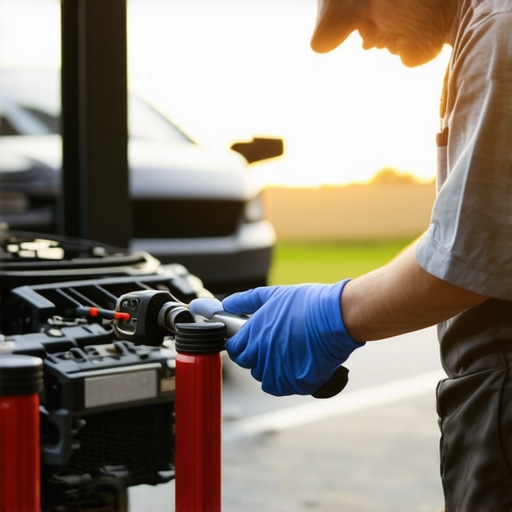 }When it comes to auto repair, many car owners operate under misconceptions that can lead to costly mistakes. One widespread myth is that all transmission repairs require a full overhaul, but in reality, many issues are fixable with selective repairs or upgrades that save money and time. Understanding this nuance can prevent unnecessary expenses—check out how transmission overhauls might actually be an investment that pays off in the long run via [transmission overhaul insights](https://collisionfixer.com/how-transmission-overhauls-save-you-money-in-the-long-run). A common misbelief is that routine maintenance isn’t crucial unless there’s a visible problem. However, expert mechanics emphasize that regular tune-ups and inspections can identify potential issues before they escalate, extending your vehicle’s lifespan. For instance, neglecting early signs of transmission slipping might seem minor but can quickly lead to expensive repairs if overlooked. Did you know that mechanics sometimes see customers delay essential services like oil changes or coolant flushes, assuming their vehicle will be fine? In truth, these small oversights can cause severe damage—consider the impact of a clogged radiator, which can overheat your engine and lead to costly repairs; more details are available on signs of radiator issues [here](https://collisionfixer.com/how-to-tell-if-your-radiator-is-clogged-internally). Another trap is believing that all auto parts sold online are equal, leading many to install cheap, aftermarket components that may fail prematurely. Professional repair shops often recommend OEM parts for critical systems like the transmission and brakes to ensure durability and safety. This presents an advanced question for seasoned DIY enthusiasts: How do you verify the quality of aftermarket parts before installation? Being aware of the subtle differences can mean the difference between a safe, reliable repair and a repeat visit to the shop. For a deeper dive into maintaining optimal vehicle performance, see our [car service tips for safe drives](https://collisionfixer.com/essential-car-service-tips-for-safe-summer-drives). Remember, the devil is in the details—overlooking small nuances can cost you big. Have you ever fallen into this trap? Let me know in the comments.Maintaining your vehicle over the long term requires the right tools and a bit of know-how. I’ve found that investing in quality equipment and understanding some essential techniques can make all the difference in preventing costly repairs and ensuring reliable performance. First and foremost, a good digital code reader is invaluable. Unlike basic scanners, I personally use the BlueDriver Bluetooth Pro OBD2 Scanner, which allows me to diagnose engine issues on the spot using my smartphone, saving trips to the mechanic and speeding up repairs. Additionally, a high-quality multimeter, such as the Fluke 115 True RMS, helps me troubleshoot electrical issues accurately, especially in complex systems like ignition circuits or sensors. To perform effective fluid changes, I rely on a precise pump such as the Mityvac Brake Bleeder and Fluid Extractor, which simplifies removing old brake fluid and ensures proper bleeding without introducing air into the system. When it comes to suspension and steering components, I recommend a set of impact wrenches, like the DeWalt Cordless Impact Driver, for efficient removal of stubborn bolts and nuts—particularly useful during tire or suspension work. As vehicles become more technologically advanced, software tools like AutoEnginuity Scan Data are emerging as essential for accessing manufacturer-specific modules, allowing preemptive diagnostics before issues escalate. Looking ahead, I predict that AI-integrated diagnostic systems will become standard, providing real-time insights and predictive maintenance alerts to car owners. To keep your vehicle in top shape, follow a routine schedule of inspections using these tools, and don’t hesitate to learn new techniques—especially as technology evolves. For example, regularly checking your transmission fluid level and quality can prevent overheating issues; try using a transparent, calibrated syringe for precise measurements—it’s a trick I swear by. How do I maintain my car’s transmission over time? Consistent fluid checks and timely flushes are key, and employing the right tools makes this process straightforward. For more detailed guidance on transmission care, visit [maximize your car’s lifespan with regular tune-ups](https://collisionfixer.com/maximize-your-cars-lifespan-with-regular-tune-ups). Remember, investing in quality diagnostic and maintenance equipment today can save you thousands tomorrow—so gear up and start mastering your vehicle’s health.
Lessons That Changed My Approach to Car Maintenance
Discovering how neglecting small issues like dark brake fluid can escalate into costly repairs was a pivotal moment for me. It taught me the importance of regular checks and the subtle signs many overlook, saving me both money and safety.
One profound insight was realizing that DIY repairs aren’t just about saving money—they’re about understanding your vehicle’s language. Listening to your car’s hints can prevent disasters and empower you as a car owner.
Tools and Resources That Elevate Your Auto Care Game
I constantly rely on tools like the BlueDriver Bluetooth Pro OBD2 Scanner for instant diagnostics, which has revolutionized my troubleshooting approach. The Fluke 115 multimeter ensures electrical systems are in check, and the Mityvac brake bleeding kit simplifies fluid changes, making complex tasks manageable.
For ongoing learning, I turn to reputable sources like CollisionFixer’s detailed guides and how-to articles, which provide trustworthy, up-to-date advice. Investing in quality tools and trusted information empowers you to keep your vehicle running smoothly and safely.
Your Next Step Toward Better Vehicle Care
Embrace the mindset of continuous learning and proactive maintenance. Your car’s health depends on your awareness and effort. With the right knowledge and tools, you can prevent problems before they start and enjoy a safer drive every day.
How do you stay ahead of potential auto repair issues? Share your tips or questions below—I’d love to hear about your experiences and help you get started on your maintenance journey!