
Ever been parked at the grocery store, only to come back and find a deep scratch marring your car’s pristine surface? That sinking feeling of frustration and helplessness hits hard. I remember one evening, stepping out of my vehicle and noticing a long, ugly mark that I knew wouldn’t just buff out with a quick polish. It was a sobering moment—realizing I might have to spend hundreds on repainting or, worse, living with the blemish forever. But then, I stumbled upon a little trick that changed everything, saving me both time and money.
The Realization That Changed My Approach to Car Scratches
For a long time, I believed that deep scratches required professional repainting, which often seemed like the only option. That was until I learned that many of these scars can be minimized—sometimes even entirely concealed—without a costly paint job. It’s a game-changer, especially for those who want to keep their car looking sharp without the hefty price tag. Today, I want to share the secret that helped me restore my vehicle’s appearance and could do the same for you. If you’ve ever faced this problem, stick around—you’re about to discover a practical solution that might surprise you.
Will This Really Work on Deep Scratches?
I understand skepticism. I made the mistake early on of trying DIY fixes without proper knowledge, which sometimes made the damage look worse. But after experimenting with different methods and thoroughly researching, I found that the right technique, when applied carefully, can significantly reduce the visibility of deep scratches. According to industry expert in auto repair, the key is to properly prep the surface and choose the correct materials for the job. For more insights on the common pitfalls, check out this guide to spotting over spray.
Now, let’s get into the practical tips and tricks that will help you minimize those unsightly scratches and keep your car looking its best without heading to the body shop. Are you ready to learn how to tackle this problem head-on?
Prepare Your Workspace and Gather Supplies
Clear a well-lit space in your garage or driveway, and assemble all necessary materials: automotive scratch remover, fine-grit sandpaper (2000 grit or higher), automotive polishing compound, microfiber cloths, masking tape, and a clean water spray bottle. I once set up my workstation under the shade of a tree, which kept my supplies dry and visible. Having everything at hand prevents trips to the store and ensures a smooth repair process.
Clean and Mask the Damaged Area
Thoroughly wash the scratched area using car soap and water to remove dirt and debris. Dry completely with a microfiber towel to avoid water spots. Use masking tape to outline the area slightly larger than the scratch to protect the surrounding paint. This step is crucial for precise application, as I learned when I accidentally polished adjacent areas, leading to uneven shine. Proper masking also prevents accidental damage to undamaged paint.
Sand the Deepest Parts of the Scratch
Dampen the fine-grit sandpaper with water and gently sand along the scratch, following the direction of the scratch. Light pressure is key—think of it as polishing a precious gemstone. I once pressed too hard, creating new scratches that worsened the look, so I learned to keep my strokes light and consistent. This step smooths out rough edges within the scratch and prepares the surface for fillers or polish.
Tip: Keep the area moist during sanding to prevent further damage. Regularly spray water and check progress. After sanding, wipe off residue with a clean microfiber cloth.
Apply Scratch Filler or Automotive Primer
If the scratch has penetrated the clear coat and reached the primer or metal, apply an appropriate filler or primer. Use a fine brush or applicator to gently fill the scratch, avoiding excess buildup. In a recent repair, I carefully dabbed on primer, which filled in the deeper gouges effectively. Allow it to cure as per product instructions—usually a few minutes to an hour. This step restores the surface’s smoothness before polishing.
Polish and Blend the Area
Once the filler is dry, apply a small amount of polishing compound to a microfiber cloth and buff the area using small circular motions. This helps blend the repaired zone with the surrounding paint. I found that patience pays off here—slow, deliberate buffing yields a more seamless finish. For best results, work in sections and periodically check your progress under good lighting.
Image placeholder: 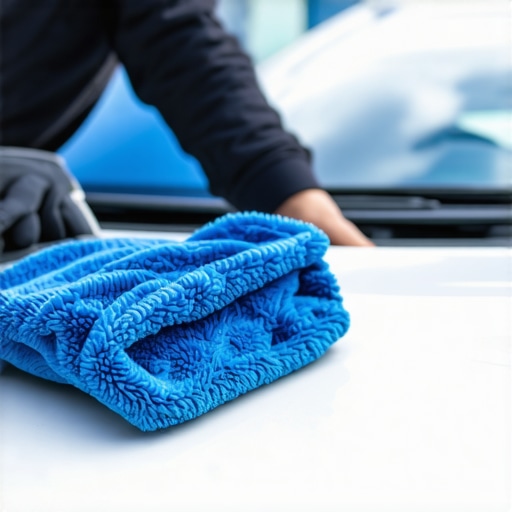
The image should depict the polishing process, showcasing a microfiber cloth buffing a car’s surface after scratch repair.
Final Inspection and Waxing
Inspect the repaired area carefully. If the scratch is less visible or gone, finish by applying a coat of car wax to protect the paintwork. Waxes contain fillers that further smooth the surface and enhance shine. Remember, regular waxing, as discussed in this guide, helps maintain your car’s paint and prevents future scratches from becoming permanent scars.
Many car owners assume that routine tune-ups and auto repairs are straightforward and universally similar, but in reality, there’s a lot of nuance that often gets overlooked. A common mistake is believing that a simple oil change equates to a thorough tune-up, when in fact, a comprehensive tune-up involves multiple systems and must be tailored to your vehicle’s specific needs. Overlooking this can lead to missed issues and unnecessary repairs. Additionally, some assume that modern vehicles require fewer attention to maintenance, but experts warn that neglecting critical service intervals for things like the transmission or cooling system can cause costly damage down the line. For instance, skipping transmission fluid changes might seem harmless but can result in shuddering or costly rebuilds, as detailed in this comprehensive guide on how transmission overhauls can actually save you money in the long run.
A widespread myth is that auto repairs are always costly and only necessary when something breaks. On the contrary, preventive maintenance — like regular fluid checks and system inspections — keeps your vehicle running smoothly and can prevent expensive breakdowns. One mistake many make is delaying minor repairs, thinking they are insignificant. However, minor issues, such as small leaks or worn belts, can escalate quickly if left unaddressed, leading to damage that could have been avoided.
Another aspect often misunderstood involves the complexity of auto diagnostics. Folks frequently rely solely on dashboard warning lights, but these signals are only the tip of the iceberg. Advanced diagnostics involve deep system checks that can identify silent issues before they trigger warning lights. For example, a silent transmission slipping during acceleration may not illuminate a warning but can be detected through expert diagnostics, which can be more cost-effective long-term.
And what about car service frequency? Many assume that following the manufacturer’s recommended service schedule is optional or overly cautious. However, adhering to those schedules is backed by extensive testing and keeps your vehicle at peak performance. Skipping scheduled maintenance on critical components like the transmission or cooling system may seem to save money temporarily but often results in amplified costs later. Learn more about how regular tune-ups can extend your car’s lifespan and improve efficiency.
Finally, understanding the risks associated with DIY repairs is essential. While some minor tasks are safe for amateurs, attempting complex fixes—like fluid flushes or system calibrations—without proper tools or knowledge can cause more harm. This is especially true with transmissions, where improper fluid changes can lead to severe damage, as outlined in articles discussing why transmission overhauls are a worthwhile investment.
So, consider these nuances and common pitfalls the next time you’re planning maintenance or repairs. Being informed helps you make smarter decisions, saving money and prolonging your vehicle’s life. Remember, if you ever feel overwhelmed, professional experts are just a click away—reach out via our contact page. Have you ever fallen into this trap? Let me know in the comments.
Maintaining your vehicle over time requires more than just basic knowledge; it demands the right tools, consistent routines, and an understanding of the evolving technology in auto repair. One essential tool I personally rely on is a high-quality OBD-II scanner. Unlike generic code readers, my advanced OBD-II scanner allows me to dig deeper into transmission and engine diagnostics, catching issues early before they escalate. It’s a game-changer for proactive maintenance, saving time and substantial costs.
Lessons That Changed My Auto Repair Mindset
One of the hardest lessons I learned was that not all deep scratches require a costly repaint. With the right technique, many can be minimized at home, saving time and money. I also realized that rushing into DIY fixes without proper knowledge can worsen the damage, highlighting the importance of preparation and patience. Lastly, understanding the nuances of vehicle paint and surface prep transformed how I approach auto repairs, making the results much more professional-looking.
Tools and Guides That Keep Me Ahead in Car Maintenance
My essential toolkit includes an advanced OBD-II scanner, which allows me to diagnose issues early and avoid costly repairs. I swear by books like this guide on maximizing your car’s lifespan and always keep a quality microfiber cloth and specialized polishing compounds handy because good materials make all the difference. These resources have empowered me to tackle problems confidently and effectively.
Fuel Your Auto Repair Passion and Keep Moving Forward
Remember, maintaining your vehicle’s health is a journey—you don’t have to do it alone. Every repair or tune-up is an opportunity to learn something new and take control of your car’s longevity. Start with small fixes, stay curious, and don’t be afraid to reach out to professionals when needed—like at our contact page. Your car and your wallet will thank you for it. So, what’s the next step you plan to take on your auto repair journey? Share your thoughts below and keep progressing!