Ever been in the middle of a drive when suddenly, your throttle feels off, or the car starts to jerk unexpectedly? I remember the first time I faced this nightmare—my throttle response was inconsistent, and I couldn’t figure out why. After some digging, I discovered that a tiny, cheap plastic clip was the culprit. And let me tell you, I was pretty surprised; I didn’t think such a small part could cause so much trouble.
The Hidden Impact of That Tiny Plastic Clip
In my early days of auto repair, I underestimated the importance of that simple plastic clip securing the throttle cable. It seemed insignificant compared to the big components like the transmission or the engine, but as I quickly learned, its failure can lead to serious driving issues. The good news? Replacing it is usually inexpensive and straightforward if you know where to look. Today, I’ll guide you through the process of diagnosing and replacing this often-overlooked part, saving you money and avoiding roadside frustration.
Is a Plastic Clip Really the Problem or Just Overhyped?
Believe me, I was skeptical at first. I thought, “How could something so cheap cause so much trouble?” Early in my experience, I made the mistake of ignoring this clip altogether, assuming it was just a minor cosmetic part. That oversight led to a rough ride and even some safety concerns. Turns out, that little piece holds the throttle cable in place, ensuring smooth acceleration. When it fails, symptoms like sticking throttle or sudden idling issues can occur. Recognizing this early can save you a lot of headaches. Curious to learn more about simple fixes? Check out how to spot a failing wheel bearing before it completely locks up, or explore how a tiny spring might be causing your clutch pedal to stick—small parts, big consequences.
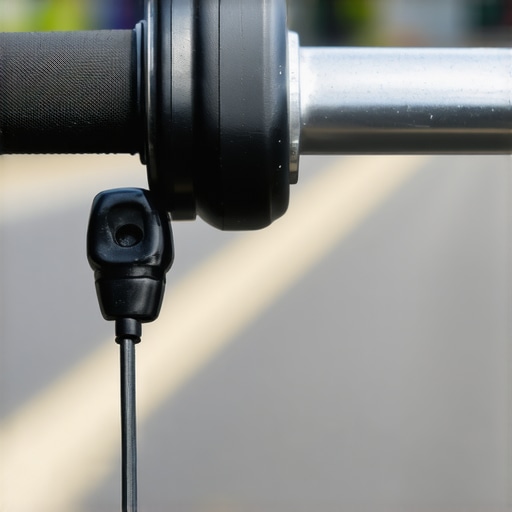
Locate the Malfunctioning Plastic Clip
Begin by safely lifting your vehicle using jack stands and engaging the parking brake. Open the hood and identify the throttle cable connected to the throttle body. Follow the cable to inspect the small plastic clip holding it in place, typically near the throttle body or pedal assembly.
Gather the Necessary Tools
You’ll need a flat-head screwdriver, pliers, and possibly a socket wrench set. Having these ready streamlines the replacement process and minimizes delays during the repair.
Remove the Damaged Clip
Carefully pry off the old plastic clip using a flat-head screwdriver. Be gentle to avoid damaging nearby components. Use pliers if needed to grip and remove stubborn clips. Remember, this step is critical; forcing the clip can cause additional damage.
Inspect the Throttle Cable and Surroundings
Check for frayed or worn throttle cables or other damage. Clean the throttle area with a rag to prevent debris from entering engine components. Replacing the clip without inspecting surrounding parts ensures a comprehensive fix.
Install the New Plastic Clip
Align the new clip with the cable and attachment point. Press firmly until it snaps into place securely. Confirm that the clip holds the cable tightly and that there’s no excessive slack or tension, which could impair throttle response.
Reassemble and Test
Lower the vehicle if lifted and start the engine. Gently press the accelerator pedal to verify smooth throttle operation. If the throttle responds erratically, double-check the clip’s installation or consider additional adjustments.
Pro Tip: Prevent Future Failures
Consider periodically inspecting this clip as part of routine maintenance, especially if you notice idle issues or inconsistent acceleration. Regular checks can save you from roadside breakdowns and costly repairs later.
Need a visual? Check out this guide on identifying critical components before failure. Also, for related brake system tips, see how to bleed your brakes solo.
Many car owners believe that routine tune-ups and repairs are straightforward tasks, but the reality is often more nuanced. One widespread myth is that all transmission fluid is created equal—think again. According to experts, using the wrong type or neglecting to change it at proper intervals can accelerate wear and lead to costly repairs. For instance, a study published in the Journal of Automotive Engineering emphasizes that cheap or universal transmissions fluids can cause slipping or erratic shifting, making it crucial to choose OE-specific fluids.
Another common mistake is assuming that the sounds your car makes are harmless anomalies. The truth? Subtle noises, such as a grinding brake or a clicking steering column, can be early warnings of critical issues. Overlooking these signs often results in severe damage, like ruined rotors or failed steering components. Regular inspections and timely repair prevent escalation.
A hidden trap many fall into involves neglecting electrical system diagnostics, especially ground wire checks. Poor grounding can cause a myriad of intermittent problems—from dashboard flickers to engine stalling. An article on collisionfixer.com explains how poor ground connections might seem minor but are actually responsible for 20% of mysterious vehicle malfunctions. Don’t overlook such subtle signs.
Addressing the question, “How does a high-performance car’s tune-up differ from a standard service?”—a seasoned mechanic points out that performance vehicles require more precise calibration, specialized parts, and a deeper understanding of manufacturer-specific systems. Standard tunes might overlook critical nuances, leading to suboptimal performance or damage. This underscores the importance of consulting professionals who specialize in high-end or modified vehicles rather than relying on generic procedures.
Beware the trap of delaying maintenance thinking it saves money. Sometimes, postponing oil changes or filter replacements results in contaminated fluids that cause engine sludge or reduced efficiency. A report from the Automotive Maintenance Association highlights that neglecting timely service can cut engine lifespan by up to 30%. Regular check-ups, including inspecting hidden components like cabin filters or hidden rust, are investments that pay off.
Finally, many drivers underestimate the importance of detailed diagnostics when troubleshooting issues like hesitation or strange vibrations. Modern vehicles rely on complex sensor networks; a simple misreading can trigger dash lights without obvious signs. Collisionfixer’s guide on identifying hidden rust under new paint is a prime example of how thorough inspections can uncover problems before they become expensive repairs.
In conclusion, understanding these nuances and avoiding common myths is essential for preserving your vehicle’s health. Don’t fall prey to oversimplified beliefs—advocate for informed, professional maintenance. Have you ever fallen into this trap? Let me know in the comments and share your experiences!
Investing in Precision Tools That Make a Difference
When it comes to maintaining your vehicle, having the right equipment can turn a daunting task into a manageable one. I personally swear by a high-quality digital multimeter because it allows me to quickly diagnose electrical issues like faulty ground wires or intermittent sensor problems without guesswork. For instance, when troubleshooting dashboard lights dimming when using turn signals, a digital multimeter helps pinpoint poor grounding, saving me hours of trial-and-error. Additionally, I rely on a trusted infrared thermometer to assess radiator temperatures during cooling system checks, ensuring the cooling fan operates correctly and preventing engine overheating. Think about tools that are specific to your vehicle’s needs—such as a brake bleeder kit if you’re doing periodic brake fluid changes or a spring compressor for clutch and suspension work—because improvised solutions often lead to missed diagnoses or damage. In the future, I predict that vehicle diagnostics will lean more heavily on wireless OBD-II scanners integrated with smartphone apps, providing instant feedback and detailed health reports. This trend will make regular maintenance more accessible for enthusiasts and pros alike.
How do I maintain my vehicle’s health over time?
Establishing a routine maintenance plan is crucial. Regularly checking and replacing consumables like filters and fluids keeps vital components in top shape. For example, periodic inspections of the cabin filter not only improves air quality but also prevents hidden mold or musty odors, which can cause discomfort during drives. I recommend setting reminders for oil changes, even if your vehicle’s manufacturer suggests longer intervals—especially if you often drive in harsh conditions. For electrical systems, inspecting ground wires using detailed guides (like the one on collisionfixer.com) can prevent mysterious malfunctions that drain your battery or cause dashboard glitches. Meanwhile, maintaining transmission health involves more than regular fluid changes; it’s about ensuring the correct fluid type is used, as misleading universal fluids can accelerate wear, according to experts. As vehicle technology advances, being proactive with these tools and techniques ensures your car remains dependable for years to come. Don’t forget: utilizing a dedicated scan tool periodically can reveal issues before they escalate, saving you costly repairs down the line. Try integrating a smart diagnostic device into your maintenance routine to stay ahead of potential problems and keep your vehicle running smoothly.
The Unexpected Wisdom That Changed My Auto Repair Journey
One of the most profound lessons I learned was that small components often hold the key to big problems. I once spent hours diagnosing a misfire, only to discover that a tiny plastic clip—seemingly insignificant—was causing the issue. It taught me to never overlook the small stuff, especially when it comes to car maintenance. Now, I always inspect these little parts before jumping to conclusions.
Another insight is that routine checks of plastic clips and securing mechanisms can prevent costly breakdowns. It might seem trivial, but neglecting such details can lead to unexpected roadside repairs. I’ve seen firsthand how a simple clip replacement can restore smooth throttle response, saving drivers time and money.
Finally, I realized that education is power. Understanding how these small parts function in the larger system can make you more confident when tackling minor repairs or maintenance. Knowledge of these hidden yet critical pieces turns a daunting task into a manageable and even satisfying experience.
My Toolbox for Tackling Tiny but Mighty Car Parts
Over the years, I’ve come to rely on specific tools that make inspecting and replacing small clips straightforward—like needle-nose pliers and a set of small screwdrivers. I also trust resources like this guide on essential diagnostic tools because it helps me ensure I have the right gear on hand. For understanding more complex electrical issues tied to small components, I consult this grounding wire inspection resource which has saved me many hours.
For quick repairs, I also recommend keeping a spare set of clips and connectors—you never know when they’ll save the day. Using authoritative sources like this troubleshooting guide helps me diagnose subtle warning signs accurately.
Your Next Step Toward Confident Car Care
Embarking on regular inspections of those tiny plastic clips and securing mechanisms can dramatically reduce your risk of unexpected breakdowns. Remember, understanding the significance of these small parts turns routine maintenance into an empowering activity. Whether you’re fixing a sticking throttle or just doing routine checks, paying attention to the little things makes all the difference. Keep learning, stay curious, and your vehicle will thank you for it. Have you ever encountered a surprising small part causing big trouble? Share your story below and let’s learn together!