Ever had that sinking feeling when your car won’t start on a chilly morning, and you realize it’s due to those pesky corrosion spots on your battery terminals? I’ve been there more times than I care to admit, fiddling with wires, hoping my trusty vehicle would just cooperate. That frustrating moment is a common experience for many drivers, and it often leads to a simple question: how can I quickly and effectively clean those corroded battery terminals without turning it into a daunting repair mission?
Why Corrosion on Battery Terminals is a Car Owner’s Hidden Enemy
Corrosion isn’t just unsightly; it can seriously hinder your car’s performance. When battery terminals develop a white, crusty buildup, it disrupts the electrical connection, leading to starting issues or even unexpected stalling. Over time, this corrosion can deepen, potentially damaging the battery itself or the cables attached. The good news? Most of these issues can be tackled with straightforward methods, keeping your vehicle running smoothly and saving you money.
If you’re like me, you might underestimate the importance of maintaining clean terminals. I once replaced a perfectly working battery only to discover that a simple cleaning might have extended its life significantly. Early on, I made the mistake of pouring household vinegar directly onto the terminals without disconnecting the battery, which caused sparks and made things worse. Trust me, that’s a mistake you want to avoid. Proper technique and a good understanding of the process can turn this minor maintenance task into a simple, effective routine.
Did you know that corroded battery connections can also contribute to more significant electrical issues, like activating warning lights or causing uneven engine performance? According to automotive experts, keeping your battery terminals clean and corrosion-free is one of the simplest yet most overlooked ways to ensure your vehicle’s electrical system stays healthy. Check out this article on why your battery dies unexpectedly for more insights.
So, if you’re tired of dealing with dead batteries on cold mornings or just want to safeguard your vehicle’s electrical health, you’re in the right place. I’ll walk you through the best way to clean those corroded battery terminals in a quick, safe, and effective manner. Ready to get your car back to peak performance? Let’s dive into the practical steps you can follow right now.
Disconnect the Battery Carefully
Begin by turning off your vehicle and removing the keys from the ignition. Using a wrench, loosen the nut securing the negative terminal clamp, then disconnect it and set it aside. Repeat for the positive terminal. Remember, always disconnect the negative first to prevent sparks. I once skipped this and caused a small arc, which scared me and made me realize the importance of following safety steps.
Prepare Your Cleaning Solution and Tools
Mix a tablespoon of baking soda into a cup of water to create an effective neutralizer for corrosion. Grab an old toothbrush or wire brush, rubber gloves, safety goggles, and a clean cloth. This homemade solution is a gentle yet powerful way to dissolve corrosion without harsh chemicals. I prefer baking soda because it’s safe and readily available, making the process less intimidating for DIY enthusiasts.
Apply the Cleaning Solution and Scrub
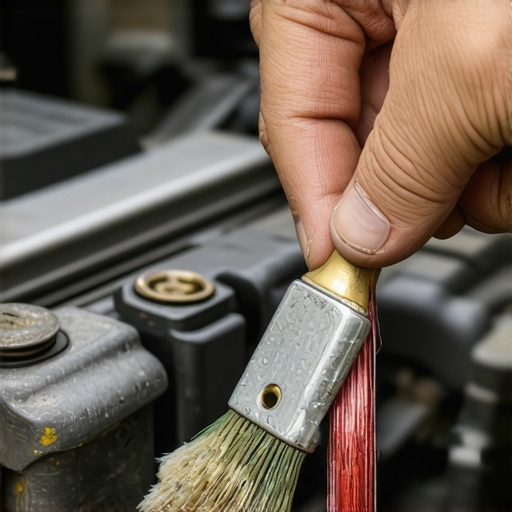
Dip the toothbrush into the baking soda mixture and scrub the terminals and cable connectors thoroughly. The fizzing action helps break down the alkaline corrosion. For stubborn spots, apply a bit more baking soda paste and let it sit for a couple of minutes before scrubbing again. You can think of this as similar to cleaning a stubborn stain on a car’s paint—patience and persistence pay off. During my first attempt, I wore safety goggles to avoid splashes, which saved me from an irritating eye sting.
Rinse and Dry Everything
Use a clean, damp cloth to wipe away the residue and baking soda. Make sure no paste remains, as leftover baking soda can cause further corrosion. After wiping, dry the terminals and cables thoroughly with a clean towel or paper towels. A quick drying ensures no moisture remains that could re-start corrosion or cause electrical issues. I once rushed this step and felt the terminals get warm shortly after, reinforcing the need for proper drying.
Reconnect the Terminals Correctly and Securely
Attach the positive cable first, tightening the nut securely, then do the same for the negative cable. Make sure the connections are snug but not over-tightened to avoid damaging the terminals or cables. Remember, a loose connection can cause starting problems or erratic electrical behavior, as I learned when my dash lights flickered after a poor connection. Tight but not overtightened is the sweet spot.
Test Your Work and Examine Further Issues
Start your car and observe the dashboard. If warning lights such as the check engine light are still on, or if you’re experiencing other issues like rough idling, it might be time to check related components or inspect underlying sensors. Properly cleaned terminals contribute to better electrical flow, but persistent problems may indicate deeper issues needing professional attention.
 Many car owners believe they know the basics of auto maintenance, but lurking beneath common advice are nuanced pitfalls that can derail even seasoned enthusiasts. For instance, a widespread myth is that regular oil changes alone suffice to keep a transmission healthy; however, neglecting transmission fluid quality and overlooked sensors can lead to shuddering and shifting issues not solved by simple oil swaps. Advanced mistakes like ignoring the significance of ground wires or underestimating the impact of faulty sensors can cause unpredictable symptoms, including engine hesitation or dashboard warning lights that stubbornly refuse to turn off. Proper diagnosis relies not just on surface checks but on understanding the complex interplay of sensors and mechanical components, such as the role of the throttle position sensor in transmission responsiveness. Experts emphasize that misdiagnosing or bypassing these subtle signals can turn a simple repair into costly replacements. According to industry studies, neglecting these nuanced details can reduce vehicle lifespan and inflate repair costs significantly. For example, a small vacuum leak during acceleration may seem minor but can trigger multiple system errors, leading to misdiagnosis. Ensuring comprehensive testing—like analyzing reference voltages or inspecting hidden wiring—can save time and money. Also, be wary of the trap where drivers think a transient warning light indicates a minor glitch—more often, it signals an underlying sensor malfunction or wiring issue that, if unresolved, could cause more severe damage later. Dive deeper by checking out related insights on how faulty sensors can mimic engine problems or lead to transmission shuddering, which aren’t always addressed by traditional repairs. Don’t let these subtle errors ruin your vehicle; proper expertise and awareness can make all the difference. Have you ever fallen into this trap? Let me know in the comments.Maintaining your vehicle over time requires the right tools and a structured approach. As cars become more technologically advanced, investing in quality diagnostic equipment is essential. I personally rely on an automotive code reader like the OBDLink MX+ because it provides comprehensive real-time data and compatibility with multiple car brands. This device allows me to swiftly identify and clear error codes, such as those related to transmission issues, which can prevent costly repairs down the line. Beyond diagnostic tools, a good set of precision screwdrivers, quality torque wrenches, and specialty shop towels are indispensable during routine tune-ups and minor repairs. For example, using a torque wrench ensures that components like wheel lug nuts or transmission bolts are tightened to manufacturer specifications, preventing future problems. Additionally, I recommend maintaining a digital maintenance log using software like CarFax Mobile or even a dedicated spreadsheet. Tracking parts replacements, fluid changes, and sensor diagnostics helps in diagnosing long-term problems early, saving money and time. Looking ahead, the trend is moving toward integrating IoT-based sensors that provide real-time health updates right to your smartphone, making proactive maintenance more accessible.
How do I maintain my auto tools and diagnostics over time?
Regular calibration and proper storage of your tools extend their lifespan. For instance, recalibrating your torque wrench annually ensures it remains accurate, which is critical for preventing over-tightening or under-tightening components. I also ultrasonic-clean my diagnostic connectors periodically, as dirty contacts can lead to unreliable readings. Investing in a small handheld ultrasonic cleaner, accessible online, makes this process straightforward and efficient. Moreover, keep software and firmware on your scan tools updated; manufacturers release updates to interpret new vehicle codes or improve compatibility. Finally, consider joining local or online automotive enthusiast communities, where members share maintenance tips and updates about emerging tools. This collective knowledge can help you discover specialized gear, like transmission pressure testers, which are vital for diagnosing complex issues beyond basic code reading. Dive into this proactive approach today by scheduling a calibration session for your diagnostic tools. Properly maintained tools mean faster diagnostics and fewer surprises during repairs, helping you keep your car running smoothly for years to come.
Lessons Car Owners Only Discover After Many Mistakes
- One of the biggest insights I gained was the importance of disconnecting the negative terminal first—it’s a small step that prevents sparks and keeps safety at the forefront. Skipping this can lead to unexpected shocks or damage, which nobody wants.
- I used to think that pouring household vinegar directly onto rusted terminals was enough—until I understood the value of neutralizing agents like baking soda, which is gentle yet incredibly effective, extending battery life and saving money.
- Patience is key. I found that scrubbing corrosion without rushing yields much cleaner terminals and better electrical contact. Rushing often causes missed spots or damage, making the cleaning less effective over time.
- Drying thoroughly after cleaning prevents the re-formation of corrosion. I learned this the hard way when moisture led to quicker buildup—making proper drying an essential step in the process.
Tools and Resources That Elevated My Maintenance Routine
- OBDLink MX+: This diagnostic scanner replaced guesswork with accurate readings, enabling me to identify issues early before they became costly, especially useful for detecting sensor glitches that can mimic bigger problems.
- Ultrasonic Cleaner: Periodic cleaning of connectors and tools kept my diagnostics reliable and extended their lifespan, ensuring each repair was precise and trustworthy.
- Torque Wrench: Properly torquing battery terminals and other components meant I avoided over-tightening, which can cause damage. It’s a small investment that saves headaches and parts in the long run.
- Dedicated Maintenance Log: Tracking every service and repair kept me on top of my vehicle’s health, allowing for proactive decisions instead of reactive fixes.
Your Next Step in Vehicle Care Starts Today
Understanding the subtle nuances of battery terminal maintenance isn’t just about avoiding a dead car on a cold morning—it’s about taking control of your vehicle’s longevity and performance. With the right tools, knowledge, and a bit of patience, you can keep your auto systems running smoothly and confidently face any road ahead. Don’t wait for a breakdown; start integrating these habits into your routine now and experience the difference firsthand.