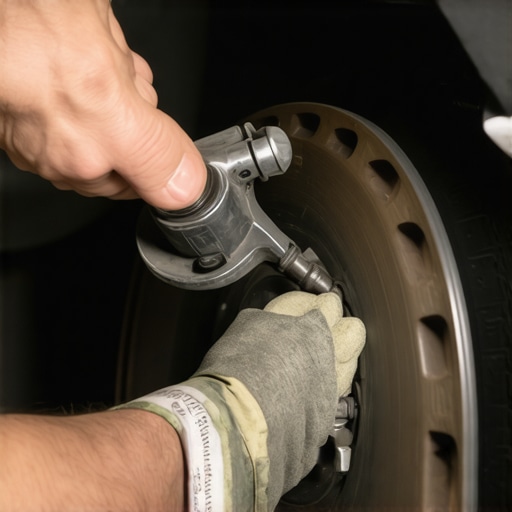
I remember the first time I attempted to bleed my brake system alone. It was early Saturday morning, and I thought, “How hard can this be?” I had the basic tools, a trusty buddy to hold the pedal, and a vague idea of what to do. Turns out, a lot can go wrong when you’re trying to juggle multiple tasks without the right gear. I ended up wasting more time and brake fluid than I care to admit, feeling frustrated and wondering if I was missing some secret trick.
Then, it hit me—there had to be a better way. Something affordable, straightforward, and reliable enough to make brake bleeding a manageable job for just one person. That’s when I stumbled upon this little gem: a inexpensive tool that costs around $30. Trust me, this isn’t just another gimmick; it’s a game-changer.
Today, I want to share with you how this simple tool transformed my DIY approach and how it can do the same for you. Forget complicated setups or multiple helpers—this device makes brake bleeding not only feasible but surprisingly easy.
Why Many DIYers Struggle to Bleed Brakes Alone (And How to Fix It)
Before I discovered this tool, my biggest headache was air pockets hiding in the brake system. No matter how many times I tried to bleed them, tiny air bubbles kept sneaking in, causing spongy brakes or, worse, a pedal that sank to the floor. I made the mistake of thinking that just cracking open the bleeder valve and squeezing the brake was enough. Spoiler alert: that’s only half the battle.
The real secret is maintaining a steady flow of fresh fluid and ensuring no air gets back in. That’s tough to do solo without a proper setup. Early on, I learned the hard way that rushing or improvising often led to incomplete bleeding and unsafe brakes. In fact, a study by the National Highway Traffic Safety Administration highlights that incorrect brake maintenance is a leading cause of vehicle accidents—underlining why proper bleeding is critical.
With this affordable tool, the process becomes much more controlled. It creates a one-way flow that prevents air from re-entering the system and keeps you from needing a second set of hands. Imagine being able to finish your brake job confidently, knowing that you’ve minimized the risk of future brake failure.
Are you tired of struggling alone with this job? Do you worry about whether your brakes are fully bled? If so, stick around. Next, I’ll show you how to use this device effectively, along with tips to make the process smooth and safe. Let’s get those brakes working like new, without the extra help or hassle.
Prepare Your Workspace
Begin by parking your vehicle on a level surface, engaging the parking brake, and opening the hood. Gather all necessary tools, including the specialized one-way brake bleeding kit, a clear hose, and container for old brake fluid. Ensure the engine is off and the wheel wells are accessible.
Locate and Access the Brake Bleeder Valves
Identify the brake calipers or wheel cylinders and find the bleeder valves; these are usually small valves with a nipple. Remove the protective caps if present. Remember: consult your vehicle’s manual for exact locations. I once overlooked a rear wheel, wasting time until I realized the bleed screw was tucked behind the suspension. Proper identification saves frustration.
Attach the Bleeding Device
Connect the inlet of your bleeding kit’s hose onto the bleeder valve, and place the other end into a container partially filled with fresh brake fluid or brake fluid-compatible fluid to prevent air from being drawn back. Tighten the connection securely; a loose fit can lead to air ingress and incomplete bleeding.
Utilize the One-Way Valve Effectively
This is the core of your improvement. Pump the device gently to pressurize the brake system; the one-way valve prevents air from flowing backward. Now, gently open the bleeder valve—you should see old fluid and air bubbles flow into your container. I once kept pressing without opening the valve enough; this delayed air removal. Open it just enough to allow a steady stream but not so much that fluid leaks uncontrollably.
Maintain Firm and Steady Pressure
Apply consistent pressure to the bleeding device. Think of it as pressing a bicycle tire pump; erratic pressure causes air pockets to re-enter. When the fluid flow slows or stops, close the bleeder valve, then release the pressure from your device. Repeat this process until the new brake fluid runs clear and free of bubbles. I noted that a consistent rhythm—like a metronome—marked my success in achieving firm, bleed-free lines.
Refill and Check Brake Fluid
Periodically, check your master cylinder reservoir. Keep it topped with fresh brake fluid specific to your vehicle. This prevents the system from drawing air through the master cylinder. After finishing each wheel, top off the fluid again. Remember, low fluid levels can cause the process to fail, or worse, introduce air back into the lines.
Test Your Brakes and Clean Up
Once all wheels are bled, gently press the brake pedal a few times to ensure firm resistance. Clean all spilled brake fluid immediately, as it damages paint and plastics. Dispose of used fluid responsibly. I once neglected this step, and the next day, I noticed some paint peeling—lesson learned.
Final Tips for Success
Always use high-quality brake fluid and protect your eyes from splashes. If you encounter stubborn air pockets, repeat the process or use a slightly higher pressure with your bleeding tool. Remember: patience and consistency are key. This technique turns what once seemed a daunting task into a manageable DIY project, saving you time and money.
Learn more about brake system issues and how proper maintenance can ensure safety on every drive.
Many car owners operate under misconceptions regarding tune-ups, car service, and auto repairs. One prevalent myth is that a simple tune-up can fix all ongoing issues without considering a comprehensive diagnosis. In reality, modern vehicles require precise diagnostics; a tune-up is just one part of maintaining optimal performance. Overlooking nuanced problems, like transmission slipping or subtle sensor failures, can lead to costly repairs down the line. For instance, some believe that transmission fluid changes are solely for luxury cars, but regular service can prevent major overhaul expenses, as detailed in [how transmission overhauls save you money in the long run](https://collisionfixer.com/how-transmission-overhauls-save-you-money-in-the-long-run).
A common trap is assuming that auto repair shops always use genuine parts, but, according to industry reports, many aftermarket parts may compromise vehicle safety and durability if not carefully vetted. This is why choosing a reputable service provider is crucial; contact us for reliable expert assistance.
Another misconception is that engine repairs are always expensive and time-consuming. Advanced diagnostic tools now allow for quick identification and targeted fixes, avoiding unnecessary disassembly. For example, cleaning a dirty mass air flow sensor can restore engine efficiency without costly repairs, which you can learn [here](https://collisionfixer.com/how-to-clean-a-dirty-mass-air-flow-sensor-in-minutes).
Do you believe in the myth that regular inspections are unnecessary if your car runs fine? Think again—many issues are invisible until they cause noticeable problems, so routine maintenance and inspections are vital to prevent unexpected breakdowns. Discover more about why your car needs consistent attention in our [maximizing your car’s lifespan with regular tune-ups](https://collisionfixer.com/maximize-your-cars-lifespan-with-regular-tune-ups).
Ever fallen into this trap or held a misconception? Share your experience in the comments and let’s clear the air around auto maintenance myths.Maintaining your vehicle over time requires more than just seasonal oil changes and basic inspections; it calls for precise tools, consistent methods, and proactive care strategies. One essential piece of equipment I rely on is a high-quality code scanner like the Autel Maxisys Elite. Unlike generic OBD-II readers, this device offers comprehensive diagnostics, capturing real-time data and referencing manufacturer-specific codes that help pinpoint issues such as transmission or sensor faults early before they escalate. I personally use it for every significant tune-up or repair, saving time and avoiding unnecessary parts replacements.
How do I maintain my vehicle’s health over years?
Regular fluid analysis is underrated but incredibly effective. For example, testing coolant and transmission fluid for contamination or degradation can prevent costly overhauls, aligning with the insights from this detailed resource. Additionally, employing an IR thermometer to check engine and exhaust temperatures helps identify cooling problems instantly, maintaining optimal performance. Future trends point toward integrated vehicle health monitoring systems that communicate with your smartphone, allowing ongoing, real-time diagnostics. Embracing these advances can make maintenance less reactive and more predictive. But don’t forget the basics: consistent inspection of belts, hoses, and electrical wiring ensures you catch minor issues before they become major headaches. Want to boost your auto repair game? Try investing in a professional-grade scan tool and get in the habit of analyzing fluids periodically—your car will thank you for the long-term performance. Check out our recommended diagnostic tools and techniques for a comprehensive approach.
Lessons That Changed My Approach to Auto Repair
One of the most eye-opening lessons I learned was that patience and the right tools can turn a daunting job into an achievable task. Years ago, I believed that brake bleeding required a skilled hand and a second helper; now I realize that investing in a quality one-way bleeding device can save time and prevent frustration. I also discovered that understanding the nuances of fluid flow and air entrapment is crucial—it’s not just about cracking a valve but maintaining consistent pressure and clarity in the system. Lastly, I realized that every repair adds confidence, transforming a once intimidating task into a satisfying skill, ultimately empowering me to keep my vehicle safe and reliable.