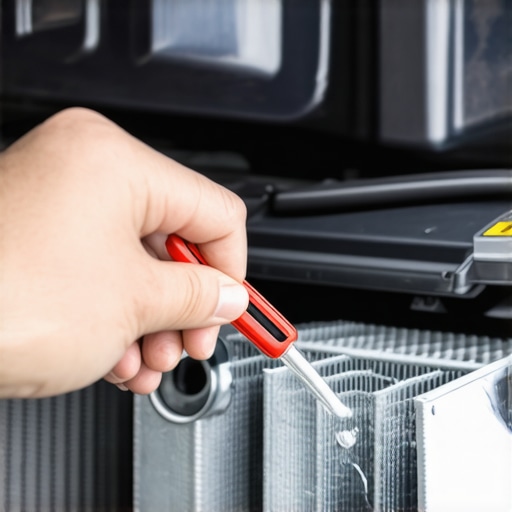
The sun was a searing white orb over the interstate when my dashboard started screaming at me. I watched, paralyzed, as the needle on my temperature gauge climbed into the red zone like it was on a mission. A moment later, a thick, sweet-smelling cloud of white steam erupted from my hood, obscuring the road ahead. I pulled over, heart hammering against my ribs, convinced my engine was toast. I spent the next hour on a baking shoulder, envisioning a four-figure repair bill and the death of my trusty sedan. It was a visceral, expensive-feeling nightmare that could have been avoided by a part that costs less than a decent burger. [image]
The Smallest Part You Are Currently Ignoring
I have spent more hours than I care to admit under a hood, but even I fell into the trap of overcomplicating things. Early in my DIY journey, I once authorized a $400 water pump replacement because I was convinced the system wasn’t circulating. The mechanic, a grizzled guy who had seen it all, swapped the pump but then pointed at my radiator cap. “This was your real problem,” he said, showing me a perishing rubber seal. I had completely missed the fact that a cooling system is only as good as its ability to hold pressure. It is one of those essential car service tips for safe summer drives that we all hear but rarely act upon until it is too late. When you maximize your cars lifespan with regular tune ups, you usually think about spark plugs or oil, but the humble radiator cap is the silent guardian of your block. According to a study by AAA, cooling system failures are the most common cause of highway breakdowns, yet most drivers never check their pressure caps.
Can a Ten Dollar Part Really Save an Entire Engine?
It sounds like a marketing gimmick, right? How can a simple piece of plastic and metal prevent a catastrophic meltdown? The physics are actually pretty straightforward. Your engine’s cooling system is pressurized to raise the boiling point of the coolant. If that pressure escapes because of a faulty cap, your coolant will boil over at a much lower temperature, leading to air pockets and warped heads. I’ve seen cases where why your engine temperature spikes while idling is simply because the system cannot maintain the 15 or 16 PSI it needs to function correctly. I used to think that as long as there was green fluid in the reservoir, I was golden. But the reservoir is just an overflow tank; the real magic happens in the sealed loop. A tiny crack in the cap’s gasket is like a pinhole in a balloon—it ruins the whole pressure dynamic. If you ignore it, you’ll eventually find that the reason your engine coolant looks like chocolate milk is because your head gasket finally gave up the ghost under the heat. Have you ever felt that sinking feeling of seeing steam from your hood? Did it turn out to be something simple, or did it break the bank? I’d love to hear about your roadside lightbulb moments in the comments below. We’re going to look at exactly how to test this tool and why it’s the best ten dollars you’ll ever spend on your car.
Never Touch the Cap When It Is Hot
Before you even think about twisting that metal disc, you have to let the engine rest. I learned this the hard way on a humid July afternoon. I thought the engine had cooled enough, but as soon as I turned the cap, it launched like a mortar shell, followed by a geyser of scalding coolant that narrowly missed my face. I spent the next three hours cleaning the driveway and nursing a minor burn on my forearm. Pressure is a literal physical force looking for an exit; do not give it one through your skin. Wait at least two hours after driving, or better yet, check it first thing in the morning before you ever turn the key. If you are noticing strange noises or leaks during this cooling period, it might be one of the top signs your car needs expert auto repair now rather than a simple DIY fix.
Scan the Rubber for Micro-Cracks
Once the system is cold, remove the cap and look at the underside. You are looking for the large rubber gasket that sits against the radiator neck. It should be supple, clean, and free of any tears. If the rubber looks like a dried-out lakebed or feels brittle, it is dead. Just like the 15 dollar gasket that stops your persistent oil leak, this tiny piece of rubber is the only thing standing between a healthy engine and a warped cylinder head. I once saw a client ignore a tiny nick in this seal, thinking it was ‘just a scratch.’ Two weeks later, he was back with a blown head gasket because the system couldn’t hold pressure, causing his coolant to boil off into the atmosphere. 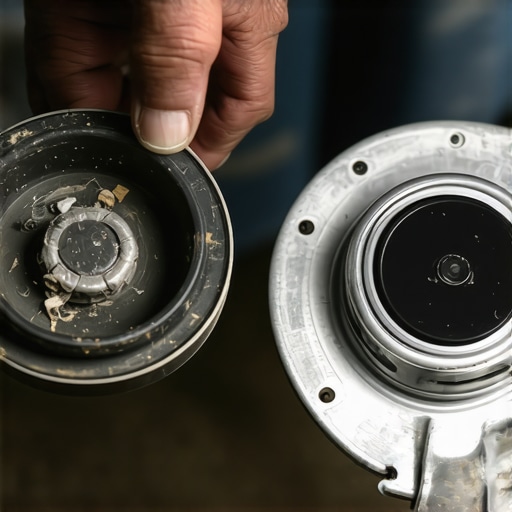
Does Your Spring Still Have Fight?
The radiator cap isn’t just a lid; it is a pressure relief valve. Inside, there is a heavy-duty spring that is calibrated to a specific PSI, usually stamped right on the top of the metal. If that spring loses its tension, it will let coolant escape into the overflow tank too early, leading to a constant cycle of overheating. You can test this by pushing the plunger with your thumb. It should be incredibly difficult to move. If it feels mushy or moves with little resistance, the spring is fatigued. Many drivers overlook this during a maximize your cars lifespan with regular tune ups session, yet it is arguably more critical than a fresh set of air filters.
Check the Radiator Neck for Debris
It is not always the cap’s fault. I have spent hours diagnosing ‘mystery’ overheating issues only to find that the radiator neck—where the cap actually seats—was pitted or covered in crusty mineral deposits. If the surface isn’t smooth, the cap cannot form a vacuum-tight seal. Use a clean rag to wipe the inner rim of the neck. If you see white or green crust, it is a sign that coolant has been slowly seeping past the seal. This is one of those essential car service tips for safe summer drives that takes thirty seconds but prevents a three-hour wait for a tow truck. If the neck is badly damaged, you might be looking at a radiator replacement. If you are unsure if you are being overcharged for such a job, knowing how to spot an honest mechanic in yuma before you drop your keys can save you hundreds on labor.
The Simple Squeeze Test for Vacuum Leaks
If the cap and neck look perfect but you are still losing coolant, try the squeeze test. With the engine cold and the cap securely on, squeeze the upper radiator hose. You should feel some resistance from the air trapped inside. If the hose feels completely limp, or if you hear a faint ‘hiss’ coming from the cap as you squeeze, you have found your leak. This pressure failure is often why your why your engine temperature spikes while idling; without pressure, the coolant can’t absorb and move heat effectively when there is no airflow from driving. While some folks worry about how transmission overhauls save you money in the long run, the reality is that an overheated engine is a much faster way to total a vehicle.
Stop Chasing Performance Caps That Your Car Can’t Handle
Many enthusiasts believe that swapping a factory 13 PSI radiator cap for a 20 PSI ‘performance’ version is an easy way to prevent boiling on hot days. In my experience, this is a dangerous myth. While a higher pressure cap does technically raise the boiling point, it also puts immense strain on every other component in your cooling system. Your radiator, plastic hose connectors, and even the heater core inside your dashboard were designed to operate within a specific pressure envelope. When you artificially inflate that pressure, you are just looking for the weakest link to fail. I have seen countless DIYers think they are helping their car when they maximize your cars lifespan with regular tune ups, only to end up with a burst radiator because the new cap was too ‘strong’ for the old aluminum.
Is Your Aftermarket Upgrade Actually Ruining Your Gaskets?
Beyond just bursting hoses, an over-pressurized system can lead to micro-leaks that are nearly impossible to find. If your engine was designed for a specific PSI, forcing it to hold more can push coolant past seals that were never meant to handle that load. It is a similar logic to the truth about cheap aftermarket brake pads; just because a part says it is ‘high performance’ or ‘heavy duty’ doesn’t mean it is the right fit for your specific vehicle. According to a technical report by the Society of Automotive Engineers (SAE) J164 standard, cooling system components are engineered for specific pressure cycles, and exceeding these limits by even 5 PSI can significantly reduce the fatigue life of your radiator’s plastic end tanks.
The Depth Measurement Most People Ignore
The biggest ‘oops’ factor I see isn’t just the pressure rating; it is the physical dimensions of the cap itself. There are two common ‘standard’ depths for radiator necks—roughly 3/4 of an inch and 1 inch. If you put a shallow cap on a deep neck, the bottom seal will never touch the seat, and your system will never pressurize. You might as well not have a cap at all. Conversely, if you force a deep cap onto a shallow neck, you can actually bend the metal tabs on the radiator, causing a permanent leak. This is why you should always compare the old and new parts side-by-side. If the shop is pushing a ‘universal’ fit, be wary. Knowing how to tell if a transmission shop is lying about a rebuild often comes down to their attention to these tiny, specific details, and the same applies to cooling system parts. 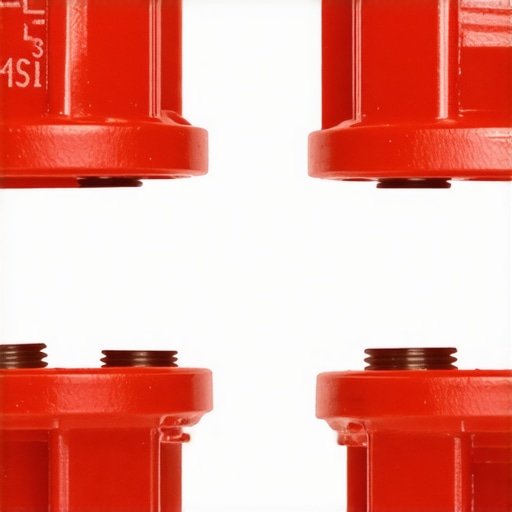
Don’t Forget the Return Stroke
A radiator cap is a two-way street. Not only does it hold pressure in, but it also has a small vacuum valve that allows coolant to be sucked back in from the overflow tank as the engine cools down. If this tiny center valve gets stuck, your radiator hoses will collapse flat like a soda straw as the engine cools. This creates a vacuum that can pull air into the system, leading to the exact same overheating issues we were trying to avoid. Integrating this check into your essential car service tips for safe summer drives is the difference between a reliable daily driver and a car that leaves you stranded. If you find your hoses are looking flat in the morning, your ‘new’ cap is likely defective. Have you ever fallen into this trap of ‘upgrading’ a part only to have it cause a bigger headache? Let me know in the comments. If you are dealing with more than just a cap issue and need professional help, check the top signs your car needs expert auto repair now to see if it is time to call in the pros. Much like the 15 dollar gasket that stops your persistent oil leak, the radiator cap is a small part with massive consequences if ignored.
The One Kit That Stops the Guesswork
I used to spend hours squeezing hoses and praying I’d see a visible drip, but that’s a fool’s errand. If you want to stop the cycle of overheating, you need a cooling system pressure tester. I personally use a Maddox universal kit because it comes with every adapter imaginable. Instead of waiting for the car to get hot and dangerous, I pump the system up to the PSI listed on my radiator cap while the engine is stone cold. This lets me hear the tiny ‘hiss’ of a pinhole leak in a hose or see a bead of coolant forming near the water pump without the risk of burns. It is a game-changer for anyone trying to essential car service tips for safe summer drives. If you can’t hold pressure for fifteen minutes on the gauge, you have a leak—period. No more ‘maybe it’s fine.’ 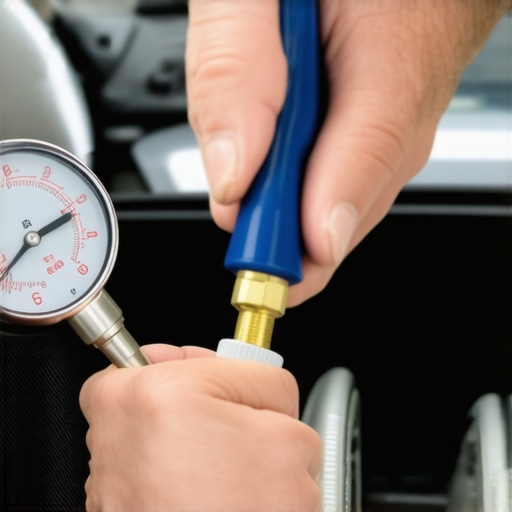
How do I maintain my car’s cooling system for the long haul?
Maintenance isn’t just about replacing parts when they snap; it’s about chemistry. Over time, coolant becomes acidic and begins to eat your engine from the inside out—a process known as electrolysis. According to a technical bulletin from Gates Corporation, the leading manufacturer of automotive belts and hoses, ‘electrochemical degradation’ is the silent killer of modern EPDM hoses, causing them to fail from the inside even when they look perfect on the outside. To prevent this, I use a simple multimeter to check the voltage in my coolant. If I see more than 0.3 volts, I know the corrosion inhibitors are spent. This proactive approach is exactly how you maximize your cars lifespan with regular tune ups. I also recommend a vacuum refill tool. It ensures you don’t leave any air pockets in the block, which is the number one reason why your engine temperature spikes while idling after a repair.
Look Toward a Future of Smart Sensors
We are moving toward a world where ‘dumb’ radiator caps are becoming obsolete. Newer vehicles are already integrating electronic thermostat housings and flow sensors that can predict a failure before the needle even moves. I predict that within the next decade, we’ll see ‘smart coolant’ that changes color or sends a wireless signal to your phone when the pH level drops. Until then, we have to rely on our tools and our senses. While some drivers are busy worrying about how transmission overhauls save you money in the long run, they often forget that a single afternoon spent flushing a radiator can save the entire powertrain. If you want to take your maintenance to the next level, I challenge you to go out and perform a pressure test this weekend. You might be surprised at the tiny leak that’s been waiting to ruin your next road trip. If you find something that looks more like a ‘chocolate milk’ mess than a simple leak, you should check out our guide on the reason your engine coolant looks like chocolate milk before you turn the key again.
The Hardest Lessons Learned from a $10 Part
I have realized that the more expensive the car, the more we tend to ignore the cheapest components. I spent years earlier in my career chasing phantom overheating issues because I refused to believe a simple plastic-and-metal disc could be the culprit. It taught me that the 15 dollar gasket that stops your persistent oil leak and a basic radiator cap are the true gatekeepers of mechanical reliability. We often focus on big-ticket items like engine rebuilds when we try to maximize your cars lifespan with regular tune ups, but real wisdom lies in respecting the pressure seals. Never assume a part is too simple to fail, because physics does not care about the price tag of your vehicle. #IMAGE_PLACEHOLDER_E#
My Go-To Gear for a Cool Engine
If you want to move beyond guessing and start diagnosing like a pro, I suggest building a small cooling-system toolkit. I always keep a digital multimeter handy; it is excellent for checking for stray voltage in the coolant, and it is also how to find a parasitic battery drain with a simple multimeter if you have electrical gremlins. I also swear by a Maddox universal pressure tester because it takes the danger out of testing hot engines by allowing you to simulate pressure when the block is cold. Finally, an infrared thermometer helps you find cold spots in a radiator that signify internal clogging. These essential car service tips for safe summer drives are only as effective as the tools you use to verify them.
Take the Fear Out of Your Hood
Seeing a cloud of steam does not have to mean your engine is destined for the scrap heap. By paying attention to the small signs—the brittle rubber, the weak spring, or the crusty radiator neck—you regain control over your vehicle’s health. Do not wait for the top signs your car needs expert auto repair now to flash on your dashboard while you are in the middle of a commute. Pop the hood tomorrow morning when the engine is cold and give that cap a thirty-second inspection. If you find something that looks less like bright coolant and more like the reason your engine coolant looks like chocolate milk, you will be incredibly glad you caught it in the driveway rather than the interstate. Your engine deserves a long, cool life, and it starts with a ten-dollar seal. Have you ever had a tiny, cheap part cause a massive repair bill? Let me know in the comments below!