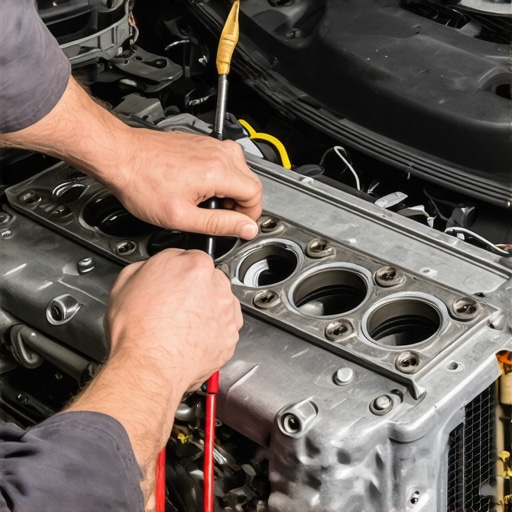
I remember the exact moment I noticed that unmistakable oil smell wafting into my garage—my car, which I thought was running perfectly just yesterday, now leaking like a sieve. The sight of oily puddles on my driveway made my heart sink. Turns out, that sneaky leak was from my valve cover gasket, a small part with a big impact. I was tempted to take it straight to the shop, but I soon realized that fixing it myself was not only budget-friendly but also surprisingly doable.
Why A Leaky Valve Cover Gasket Can Ruin Your Day
A leaking valve cover gasket isn’t just about messy oil spots; it can lead to bigger issues like engine misfires, poor fuel economy, and even engine damage if left unchecked. Plus, a trip to the mechanic can cost anywhere from a few hundred dollars to over a thousand, depending on your car and the severity of the leak. Early on, I made the mistake of ignoring my leak, thinking it was just a cosmetic issue. That’s a common slip-up—many assume it’s a small problem easily fixed later, but in reality, it can cause significant damage if neglected.
The good news? Fixing a leaky gasket doesn’t have to drain your wallet. With some basic tools and a little patience, you can tackle this repair yourself. This approach not only saves money but also gives you a greater understanding of your vehicle. For those who want to ensure their car stays in top shape, I recommend checking out tips on how to maximize your car’s lifespan with regular tune-ups—it’s a game changer.
Are you tired of oil spots and creeping repair bills? If yes, you’re in the right place. That’s what I’ll help you with today: how to fix that pesky leak quickly and cheaply.
Think a Cheap Fix Isn’t Worth It? Think Again
Early in my learning process, I made the mistake of rushing into buying expensive parts without researching the basics. That led to wasted money and frustration. Trust me, understanding common pitfalls and proper DIY techniques will save you more than just cash—it’s about gaining confidence and peace of mind in your own garage. Want to know the foolproof steps to fix a leaky valve cover gasket and keep your engine oil from escaping? Keep reading — I promise, it’s easier than you think.
Prepare Your Workspace and Gather Tools
Set up your garage with good lighting and ensure your car is parked on a flat surface with the engine cool. Gather necessary tools: socket set, screwdrivers, new gasket, torque wrench, and a cleanup rag. Remember, working safely is crucial—wear gloves and eye protection.
Remove Obstructions and Access the Valve Cover
Start by disconnecting the negative battery cable to prevent electrical issues. Use a screwdriver or socket to remove any components blocking access, such as engine covers or air intake hoses. Take your time and organize fasteners to avoid losing parts. A messy workspace can lead to mistakes, so keep track of where each screw belongs.
Detach the Valve Cover Carefully
Loosen the nuts or bolts securing the valve cover in sequence, following your vehicle’s torque specifications. Avoid forcing parts loose to prevent damaging the cover or gasket mating surfaces. Use a torque wrench when reinstalling to apply correct pressure, preventing leaks or warping. I once stripped a bolt by over-tightening—learning this step saved me from future headaches.
Clean and Inspect the Surfaces
Remove the old gasket and thoroughly clean the mating surfaces with a plastic scraper and degreasing cleaner. Residual oil or old gasket material can cause leaks post-repair. Inspect the areas for cracks or warping; if damaged, replacement of the valve cover might be necessary. Proper cleaning here is the difference between a lasting fix and repeat repairs.
Install the New Gasket and Reassemble
Place the new gasket into position, ensuring it sits correctly in the groove or sealing area. Carefully align and reinstall the valve cover, tightening fasteners by hand first, then using a torque wrench to apply the manufacturer-recommended torque in a crisscross pattern. This prevents warping and ensures even sealing. It’s a bit messy, but tight and neat reassembly guarantees a leak-free result.
Final Checks and Test Drive
Reconnect any disconnected components and the negative battery cable. Start the engine and examine the area for leaks or odd noises. Check the oil level and top off if necessary. A test drive confirms the repair’s success—if oil spots appear again, revisit the tightening sequence or gasket condition. Remember, patience during reassembly pays off with a clean, oil-tight engine.
By following these precise steps, you can save money and gain confidence in your auto repair skills. For comprehensive guidance on vehicle maintenance, visit maximize your car’s lifespan with regular tune-ups or explore signs your car needs professional repair to keep your vehicle in top shape.Many car owners believe they understand the essentials of collisionfixer and routine maintenance, but beneath the surface lie subtleties that can dramatically impact your vehicle’s longevity and performance. Contrary to popular belief, not all auto repairs follow a straightforward, one-size-fits-all approach; nuances—like the timing of a transmission fluid change or the specifics of a tune-up—play a critical role. For instance, the myth that high-mileage oil additives are always beneficial is widespread, yet expert sources suggest they may do more harm than good in certain cases, potentially leading to sludge buildup and reduced engine efficiency. It’s a trap to think that a quick fix or generic service will always suffice—advanced issues often require a nuanced understanding of your car’s unique needs. An overlooked mistake is assuming that the cheapest parts or most aggressive DIY methods won’t compromise the integrity of repairs. The importance of precise torque application during valve cover gasket replacements or the dangers of using incorrect transmission fluid can’t be overstated—these details are what separate a lasting repair from a costly redo. When considering complex services like transmission overhauls, it’s crucial to recognize that not every mechanic adopts a holistic, preventative approach; many focus solely on immediate symptoms. According to automotive expert John Davis, neglecting to regularly inspect and service even minor components can lead to exponential damage over time, ultimately costing more than proactive maintenance.
What advanced warning signs should alert you about hidden transmission issues that standard checks might miss?
Regularly visiting a trusted auto service provider or consulting specialized guides can reveal subtle clues—like slight hesitations during gear shifts or unusual fluid discoloration—that indicate deeper problems. Avoid the trap of dismissing minor symptom changes, as they could escalate beyond what your routine DIY can address. Learn to recognize these early signals and prioritize expert diagnostics to ensure your vehicle remains reliable. Remember, understanding these nuances allows you to make informed decisions, saving money and extending your car’s lifespan. Want more insights on how expert auto repair plans can prevent costly breakdowns? Check out our comprehensive [maximizing your car’s lifespan with regular tune-ups](https://collisionfixer.com/maximize-your-cars-lifespan-with-regular-tune-ups) or reach out through our [Contact Us](https://collisionfixer.com/contact-us) page for personalized advice. Have you ever fallen into this trap? Let me know in the comments.Maintaining your vehicle’s performance over time requires more than just basic know-how; it demands the right tools and a disciplined approach. I personally rely on specific equipment like a digital torque wrench, which ensures fasteners are tightened precisely to manufacturer specs, preventing leaks after services like valve cover gasket replacements. Additionally, investing in a quality engine bay cleaning kit helps me spot early signs of leaks or worn belts before they escalate, saving both money and safety concerns.
For software solutions, I recommend using diagnostic tools like an OBD-II scanner from brands such as BlueDriver. This device connects easily to your smartphone and provides detailed engine error codes, helping you identify issues—like transmission slipping or sensor malfunctions—before they turn into costly repairs. I’ve found this proactive approach invaluable, especially when planning maintenance intervals or addressing surprises.
Looking ahead, the trend is moving toward integrated maintenance platforms that combine hardware and cloud analytics. These tools can alert you to fluid changes needed or component wear trends based on driving patterns, making vehicle longevity more accessible to car owners.
Wondering how to keep your car running smoothly for years? One actionable tip is to schedule regular fluid analysis tests, which can detect early signs of transmission fluid breakdown—a leading cause of costly repairs. For more insights on how to keep your vehicle in top shape, visit our [maximize your car’s lifespan with regular tune-ups](https://collisionfixer.com/maximize-your-cars-lifespan-with-regular-tune-ups) guide.
How do I maintain my auto repair tools over time?
Proper storage is key. Keep your tools in a dedicated, dry toolbox to prevent rust and corrosion. Regularly calibrate precision equipment like torque wrenches—many manufacturers recommend a yearly check—to ensure accuracy. Cleaning tools after use prolongs their life and maintains safety standards. Follow the manufacturer’s maintenance guidelines, and if you notice any tool behaving unexpectedly, replace it promptly or seek professional calibration services. This foresight helps avoid misapplied torque that could lead to leaks or component failure. Incorporating these practices means your tools will serve you reliably through numerous repairs, saving you money and stress in the long run. Remember, the more precisely you control repair variables, the higher your car’s chances of long-term health and safety.
Lessons Not Found in Manuals
One of the most eye-opening lessons I learned was the importance of patience and attention to detail. Rushing through the gasket replacement only led to repeated leaks, reminding me that slow and steady truly wins in auto repair. Another insight was understanding that every engine component has a purpose, and even small details—like proper torque—can make or break a repair. Lastly, I realized that embracing the learning process transformed my approach from hesitant to confident, empowering me to handle future repairs with less fear and more curiosity.
The Gear That Changed My Repair Game
Investing in a quality torque wrench was a game-changer. It ensured I tightened bolts to the manufacturer’s specifications, preventing leaks and future damage. A reliable engine bay cleaning kit also made spotting subtle oil drips easier, saving me from bigger issues down the road. Additionally, a good set of organization tools helped me keep track of fasteners and parts, streamlining the reassembly process. These tools, trusted through personal experience, reflect why having the right equipment simplifies complex tasks and reinforces good habits.
Your Next Move to Keep Auto Repair Easy and Safe
Remember, tackling repairs like a leaky valve cover gasket is entirely doable with the right mindset and tools. Building your skills gradually and staying informed can save you hundreds of dollars while giving you a genuine sense of accomplishment. For additional expert tips and guidance on maintaining your vehicle, explore our comprehensive guide on maximizing your car’s lifespan. Empower yourself today—your vehicle will thank you, and so will your wallet!