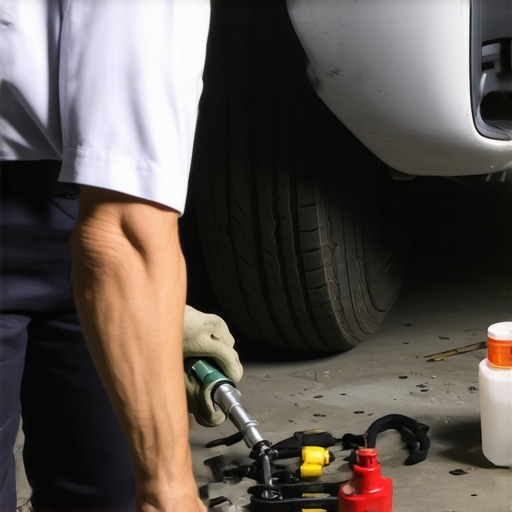
Ever been under your car, battling that stubborn brake pedal, thinking, “There’s got to be a better way”? I’ve been there myself—stuck in a driveway, trying to bleed the brakes, wishing I had a second pair of hands or a magical tool that could do the job for me. That frustrating moment was my lightbulb, revealing there’s actually a simple, effective way you can purge those brake lines without needing someone else to help. Imagine the satisfaction of doing it all on your own, saving both time and cash.
Why You Should Never Rely on Help for Brake Flushing
When I first started dabbling with car maintenance, I naively thought that flushing brake lines was a two-person job. It seems logical, right? You pump, you hold the brake pedal, your friend opens and closes the bleeding valve. Simple. Or so I thought. But here’s the kicker: many of us get stuck because of tight spaces, lack of assistance, or even the fear of messing up the brake system entirely. The truth is, with the right technique, you can confidently handle this task solo. In fact, doing it yourself not only saves money but also gives you a better understanding of your vehicle, which is crucial for safe driving.
Early on, I made a mistake many DIYers fall into: rushing through the process without proper setup. This led to air getting trapped in the brake lines, causing a spongy pedal—that scared me half to death! That’s when I realized that mastering a simple, helper-free method could have saved me that trouble in the first place. According to automotive experts, proper bleeding techniques are essential to avoid brake failure, which can be catastrophic. This insight motivated me to learn the exact steps, and now I want to share them with you so you can avoid my beginner’s errors.
Got that frustrating brake feeling or struggling to find a helper? Don’t worry—there’s a straightforward way to fix this on your own. We’ll walk through the simple, step-by-step method that puts you in control, so you won’t need extra hands or expensive workshops. Ready to become your own mechanic? Let’s dive into how you can flush your brake lines confidently and efficiently.
Prepare Your Workspace and Gather Tools
Start by parking your vehicle on a level surface, engaging the parking brake, and holding the brake pedal down with your foot firmly pressed. Gather the necessary tools: a clear plastic hose, a catch container, a wrench suitable for your bleed screw, fresh brake fluid, and safety gloves. I remember one time I set everything out on my driveway, realizing I was missing a simple wrench—an experience that cemented the importance of preparation before starting any repair.
Access the Brake Bleed Screws
Locate the brake calipers or wheel cylinders corresponding to each wheel. Remove the wheel cover or lug nuts if necessary. Using your wrench, loosen the bleed screw slightly—just enough to let air and fluid escape without letting everything spill. To keep your workspace clean, place the catch container with a bit of rag underneath, preventing fluid from dripping onto the ground. Once I learned this, my cleanup time drastically reduced, and I avoided staining my driveway.
Fill and Pump to Remove Air
Fill the master cylinder reservoir with fresh brake fluid. Have an assistant or, in this case, use a brake pedal depressor or a sturdy object to hold the pedal down—since we’re doing this alone, I used a thick piece of wood to keep the pedal pressed. With the pedal held down, open the bleed screw slightly; brake fluid and air bubbles will start to come out into your catch container. Close the screw before releasing the pedal to prevent air from being drawn back in. Repeating this process slowly pushes air out of the system and refills it with fresh fluid. I found that patience was key here; rushing only caused more air to get trapped, leading to a spongy pedal again.
Repeat Until Air Is Fully Removed
Continue this cycle—pedal down, loosen bleed screw, tighten screw, release pedal—until clear, bubble-free brake fluid flows out. During my first attempt, I struggled to get all the air out, but using a transparent hose allowed me to see the bubbles and know when the line was clear. This visual cue was priceless, reducing guesswork and ensuring a solid brake pedal feel. Remember, always keep the master cylinder reservoir topped off to prevent new air from entering the system. Regular topping during the process saved me from having to start over due to low fluid levels.
Final Checks and Clean-Up
Once the air pockets are gone, tighten all bleed screws securely, replace the wheels and lug nuts, and lower the vehicle. Test the brake pedal’s firmness to confirm a proper flush. You’ll notice an immediate difference—the pedal will feel firm and responsive, just like when I finally got rid of that spongy feeling after my first solo flush. Properly disposing of used brake fluid is crucial, so always recycle or take it to a designated disposal site. This process, which once felt intimidating, now feels straightforward and empowering, especially after I saw how effectively I could do it myself.
Many car owners believe that transmission issues are always a sign of a big, expensive overhaul, but in reality, understanding the nuances can save you thousands. A common myth is that all transmission problems require complete replacements, yet often, these issues are due to simple fixes like fluid leaks or sensor failures. Jumping to costly repairs without proper diagnostics can lead to unnecessary expenses. Another misconception is that regular service isn’t crucial unless you notice symptoms; however, proactive maintenance, including tune-ups, can prevent many transmission failures and extend your vehicle’s lifespan, as highlighted in expert guides. Beware of the trap of ignoring subtle signs like sluggish shifting or strange noises—earlier intervention can save you from emergency repairs. Advanced issues such as internal clutch wear or valve body malfunctions require specialized diagnostics, often missed by DIYers, underscoring the importance of trusting qualified technicians. Have you ever fallen into this trap? Let me know in the comments.
Investing in Quality Tools for Auto Maintenance
When it comes to keeping your vehicle in top shape, the right tools can make all the difference. I personally swear by a high-quality digital multimeter, such as the Fluke 115, for diagnosing electrical issues. Its precision and durability allow me to quickly identify faulty sensors or bad connections, preventing more extensive repairs down the line. For brake bleeding, a brake bleeder kit with a one-way valve and transparent tubing simplifies the process, making it feasible to do a thorough flush without assistance. These tools are reliable, user-friendly, and essential for any serious DIYer.
Why I Trust Specific Equipment and Software
In addition to physical tools, I recommend automotive diagnostic scan tools like the Autel MaxiCOM MK808. It connects via OBD-II port and instantly provides error codes, live data, and even offers step-by-step troubleshooting guides. Having such software at hand not only accelerates repairs but also promotes a deeper understanding of your car’s systems. These diagnostic tools are becoming more affordable and advanced, hinting at a future where DIY repairs are increasingly DIY diagnostics, reducing reliance on costly shop visits.
Long-Term Care and Routine Checks
Consistency is key. Regularly inspecting and replacing consumables like air filters, spark plugs, and transmission fluid can extend the life of your vehicle significantly. I utilize a magnetic drain plug for the transmission pan, which helps me monitor fluid condition over time—catching early signs of wear before costly damage occurs. Setting a maintenance schedule aligned with your vehicle manufacturer’s recommendations, like the ones outlined in Tune-Up Tips for Longevity, ensures longevity and reliable performance.
Scaling Up Your Maintenance Efforts
As your skills improve, consider upgrading from basic tools to more advanced equipment. An infrared thermometer allows you to check cooling system efficiency, and a vacuum pump can refresh brake and power steering fluids more effectively. These enhancements can decrease labor time and increase precision, paving the way for larger projects such as engine rebuilds or transmission overhauls. Predictive maintenance, powered by data analytics and sensors, is also emerging, providing insights that help plan repairs proactively rather than reactively.
How do I maintain transmission systems over time?
Long-term transmission maintenance involves regular fluid checks and changes, as well as monitoring for unusual shifting behavior. Using a quality transmission additive like Liqui Moly’s Top Tec ATF can bolster internal components against wear. With expert guidance, such as the insights found here, you can develop a proactive plan. I encourage you to try a fluid flush with a high-grade additive to see immediate improvements in shift smoothness and longevity. Consistency with routine checkups and utilizing advanced tools ensures your transmission remains reliable season after season.
Lessons That Took Me Longer Than Expected
- Initially, I underestimated the importance of proper fluid levels; a simple mistake led to recurring transmission issues, teaching me to double-check fluid consistently.
- I learned that rushing through brake bleeding without visual cues can cause trapped air, which I only realized after experiencing a spongy pedal—patience truly pays off.
- My biggest lightbulb moment was discovering that many problems seem complex but often have straightforward DIY fixes when approached with the right tools and mindset.
Tools That Changed My Auto Maintenance Game
- The Fluke 115 multimeter became essential for diagnosing electrical glitches—trust me, quality diagnostics tools save time and money.
- A reliable brake bleeder kit simplified fluid flushes, making solo repairs smooth and mess-free, perfect for anyone working alone.
- My OBD-II scanner, the Autel MaxiCOM MK808, opened insights into hidden error codes, empowering me to tackle issues proactively rather than reactively.
Don’t Wait for a Breakdown—Start Today
Taking charge of your vehicle’s maintenance isn’t just economical—it’s empowering. By understanding key mechanics like transmission fluid conditions or brake system behavior, you can extend your car’s life and safety. Remember, each small fix builds confidence and skill, so why not start with that squeaky brake or sluggish shift? Your car—and your wallet—will thank you. Curious about specific repairs? Dive into our summer driving tips or connect with professionals when needed. How are you planning to elevate your auto maintenance skills next?