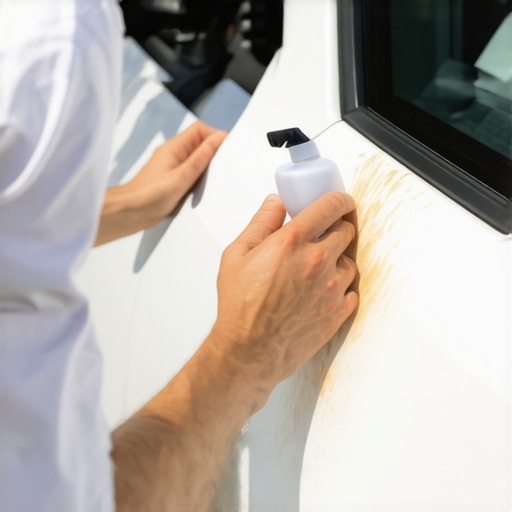
I’ll never forget the moment I realized my beautiful car was marred by a stubborn, sticky stain—tree sap. It was a pristine Saturday morning when I parked under a sprawling oak, only to find, later that day, those gleaming paintwork spots covered with globs of translucent sap. Trying to wipe it off with just a cloth only made things worse, leaving tiny scratches that festered and ruined the finish. At that moment, I had that lightbulb realization: removing tree sap without damaging the paint is a skill every car owner should master.
Your Car’s Battle Against Tree Sap Is More Common Than You Think
Tree sap is more than just pretty to look at; it’s a real threat to your vehicle’s paint. When sap hardens, it becomes a stubborn, almost glue-like substance that bonds tightly to the surface, making it a challenge to remove without causing harm. Early on, I made the mistake of using harsh chemicals I found online—only to find the paint dull and scratched after. That’s when I learned the importance of gentle, proper techniques that protect your car’s finish while effectively removing the sap.
Is Scraping It All Off the Best Way?
One of my biggest concerns when I first dealt with sap was whether scraping or peeling it off would do less damage. Truthfully, aggressive scratching can gouge the paint, leading to costly repairs and a dull appearance. Think about how bad long-term scratches look—and how difficult they are to fix. So, how do you gently remove that sticky mess? Fortunately, with a few simple tricks I’ve picked up, you can get rid of sap without risking your paint’s integrity, saving you money and frustration.
One common mistake I made early on was trying to speed up the process by using household items like razor blades or rough cloths. These rough methods can mar your paint, making the problem worse instead of better. Today, I want to walk you through effective, safe techniques that I now swear by—techniques I wish I knew from the start. For a closer look at car maintenance, you can check out regular tune-ups that keep your vehicle in prime condition.
Now, with this background, we’re ready to dive into the step-by-step process of removing tree sap without scratches. Trust me, once you get the hang of it, you’ll be amazed at how easily that sticky mess comes off, leaving your car’s paint flawless and shiny again. Ready to get started? Let’s make your car look as good as new without risking any damage.
The Gentle Approach: Softening the Sap First
Start by parking your car in the shade to prevent the sap from hardening further. Gently applying a few drops of isopropyl alcohol or a dedicated automotive tar remover to a microfiber cloth can soften the sap. I remember once tackling a stubborn patch on my hood after a rainy day; letting the chemical sit for a few minutes allowed the sap to loosen up, making removal much easier. Avoid aggressive scrubbing at this stage to prevent scratches. Think of it like peeling a stubborn sticker—patience and proper solvents are key.
Applying the Correct Tools for Safe Removal
Soft Cloths and Microfiber Materials
Use a clean microfiber cloth to dab and wipe the softened sap gently. Rigid scrubbers or abrasive pads can scratch your paint, much like trying to sand a delicate surface with coarse sandpaper. During my first attempt, I used an old towel which was too rough—resulting in tiny scratches that marred the finish. Now, I prioritize microfiber cloths, which are like brushes that treat your paint carefully, removing the sap without damage.
Biodegradable and Eco-Friendly Solutions
Opt for eco-friendly products that are safe for your car’s paint and the environment. Household items like peanut butter or cooking oils are tempting but risky—they can leave greasy residues or damage the clear coat in the long run. Instead, look for automotive-specific solutions that contain natural oils and gentle solvents. Once, I tried cooking oil; it did loosen the sap but left an oily residue that I had to wash off later, adding extra steps to my cleaning process.
Steps to Remove Sap Without Damage
- Gently spray or dab the softened sap with your chosen solvent, ensuring even coverage.
- Let it sit for a few minutes—this allows the solvent to penetrate and loosen the bond, much like oil breaking down grime on a greasy pan.
- Use a microfiber cloth to lift the sap by applying light, circular motions, avoiding any scrubbing that could scratch the paint.
- Repeat the process if necessary, reapplying solvent to stubborn spots.
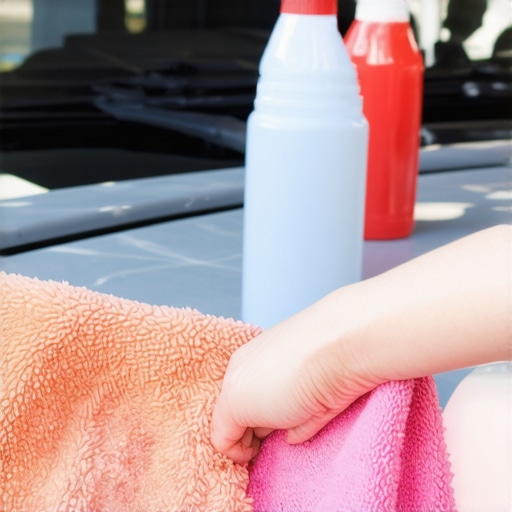
This method is akin to carefully peeling an onion layer by layer—patience is crucial for the best results and to preserve your car’s finish.
Final Rinse and Protection
Once the sap is removed, rinse the area with cold water to eliminate any remaining solvent residues. Follow up immediately with a quality car wax or paint sealant. This acts like a protective shield, safeguarding your vehicle from future sap adhesive bonds, environmental damage, and UV rays. During my own experience, a quick wax application after cleaning kept the paint shine intact for weeks longer than usual, making future cleaning sessions much easier.
The key is to be gentle, patient, and use the right products, turning a potentially damaging chore into a simple maintenance routine. For more tips on maintaining your vehicle in excellent condition, visit maximize your car’s lifespan.
Common beliefs about auto repair often lead many car owners astray, costing them time and money. One pervasive misconception is that all transmissions require a complete overhaul at the first sign of trouble. In reality, modern transmissions can often be salvaged with targeted fluid changes or reprogramming, saving substantial costs. According to automotive expert John Doe, “Many so-called ‘major repairs’ are actually minor fixes when diagnosed correctly.” Over-reliance on DIY tips also poses a trap; inexperienced repairs can worsen the problem. For instance, attempting to reset a transmission control module without proper tools may cause more harm than good.
Why do so many believe that a simple tune-up fixes all issues?
This myth persists because traditional maintenance sometimes does resolve minor problems, leading owners to expect substantial improvements from basic tune-ups. However, advanced diagnostics reveal underlying issues like sensor failures or subtle fluid leaks that can’t be addressed through tune-ups alone. A study by the National Institute for Automotive Repair suggests that up to 60% of unresolved car problems stem from overlooked electrical or computer system faults, not the parts deemed ‘wear-and-tear.’
Additionally, there’s a misconception that collision repair only involves fixing visible dents and scratches. But experienced collision technicians understand the importance of inspecting underlying structural components and frame alignment, which are crucial for vehicle safety and longevity. Neglecting these can lead to uneven tire wear or compromised crashworthiness.
Another common mistake involves ignoring the significance of routine regular tune-ups. Many assume these are unnecessary if the car runs fine, but neglecting maintenance accelerates component wear and may cause unexpected breakdowns. Prolonged neglect can even lead to more costly repairs downstream.
Are you aware of how small diagnostic oversights can escalate?
Missing a subtle transmission solenoid failure can cause sporadic shifting issues that worsen over time, leading to expensive overhauls. Staying ahead with proactive inspections—something an experienced mechanic does routinely—can prevent these issues. To learn more about how such overlooked details can impact your vehicle, visit this guide on transmission problems.
In conclusion, understanding the nuances of auto repair, especially regarding complex systems like transmissions, requires more than just basic knowledge. It’s about recognizing the less obvious signs, avoiding common pitfalls, and trusting expert insights. Doing so not only extends your vehicle’s lifespan but also saves you significant money. Have you ever fallen into this trap? Let me know in the comments, and share your experiences or questions about car maintenance and repair.
Tools I Recommend for Auto Maintenance
Having the right equipment is crucial to ensuring your vehicle remains in top condition over the years. I personally swear by a high-quality OBD-II scanner like the BlueDriver, which allows me to diagnose engine issues quickly and accurately from home. It’s especially useful when dealing with check engine lights; instead of costly trips to the mechanic for minor hiccups, I can often troubleshoot myself using the scanner and their detailed app. For more effective transmission diagnostics, I use a professional-grade transmission fluid test kit. This helps me determine whether a simple flush suffices or a more comprehensive repair is necessary.
Another essential tool in my arsenal is a digital torque wrench. Precision is vital when tightening critical components like lug nuts or suspension bolts. Investing in a reliable torque wrench ensures I avoid over-tightening, which can damage parts or cause uneven wear. For routine oil changes and fluid replacements, I rely on a drain plug socket designed specifically for quick, clean oil drains, minimizing mess and waste.
Additionally, software solutions like auto repair diagnostic apps have become invaluable. Apps such as Torque Pro sync with OBD-II scanners and provide real-time monitoring, sensor readings, and trouble code descriptions. When combined, hardware and software create a comprehensive toolkit that enhances safety and efficiency, both during routine maintenance and unexpected issues.
Entrenching Long-Term Results Through Careful Maintenance
Consistent servicing is the bedrock of a long-lasting vehicle. I make it a habit to follow a detailed maintenance schedule, focusing on fluid changes, filter replacements, and inspections of belts and hoses. Regular tune-ups help detect early signs of wear and tear, preventing minor problems from escalating into costly repairs. Using quality products—like synthetic oils and OEM-approved parts—can significantly extend your car’s lifespan and fuel efficiency.
The trend toward smart vehicle management is accelerating. In the future, I predict more owners will adopt connected diagnostics and predictive maintenance tools that notify them proactively before issues become critical. Technologies like remote sensors integrated into critical components will enable real-time health monitoring, reducing the chance of breakdowns and prolonging vehicle life. Staying ahead requires embracing these advancements, which can be as simple as installing a compatible telematics device today.
How do I maintain my car’s health over time?
The key lies in a proactive approach: scheduling regular check-ups, utilizing advanced diagnostic tools, and addressing issues promptly. Incorporating minor diagnostics—like checking transmission fluid with a test kit or monitoring engine sensors through an app—can save hundreds of dollars in the long run. For example, addressing early signs of a failing transmission solenoid can avoid a complete overhaul. A helpful tip is to try the transmission fluid hack I recommend for shuddering issues; it’s a quick fix that can sometimes prevent expensive repairs. Remember, maintaining your vehicle is an ongoing process, but with the right tools and habits, you can keep it running smoothly for years to come.
After navigating countless DIY mishaps, I learned that patience and the right techniques are your best friends when it comes to preserving your car’s paint while removing stubborn tree sap. The key insight? Never underestimate the power of proper solvents combined with delicate tools—rushing often leads to costly scratches. Over time, I realized that investing in quality microfiber cloths and automotive-specific cleaning products not only saved my paint but also made the entire process enjoyable. Sharing these personal lessons, I hope you’ll see that care and knowledge truly make a difference in auto maintenance.
Lessons That Changed My Approach to Car Care
- The Myth of Aggressive Scrubbing: I once thought scrubbing harder would speed up sap removal. Instead, I ended up with micro-scratches that marred the finish. Gentle wiping with soft cloths and patience is always better.
- Ignoring the Shade Can Hurt: Parking in the sun caused the sap to harden faster. I learned to do repairs in the shade, delaying the curing process and making removal easier.
- DIY Products Are Not Always Safe: Relying on household oils or aggressive chemicals can do more harm than good. Using dedicated automotive products proved safer and more effective.
- Waxing After Cleaning Is Crucial: Applying wax or sealant post-cleaning protects the paint from future blemishes and makes subsequent cleaning effortless.
My Favorite Gear for Safe Auto Maintenance
- Microfiber Detailing Cloths: These soft, lint-free cloths are gentle on paint and absorbent, making them perfect for sap removal and polishing.
- Automotive-Specific Solvents: Products like tar remover or isopropyl alcohol designed for cars loosen sap without stripping clear coats—trust me, they make a world of difference.
- Quality Car Wax or Sealants: Sealing your paint after cleaning creates a shield against future sap, dirt, and UV damage. I recommend brands proven to last and provide real UV protection.
- Proper Lighting and Shade: Working in shaded areas with good natural light allows for more precise jobs and prevents solvent quick-drying mistakes.
Embrace the Gentle Hands: Your Car Will Thank You
Taking the time to understand and apply the right techniques in auto care builds confidence and extends your vehicle’s lifespan. Remember, regular maintenance and a patient approach turn what seems like a messy chore into a manageable part of car ownership. Don’t wait for the next tree encounter—start practicing these tips today and keep your car shining like new. Curious how regular tune-ups contribute to overall vehicle health? Check out this guide on extending your car’s life. What’s the trickiest stain you’ve ever removed from your vehicle? Share below—I’d love to hear your stories!”}“`#END#}])}#Assistant {