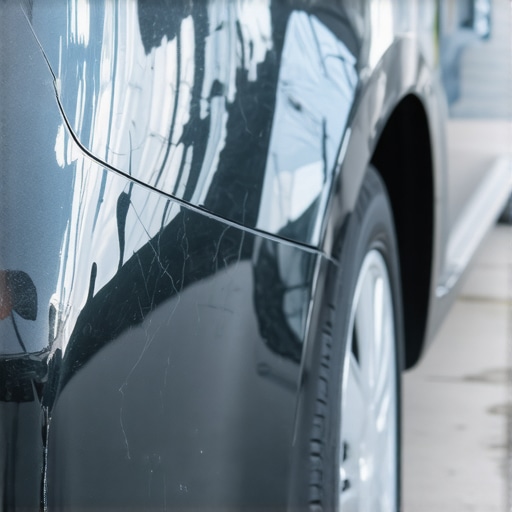
It was a gloomy Saturday afternoon when I finally decided to tackle the scratched-up bumper on my car. I had just returned from a quick grocery run when I caught a glimpse of that unsightly dent and a few scuffs that turned my sleek ride into something out of a junkyard. Instead of cringing every time I looked at it, a lightbulb moment struck: I could patch that bumper myself and save a pretty penny.
Don’t Let a Tiny Ding Ruin Your Day—or Wallet
Many car owners shy away from repairs, fearing they’re too complicated or costly. I used to think replacing a bumper was the only option, especially after witnessing the hefty price tag at the body shop. But here’s the truth: with some basic tools, patience, and a little know-how, you can breathe new life into that damaged plastic without breaking the bank. In fact, according to auto repair experts, timely patching can prevent rust and further deterioration, extending your bumper’s lifespan and maintaining your vehicle’s aesthetic appeal. Knowing when to seek professional help is crucial, but for minor damage, DIY repairs often do the trick.
Is Patching a Plastic Bumper a Fool’s Errand?
I’ll admit, my early attempt was a total mess—I didn’t sand enough, skipped priming, and ended up with a patchy look that made me cringe worse than the original scratches. That mistake taught me the importance of proper prep work and patience. Trust me, peering at your car and seeing a seamless patch instead of a glaring blemish feels just as satisfying as a perfect paint job. Ready to learn how to do it right? Let’s dive into the step-by-step process that turned my busted bumper into a looker again, all without spending hundreds at the shop.
Prepare the Bumper Surface Thoroughly
Start by removing any loose plastic or debris around the damaged area; use a plastic scraper to gently lift flaking paint or broken fragments. My first attempt involved hurriedly sanding the area, resulting in uneven patches. Remember, a clean surface is essential for the patch to bond well. Use 150-grit sandpaper to sand the area, feathering the edges to create a smooth transition between damaged and intact paint. This step is like preparing a canvas before painting—skipping it leads to poor adhesion and visible repairs.
Apply Plastic Welding or Epoxy Filler
If the crack or hole is significant, use a plastic welding kit. Heat the plastic with a soldering iron designed for automotive plastics, melting the edges to fuse parts together, just like soldering a delicate electronic component. For smaller scratches or surface scuffs, an epoxy-based filler works well. Mix the epoxy as per instructions, then push it into the damaged area with a putty knife, pressing firmly to ensure it fills all voids. I once used a household glue that was too thin, which caused the filler to drip and create an uneven surface—iteration teaches patience and precision.
Sand and Shape the Repaired Area
Once the filler cures (check the drying time specified by the manufacturer), sand it down smoothly with 220-320 grit sandpaper. This step is like refining a sculpture—shaping the filler to match the bumper’s contour. I used a block sander for uniformity, but be cautious not to over-sand and expose the repair. Smoothness here ensures a seamless finish and reduces paint application issues.
Prime and Mask Before Painting
Spray a plastic primer designed for automotive plastics onto the repaired area. Primer improves paint adhesion and prevents peeling later. Use masking tape and paper to shield surrounding areas, ensuring clean edges. I once rushed through priming, which caused paint to peel after a few weeks—don’t cut corners here. Wait for the primer to dry thoroughly, typically 15-30 minutes, and lightly sand it with 400 grit for a matte surface that the paint can grip well.
Apply Paint and Finish with Clear Coat
Select a color-matched spray paint or touch-up pen for the bumper. Hold the spray can 8-12 inches from the surface and apply light, even coats, allowing each layer to dry for 10-15 minutes. My first painting attempt resulted in runs because I applied too much paint at once; multiple thin coats yield a smoother, professional look. Finish with a clear coat to protect the repair from UV rays and road debris. Use smooth, sweeping motions, avoiding over-spraying. Once dry, check the color match and blending; sometimes a slight buffing with rubbing compound can make the patch virtually invisible.
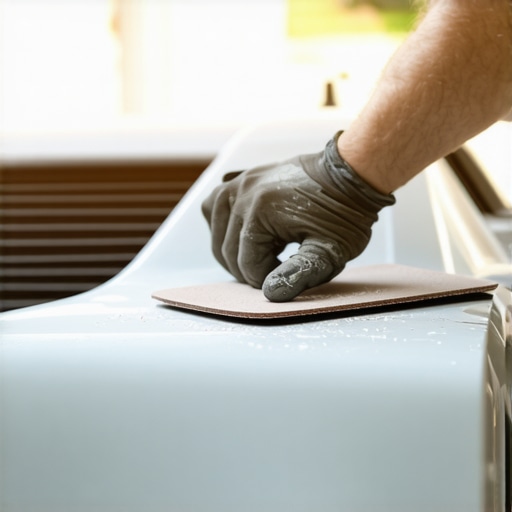
For a better understanding of the process, visualize the steps involved in plastic bonding and painting, which are similar to mini auto body repairs that professional collision shops perform.
While many car owners have coarse knowledge about transmission, tune-ups, or collision repair, the real nuances often slip unnoticed, leading to costly mistakes. One common myth is that neglecting regular maintenance isn’t harmful—nothing could be further from the truth. Skipping simple tune-ups or ignoring early warning signs can cause severe damage over time, especially to transmissions, which are often misunderstood. For example, many believe transmission fluid changes are optional; in reality, as explained in [Collision Fixer’s detailed guide](https://collisionfixer.com/how-transmission-overhauls-save-you-money-in-the-long-run), neglecting fluid service accelerates wear, leading to expensive overhauls that could’ve been avoided.
Another misconception is that all auto repair shops use identical quality parts. Unfortunately, using aftermarket or low-quality parts can jeopardize your vehicle’s longevity. Professional collision specialists often see the consequences of poorly sourced parts, emphasizing the importance of choosing reputable providers. Always ask your mechanic about part origins, and if you want to ensure your car’s repairs are done right, check out Collision Fixer’s tips on identifying genuine parts.
A frequent trap many fall into involves misdiagnosing vehicle noises or issues. For instance, brake squeal is often dismissed as normal or ignored, but it can signal worn pads or calipers—ignoring this can cause uneven rotor wear or even brake failure. Regular inspections can prevent such accidents, and understanding the true cause is crucial. For detailed diagnostics, consider consulting reliable sources or professional opinions. Do you know what your vehicle’s noises really mean? Learning to interpret these signs can save you thousands.
Ever wonder if your car’s subtle vibrations indicate something more serious? Vibrations at certain speeds might seem trivial but could point to worn suspension components or imbalanced wheels—issues that tend to be overlooked. These physics-based nuances are vital, and for advanced insight, [Collision Fixer’s exploration of wheel balancing](https://collisionfixer.com/stop-that-high-speed-steering-wheel-shake-without-a-balance) underscores the importance of addressing them promptly.
Make sure you’re not falling for the trap of believing that auto repairs are all about replacing parts. Often, a fix is as simple as adjusting or cleaning a sensor or applying some preventive care. For example, cleaning dirty sensors can restore engine performance and fuel economy, as discussed in [this article](https://collisionfixer.com/stop-engine-surging-at-idle-with-this-simple-sensor-clean). Don’t hesitate to ask your mechanic about small tune-up tasks that can make a big difference.
Remember, staying informed prevents you from becoming just another victim of hidden vehicle problems. When in doubt, consult trusted resources or professionals. Have you ever fallen into this trap? Let me know in the comments! For more tips on maintaining your car’s peak condition, visit Collision Fixer’s [essential maintenance guide](https://collisionfixer.com/essential-car-service-tips-for-safe-summer-drives).
Investing in Reliable Equipment for Auto Maintenance
Maintaining your vehicle’s health requires more than just knowledge; having the right tools is crucial. I personally swear by a high-quality digital multimeter, like the Fluke 117, which provides accurate readings for battery health, alternator output, and sensor diagnostics. It’s an invaluable device that saves me time and guesswork, especially when troubleshooting electrical issues. Additionally, a good set of automotive pry bars and plastic trim removal tools helps prevent damage when disassembling panels or accessing hard-to-reach areas. For oil changes and fluid flushes, a 12V pump with adaptable hoses makes transfers effortless and clean, minimizing mess and contamination risks.
Software and Diagnostics That Make a Difference
Modern vehicles rely heavily on electronic systems, so I recommend investing in a professional-grade OBD-II scan tool such as the Autel MaxiCOM MK808. Unlike generic code readers, this device provides in-depth diagnostics, live data streams, and customization options that unveil hidden problems before they escalate. Regularly updating its software ensures compatibility with the latest vehicle models and systems, which is essential given how rapidly automotive electronics evolve. For a DIY enthusiast aiming to extend the lifespan of their car, coupling this with manufacturer-specific diagnostic software can uncover issues like sensor failures or ECU glitches that are not always apparent through visual inspections alone.
Long-Term Maintenance Techniques and Tools
Consistent maintenance is the bedrock of vehicle longevity. Using a magnetic drain plug magnet during oil changes can attract metallic debris, giving you early warning of engine wear that requires attention. I also perform a periodic coolant system flush with a specialized flushing kit, which prevents buildup of sediment that could lead to overheating or corrosion. Ensuring your tire pressure monitoring system (TPMS) sensors are clean and functional prevents unexpected alerts and maintains correct tire pressure, which is vital for safety and fuel economy. Equip your garage with a durable creeper and good lighting—these might seem simple, but they dramatically improve your access and visibility during repairs. Knowledge and proper tools combined will keep your car running smoothly long into the future.
How do I keep my auto repair setup effective over time?
To ensure your tools remain reliable, routine calibration and maintenance are essential. For electronic diagnostics, regularly update your scan tool’s software and verify serial numbers and certificates. Mechanical tools like socket sets and wrenches should be cleaned and lubricated periodically to prevent rust. Investing in a dedicated organized toolbox prevents loss and makes your work more efficient. As vehicle systems become more complex, staying informed about emerging diagnostic tech—like wireless sensors and AI-enabled diagnostics—is increasingly important. Keeping a knowledge base updated with reputable sources such as Collision Fixer can help you adapt your setup and skills over time, making DIY maintenance both feasible and effective. For advanced troubleshooting, I recommend studying the detailed procedures outlined in automotive repair manuals, which can often be found online through trusted platforms.
Looking ahead, the trend is moving towards smarter, connected vehicles. Integration of IoT devices and cloud-based diagnostic tools will become standard, allowing for real-time monitoring and proactive maintenance. As this technology matures, having an up-to-date toolkit and software will be more important than ever. Start by experimenting with higher-tier diagnostic tools and regularly following expert guides to stay ahead. If you’re ready to elevate your DIY skills, I suggest trying the advanced sensor cleaning method detailed here, which can instantly improve engine responsiveness. Give it a shot today, and see how a simple tweak can make a big difference in your vehicle’s performance.
The Hard Lessons I Stumbled Over When DIY Fixing My Car
One of the biggest truths I uncovered is that patience is key—rushing through a bumper patch or ignoring proper prep leads to frustrating results. I learned to thoroughly clean and sand the surface, which made all the difference in the seamless finish I aimed for. Also, never underestimate the value of quality tools; cheap supplies often cause more harm than good, costing me extra time and money. Lastly, I discovered that understanding the specific problem—not just treating symptoms—saves tons of headaches and cash, especially when diagnosing engine or transmission issues. These insights taught me that auto repairs aren’t just about fixing things, but about truly understanding your vehicle’s needs to keep it running smoothly.
Tools and Resources That Transformed My Car Maintenance Routine
Investing in a good OBD-II diagnostic scanner like the Autel MaxiCOM MK808 changed how I approach troubleshooting. Its detailed insights mean I catch issues early before they escalate, saving hundreds. For practical repairs, a quality set of plastic trim tools and a digital multimeter—such as the Fluke 117—are indispensable for safe, efficient work. I also rely on trusted online guides and communities, including Collision Fixer, which offers expert advice on everything from simple oil additive fixes to complex cooling system flushes. These resources help me feel confident tackling tasks myself, knowing I have backing from seasoned professionals and thorough guides.
Get Moving On Your Car Journey Today
Remember, every repair you undertake is a step toward greater independence and understanding of your vehicle. Whether it’s patching a bumper, diagnosing a slipping transmission, or tuning up your engine, embracing the learning process empowers you to keep your car in prime condition. Don’t hesitate to start small—each fix boosts your confidence and skills. The future of car maintenance is leaning toward smarter, more connected solutions, but the foundation remains your hands-on knowledge and willingness to learn. Are you ready to take charge of your vehicle’s health and unlock its full potential? Share your experiences or questions below—I’d love to hear your auto repair stories and tips!