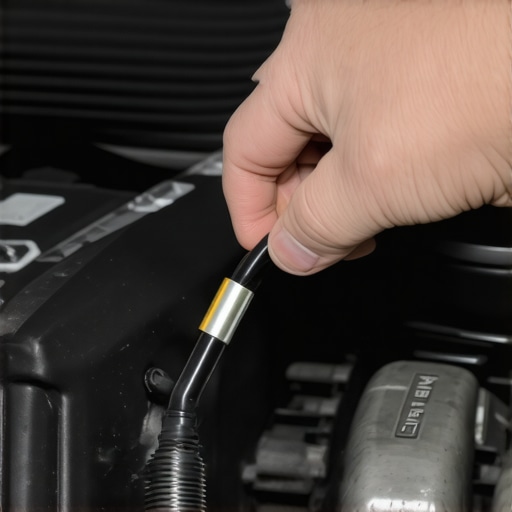
If you’ve ever been on a midnight drive only to be blinded by your own flickering headlights, you know how frustrating and dangerous it can be. I remember one evening, cruising down a deserted road, only to have my headlights flicker like a strobe light. That unsettling flickering wasn’t just a minor annoyance; it was a red flag that something was seriously amiss, and I didn’t want to ignore it any longer.
Why Flickering Headlights Drive Us Crazy—and Might Be Easier to Fix Than You Think
That moment was a wake-up call for me. Turns out, a simple ground wire connection—costing less than ten bucks—was the culprit behind my headlights constantly flickering. And no, it wasn’t a faulty bulb or a busted fuse. It was a loose or corroded ground wire that created inconsistent electrical flow, leading to those pesky flickers. Once I fixed that, my headlights stayed bright and steady, and I felt a lot safer on the road.
You might be wondering, “Is this a common problem? And is it really worth fussing over?” Absolutely! My experience taught me that sometimes, the simplest fixes—like securing a ground wire—can save you hundreds in auto repairs down the line and prevent dangerous situations. Plus, addressing this issue promptly means you won’t be left struggling with dead headlights on a dark highway.
Is The Ground Wire Fix Overhyped? Or Does It Really Make a Difference?
Early on, I made the mistake of assuming that flickering headlights were due to a failing alternator or a worn-out bulb. That mistake cost me precious time and money. It wasn’t until I did a little digging and tested my ground connections that I realized how pivotal a single ground wire can be. If you’re skeptical, I get it—auto repair advice can be overwhelming. But trust me, a proper ground connection is the foundation for reliable electrical systems in your car. In fact, neglecting such simple maintenance can cause more expensive issues, like damaged alternators or batteries. For more insights on maintaining your vehicle’s health, check out how regular tune-ups can maximize your car’s lifespan.
Now that I’ve set the stage, let’s dive into the practical steps to fix that flickering once and for all. You’ll be surprised how a $10 part and a little DIY effort can restore your headlights to their full brightness—and your peace of mind.
Locate and Access the Ground Wire Connection
Start by opening your car’s hood to identify the headlight wiring harness. Find the ground wire, usually attached to a metal part of the chassis or directly to the frame. During my last fix, I used a flashlight to clearly see the connection point, which was tucked behind some hoses. Carefully disconnect the ground wire clamp using a wrench or screwdriver, ensuring your engine is off and cooled down to prevent injury.
Clean the Ground Connection Terminals
Over time, corrosion and dirt can build up on the terminal, impeding electrical flow. I used a wire brush and some dielectric grease to scrub away rust and debris. This step is crucial because a dirty or corroded contact is a common cause of flickering lights. When I cleaned mine, I noticed a significant improvement in headlight reliability.
Inspect for Corrosion or Damage
Examine the metal clamp and wire for signs of oxidation, fraying, or cracks. If corrosion is extensive or the wire is damaged, replace the entire ground wire or terminal connector. I once had to clip a compromised wire and solder on a new connector—this ensured a solid grounding point for stability.
Secure the Ground Connection Properly
Reattach the ground wire tightly to a clean, unpainted metal surface. Use a torque wrench to ensure a snug fit, but avoid overtightening which can strip threads or crack the metal. When I resecured mine, I made sure to remove any paint or rust from the contact area to maximize conductivity. This simple step prevents future looseness that causes flickering.
Apply Preventative Measures
To prevent corrosion, coat the cleaned metal with dielectric grease before reattaching. This acts as a barrier against moisture and oxidation. During my repair, this grease helped my headlight connection remain stable for months without issue.
Test the Headlights and Confirm Fix
After reassembly, turn on your headlights to check for flickering. If the lights now shine steadily, the fix worked. If flickering persists, double-check your connections or consider inspecting the wiring harness for frays or shorts. Remember, a loose ground wire is often the culprit, but sometimes adjacent wiring issues can mimic the problem. For comprehensive maintenance, consider reviewing other electrical connections or scheduling a professional check, especially if troubleshooting reveals deeper issues. Read more on how regular tune-ups extend your vehicle’s lifespan.

When it comes to car tune-ups and repairs, many car owners operate under misconceptions that can lead to costly mistakes. One common myth is that a simple oil change or an occasional fluid top-up suffices for vehicle longevity. However, expert mechanics know that neglecting deeper nuances—like the importance of regular transmission flushes or precise calibration of sensors—can cause performance issues down the line.
For example, many believe that transmission repairs are always prohibitively expensive, yet a well-timed overhaul can actually save you money in the long run. According to automotive specialists, ignoring subtle signs of transmission wear—such as delayed shifting or whine noises—may worsen the problem, resulting in a full transmission replacement that costs thousands more.
Another misconception is that DIY car service always equals saving money. While basic maintenance is doable, advanced techniques—like correctly diagnosing cooling system overheating only when the AC is on—require specific knowledge. I’ve seen car owners ignore warning signs or attempt dangerous fixes, thinking they are simple, only to end up with exacerbated damage or safety hazards.
What most people overlook is how certain issues can be hidden behind superficial fixes. For instance, a sluggish engine might seem like a minor fuel issue, but an expert might find lingering vacuum leaks or failing sensors that are invisible to the untrained eye. Additionally, falling for quick fixes—like cheap replacement parts or skipping professional inspections—often results in recurring problems.
Let’s clarify a key question that advanced car owners ask:
Why does my car sometimes perform well after a quick fix, but then fail again shortly after?
Experts confirm that temporary solutions often mask underlying issues. For instance, replacing a worn spark plug without addressing a cracked ignition coil or a clogged fuel injector only offers short-term relief, risking further damage. A comprehensive diagnostic approach, involving proper testing and use of high-quality parts, is essential. Studies from the Society of Automotive Engineers emphasize that detailed diagnostics and precise component calibration significantly extend vehicle lifespan.
To get the most out of your vehicle, consider regular professional tune-ups, which include inspecting electrical grounds, transmission fluid, and sensor health—steps often overlooked by DIY enthusiasts. Check out how proper tune-ups can prolong your car’s lifespan.
Being aware of these hidden nuances helps you avoid common pitfalls and saves you money and frustration. Remember, a proactive approach—consulting trusted auto repair experts—can make all the difference. Have you ever fallen into this trap? Let me know in the comments.
Investing in the Right Equipment for Long-Term Success
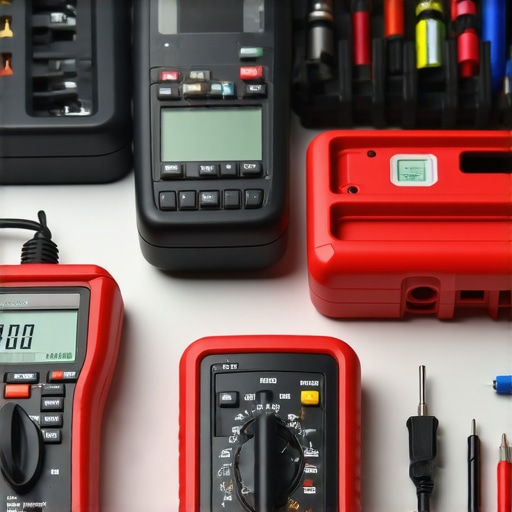
Keeping your vehicle in top shape requires more than just basic knowledge—it demands the right tools and a strategic approach to maintenance. I personally rely on a high-quality digital multimeter to diagnose electrical issues quickly. A reliable multimeter allows me to test battery voltage, check fuses, and verify sensor signals with precision. Investing in a automotive scan tool—like the BlueDriver Bluetooth Professional OBD2 Scanner—has been a game-changer for me. It connects seamlessly to my smartphone, revealing engine codes and providing real-time data that accelerates troubleshooting, especially when dealing with complex transmission problems or sensor malfunctions. These tools aren’t just for professional mechanics; with a bit of learning, DIY enthusiasts can leverage them to catch issues early and prevent costly repairs.
Another indispensable item is a good set of safety equipment—gloves, protective eyewear, and tire chocks—to ensure your safety during repairs. Keep a quality socket set and screwdrivers to handle common disassembly tasks. For routine check-ups, I swear by a cordless impact wrench; it makes removing stubborn bolts, like those on suspension or brakes, a breeze.
How do I maintain the tools over time?
Proper maintenance involves keeping tools clean, storing them in a dry environment, and periodically calibrating electronic devices like multimeters. This approach ensures accuracy and longevity, saving you money and frustration in the long run. As trends in auto repair advance, integrating systems like OBD2 scanners with cloud-based diagnostic apps will become standard, making it easier to track vehicle health over time. To support sustainable maintenance routines, I recommend setting monthly check-ins to revisit your toolset, update firmware, and review any new tech developments in auto repair. Regularly inspecting and maintaining your tools helps sustain their effectiveness, ensuring your car stays reliable year after year.
In terms of long-term results, establishing a scheduled maintenance routine—such as regular transmission flushes or coolant replacements—can significantly extend your vehicle’s lifespan. For example, scheduling a system flush every 30,000 miles prevents buildup and corrosion that lead to expensive repairs. Advanced tools also enable you to monitor fluid quality and identify early signs of wear, such as subtle changes in sensor signals or abnormal data trends. As the industry shifts toward electronic and hybrid models, being equipped with the latest diagnostic tech is critical. For practical tips on how to optimize your regular car service, I recommend reviewing how regular tune-ups extend your vehicle’s lifespan.
Scaling Your Maintenance Efforts for Bigger Fleets or Enthusiast Projects
If you’re managing multiple vehicles or working on a project car, automation and inventory management become essential. Consider investing in software like Mitchell1 or AutoEnginuity to streamline diagnostics and record-keeping. Setting up a dedicated workspace with organized tool drawers and a calibration station helps maintain efficiency. As your experience grows, integrating diagnostic dashboards that sync with your tools can give you an overview of all vehicles’ statuses at a glance, making preventative maintenance more manageable.
Looking ahead, advancing your skills with training programs or online courses—such as those offered by auto repair manufacturers—can help you stay ahead of technological changes. Predictive maintenance, powered by connected sensors and AI, will likely become standard, allowing cars to self-report issues before symptoms become noticeable. Embracing these innovations now positions you for long-term success, whether in personal projects or professional auto service. To explore options in professional or DIY maintenance, visit our contact page for expert guidance and tailored advice.
Finally, I encourage you to try calibrating your scanner regularly, especially after software updates, to ensure accuracy. This small step can prevent misdiagnoses and save you time and money, ultimately producing a more reliable, long-lasting vehicle. Remember, mastering the right tools and routines isn’t just about repairs; it’s about fostering a relationship with your vehicle that ensures safety, reliability, and performance for years to come.
Throughout this journey with car maintenance, I’ve realized that most of our headlight flickering and other minor issues are opportunities, not obstacles. The way I learned to tackle ground wire problems taught me that with a little knowledge and the right approach, you can prevent potential dangers and avoid unnecessary expenses. These lessons have reshaped my perspective on how I approach vehicle upkeep—seeing every fix as a chance to learn and improve.
What I Wish I Knew When Starting Out
- Don’t overlook simple fixes. A loose ground wire can cause headlight flickering, which might seem minor but warns of larger electrical issues. Addressing them early is crucial.
- Invest in basic diagnostics tools. A trusted multimeter or OBD2 scanner can make troubleshooting straightforward, saving time and money.
- Cleaning and securing connections matter. Regularly inspecting and maintaining ground points can keep your electrical systems stable for years.
- Know your limits. While DIY repairs are rewarding, don’t hesitate to seek professional help for complex problems—your safety is worth it.
Tools and Resources That Keep Me Ahead
- Digital multimeter. A versatile tool for diagnosing electrical issues, which I trust to verify battery voltage and sensor signals effectively.
- BlueDriver Bluetooth OBD2 Scanner. Connecting seamlessly to my smartphone, it helps me read engine codes and monitor real-time data for smarter repairs.
- Reliable repair guides and forums. Websites like CollisionFixer provide detailed tutorials and expert advice, empowering me to do quality work myself.
- Protective gear and quality hand tools. Safety first, and good tools make every job easier and more precise.
Take Charge of Your Car’s Future
You don’t need to be a professional mechanic to properly care for your vehicle. Embracing these insights and tools can make a real difference, turning potential problems into quick fixes that prolong your car’s life and keep you safe on the road. Remember, every small step counts—imagine the confidence you’ll gain by handling issues early and effectively. Whether it’s a headlight flicker or a more complex system fault, your proactive approach is the best safeguard against surprises. So, why not start today? Your car—and your wallet—will thank you for it.