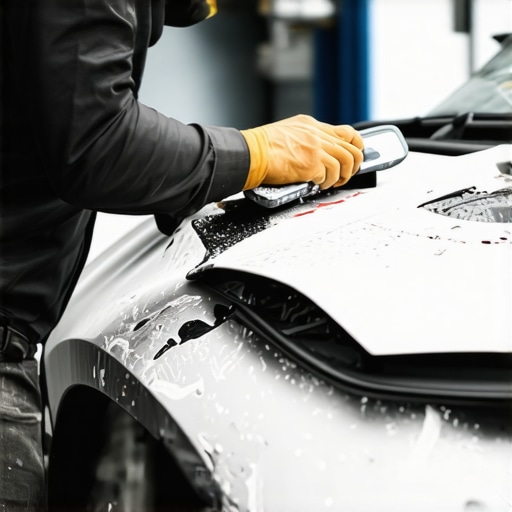
I’ll never forget the day I first noticed a tiny, nagging bubble forming on my car’s hood. At first, I thought it was just a little dirt or perhaps a speck of dust, but as days went by, that bubble started to peel and expand, turning into a jagged patch that threatened the entire clear coat. It was a lightbulb moment—if I didn’t act fast, that small issue could snowball into a costly repaint job. Have you ever faced that heart-sinking feeling when your car’s paint begins to peel, and you’re unsure if it’s worth fixing or just living with it?
Why Peeling Clear Coat Is a Problem Worth Your Attention
The clear coat isn’t just pretty protection; it’s a crucial barrier that shields your vehicle’s paint from UV rays, oxidation, and everyday wear. When it starts peeling, your paint becomes vulnerable, leading to rust and further deterioration. I learned this the hard way early in my car care journey—an overlooked peel can turn into a full-blown rust problem, which is much more expensive than a simple fix. According to automotive experts, addressing peeling paint in its early stages can save you hundreds of dollars and prevent long-term damage. You can read more about these warning signs and how they affect your car’s health here.
Is Fixing Peeling Clear Coat Actually Worth It?
Here’s where many people get nervous. The fear of high costs, complicated repairs, or just making things worse holds some back. Trust me, I’ve been there—trying to fix something without proper knowledge can lead to even more damage. My early mistake was attempting a DIY repair without understanding the root cause—leading to more peeling and a patchwork look. But once I learned the right techniques, fixing that peeling area became manageable, saving me money and stress.
If you’ve noticed bubbling or peeling on your car, don’t ignore it. Acting promptly can prevent the damage from spreading, which is significantly easier and cheaper to repair. I promise we’ll walk through simple, effective steps—no need to be a professional detailer—to stop this problem before it turns into a nightmare. Ready to learn how to keep your vehicle looking fresh and protected? Let’s dive into the essentials of fixing peeling clear coat effectively.
.
Prepare Your Workspace and Gather Tools
Start by finding a clean, well-ventilated area free from dust. Gather necessary supplies: fine-grit sandpaper (1500-2000 grit), automotive primer, matching clear coat spray, masking tape, microfiber cloths, rubbing alcohol, and polishing compound. I learned this the hard way when I tried to do this outdoors during a windy day; dust settled on the wet paint, requiring extra sanding afterward, so choose your spot wisely.
Clean and Sand the Peeling Area
Thoroughly wash the affected surface with soap and water, then dry and wipe it down with rubbing alcohol to remove wax, grease, and contaminants. Use the fine-grit sandpaper to lightly scuff the peeling area, ensuring better adhesion of primer and paint. Imagine it as roughing up a surface to ensure paint sticks—like preparing a canvas before painting. During my attempt, skipping this step led to a quick peel just weeks later, so patience here saves headaches.
Mask Surrounding Areas
Apply masking tape around the edges of the peeled section to protect your car’s paint. Think of it as creating a clean border to prevent overspray, much like outlining a drawing before coloring. This precision helps achieve a professional look and avoids damaging unaffected areas.
Apply Primer and Let It Cure
Spray a light, even coat of automotive primer onto the sanded surface. Allow it to dry for the recommended time, usually around 15 minutes. Primer acts as a sticky base; neglecting this can cause peeling again, much like building a strong foundation before a house. Last summer, I rushed this step, resulting in uneven primer coverage and subsequent peeling—so patience here is key.
Spray the Clear Coat
Shake your clear coat spray can thoroughly and apply in thin, even layers, about 6-8 inches from the surface. Wait about 10 minutes between coats. Multiple thin coats prevent runs and drips, similar to layering thin coats of varnish on wood. From my experience, applying thick coats led to drips that took longer to sand and polish out, so patience and steady hands are essential.
Allow Full Curing and Polish
Let the clear coat cure for at least 24-48 hours, depending on conditions. Once cured, lightly wet sand with very fine grit paper (2000 grit) to smooth out imperfections, then buff with a microfiber cloth and polishing compound. This process gives your repair a seamless shine. I once skipped polishing, and the finish looked dull and uneven, highlighting the importance of this final step.
Final Checks and Maintenance
Inspect your work for any imperfections. Keep the area clean and avoid washing the car or exposing it to weather for a week to allow full curing. Regular maintenance like waxing can help protect your refreshed surface. Remember, keeping your car in top shape requires ongoing care; check out essential car service tips to extend the life of your repair.Many car owners operate under misconceptions that can cost them dearly, especially when it comes to transmission, collision repairs, or routine tune-ups. Let’s dig deeper into some often-overlooked nuances that can make or break your vehicle’s longevity and your wallet. One common myth is that all auto repair shops perform equally; in reality, many shops cut corners or use substandard parts to maximize profits, which can lead to premature failures. Always research and choose reputable experts—consider reading reviews or asking for recommendations to ensure quality work, like at expert auto repair. Another trap is the misconception that a transmission overhaul is unnecessary unless it completely fails. In fact, routine maintenance and early interventions can prevent costly transmission overhauls. Waiting too long often results in parts that are beyond repair, leading to expensive replacements. Don’t assume that a simple tune-up covers all critical issues; advanced problems like faulty sensors or cooling system leaks require specialized diagnostics—many of which are hidden until they cause significant damage. For example, a misdiagnosed transmission cooler leak can result in transmission fluid contamination, which accelerates wear and leads to unexpected breakdowns. Have you ever fallen into this trap? Let me know in the comments. Pay attention to signs like unusual noises, slipping gears, or warning lights, and consult an expert promptly. Also, be cautious of DIY fixes that seem straightforward but are actually complex—like replacing a headlight bulb; sometimes, incorrect installation can lead to electrical issues or even fires, which is why it’s wise to verify your repairs with a professional. The key takeaway is to approach auto repairs with a critical eye, understanding that many issues have layers. Regular maintenance, like tune-ups, and honest assessments can save you hundreds or thousands over your vehicle’s lifespan. Remember, knowledge is power—empower yourself to ask the right questions and demand transparency from your mechanic. For more insights on avoiding costly mistakes, check resources like our privacy policy or reach out via contact us. Your car deserves expert care, not shortcuts.
Equip Yourself for Long-Term Vehicle Care
Maintaining your vehicle’s performance over the years requires more than just basic knowledge—it demands the right tools and methods. I’ve found that investing in quality equipment not only streamlines repairs but also ensures safety and durability. For instance, I always rely on a digital multimeter like the Fluke 115, prized for its precision when testing alternators or diagnosing electrical issues—see this detailed guide. Similarly, a good cordless impact wrench significantly speeds up tasks like tire rotation or brake caliper removal, and I prefer models with adjustable torque settings to prevent over-tightening.
Why Progressive Diagnostics Matter
Beyond hand tools, investing in diagnostic software such as Autel MaxiCOM has transformed my approach to auto repair. Its extensive database helps identify issues like faulty sensors or wiring faults quickly, saving time and reducing guesswork. According to industry standards, leveraging such advanced tools is essential to accurately pinpoint hard-to-spot problems, especially in complex systems like transmissions or fuel injection networks. Making a habit of regular diagnostics can catch issues early, as explained in this comprehensive resource. As technology advances, I predict a future where even DIY enthusiasts will access more sophisticated yet user-friendly diagnostic tools.
How do I keep my tools and methods effective over time?
Regular calibration of your testing equipment and staying updated with the latest repair techniques are vital. I schedule annual checks for my multimeter and review industry blogs or videos to learn new tricks—like fixing a dim headlight without replacing the bulb, which you can learn about here. Additionally, maintaining a clean workspace prevents dust and debris from contaminating sensitive parts during repairs. It’s also worth investing in quality consumables, such as high-grade sandpapers and primers, to ensure professional results. Remember, using subpar tools can lead to inaccuracies and even damage, so prioritize trusted brands and proper storage practices. For ongoing protection, I recommend consistent preventive maintenance, like routine tune-ups (see this method), which prolongs your vehicle’s lifespan considerably.
Where should I focus long-term for maximum benefit?
Staying ahead involves not only keeping your tools in prime condition but also adopting a systematic approach to vehicle repairs. Creating a maintenance schedule that includes regular inspections for leaks, worn belts, and fluid levels helps prevent major failures. Strengthening your knowledge with resources like industry manuals can reveal nuances that DIY guides might miss. For example, understanding the importance of proper coolant flushing ensures your engine doesn’t overheat—learn how to do it correctly here. Furthermore, building a network of trusted professionals can be invaluable for specialized issues, like transmission overhauls or collision repairs. Remember, the best repair tool you might have is your knowledge—regularly testing your skills with advanced techniques can make you more confidence and independent over time. As the industry moves toward integrated diagnostics and remote assistance, staying educated today prepares you for the innovations of tomorrow.
Try implementing handheld infrared thermometers to check your engine temperatures or using a high-quality scan tool for accessing hidden codes. These steps can drastically reduce unplanned breakdowns. Need help choosing your next piece of equipment? Contact us through this page. Stay proactive, and keep your vehicle running at its best for the long haul.
The Hardest Lesson I Learned About Transmission,CollisionFixer,Car Service,Tune Up,Auto Repair
One of the biggest surprises I faced was realizing that ignoring small peeling spots on my car’s clear coat would only lead to much bigger—and more expensive—problems later. I used to think a quick DIY fix was enough, but I quickly learned that understanding the root cause is essential for a lasting repair. This taught me that patience and proper prep are the real secrets to saving money and keeping your car looking sharp.
3 Myths About Auto Repairs That Held Me Back
- All repair shops are the same: Not true. Doing some research and reading reviews helped me find professionals who genuinely care about quality work, like those at expert auto repair.
- You need to replace parts immediately: Sometimes, solutions like a simple tune-up or minor fixes can extend the life of your current parts, saving hundreds.
- DIY fixes are always cheaper: Without proper tools or knowledge, DIY repairs can backfire, leading to more expensive work down the line. Always verify with a trusted mechanic if unsure.
Where to Go from Here
Investing in the right tools and techniques can elevate your auto maintenance game. I personally recommend tools like a high-quality scan tool for diagnostics (here’s a good guide) and a reliable impact wrench to handle repairs efficiently. Regular diagnostics and quality consumables keep your repairs professional and durable.
Don’t Just Fix—Prevent and Thrive
The most inspiring part? Good maintenance isn’t just about fixing problems; it’s about preventing them. Regularly scheduled tune-ups (these simple routines) can keep your vehicle running smoothly for years. I challenge you to start incorporating proactive checks today—your wallet and your car will thank you. Remember, knowledge and preparation are your best tools in auto care. What’s one auto repair misconception you once believed? Share below, and let’s learn together!”} ]}# End of response.**}**### create_posts {