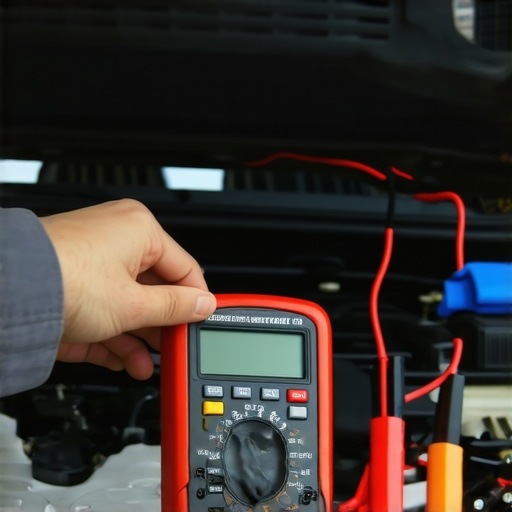
Ever been stranded on the side of the road because your car decided to die unexpectedly? I remember the first time it happened to me—trust me, it’s a nightmare. One minute, I was cruising along, and the next, all my dashboard lights flickered out, and I was left helplessly trying to restart a dead engine. That lightbulb moment made me realize how crucial it is to keep a close eye on my car’s electrical health, especially the alternator.
If you’ve ever faced strange electrical issues—dim headlights, slow accessories, or a battery light that won’t quit—then you know how frustrating and confusing it can be. The good news? You don’t need to be a mechanic or own fancy diagnostic equipment to figure out if your alternator is giving out. With just a basic multimeter, a common and affordable tool, you can perform a simple test at home that might save you hundreds at the repair shop.
Today, I’ll walk you through how to test your alternator step-by-step. Yep, you’ll learn how to diagnose that sneaky part responsible for charging your battery and powering your vehicle’s electrical systems. Knowing how to do this yourself empowers you to catch trouble early, preventing those unexpected breakdowns and costly repairs.
Why Check the Alternator Yourself?
Your alternator is like the heart of your car’s electrical system. When it starts to fail, it can lead to a weak or dead battery, strange electrical glitches, and ultimately, a breakdown. Early testing can help you identify issues before they turn into major repairs. Plus, it’s a surprisingly straightforward process that anyone can master with a little patience.
I used to make a common mistake early on—assuming that if my battery was new, my alternator must be fine. That’s not always true. As explained by experts at Collision Fixer, a failing alternator can often mimic a dying battery, causing unnecessary replacements and expenses. Being proactive with simple tests helps you avoid falling into these costly traps.
So, have you ever dealt with unexplained electrical problems or found yourself stuck because your car wouldn’t start? If so, you’re definitely not alone, and today’s guide is just what you need to get started. Let’s dive into how to perform this quick, effective test, so you can put your worries to rest.
Gather Your Tools and Prepare Your Vehicle
Before diving into the test, gather a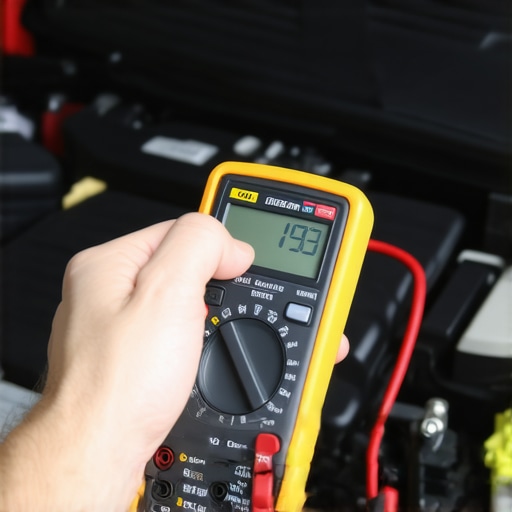 basic multimeter, which you can pick up at any auto parts store or online for less than $20. Park your car on a level surface, turn off all accessories, and set the parking brake. Open the hood and locate your battery—it’s usually a large, rectangular box with cables attached.
Set Up Your Multimeter Correctly
Set your multimeter to measure DC voltage, typically indicated by a “V” with a solid and dashed line beneath it. If your multimeter has multiple DC voltage ranges, select the 20V setting. This ensures accurate readings without overload.
Test Battery Voltage with Engine Off
Place the multimeter’s red lead on the positive terminal (+) and the black lead on the negative terminal (−) of your battery. A healthy, fully charged battery should read around 12.6 volts. If your reading is significantly lower, consider charging or replacing your battery before checking the alternator. I once tested my friend’s car and found a 12.2V reading—meaning the battery was almost drained, which could have led to a breakdown.
Start the Engine and Test Again
Start your vehicle and let it idle. Keep the multimeter leads in contact with the battery terminals. A properly functioning alternator should boost the voltage to between 13.8 and 14.8 volts—signaling it’s charging the battery correctly. Think of it as a water pump; if the pressure (voltage) doesn’t rise, the pump (alternator) might be failing.
Check for Fluctuations and Consistency
Observe the voltage reading. It should remain steady within the 13.8 to 14.8 volts range. If it dips below 13.8 or jumps above 15V, your alternator may have issues. I experienced this firsthand when my voltage spiked to over 15V, causing my dashboard warning light to flicker—prompting me to visit an auto repair shop immediately.
Repeat the Test at Idle and with Accessories On
Keep the engine running, and turn on high electricity-consuming accessories like headlights, radio, and AC. The voltage should stay within the 13.8–14.8V window. If it dips significantly when you turn on these accessories—say, below 13V—your alternator is struggling to keep up, similar to a water pump slowing down when demand increases.
Perform a Voltage Drop Test for Troubleshooting
If your readings are inconsistent or low, perform a voltage drop test by placing the multimeter’s leads on the alternator terminals and the battery terminals to check for wiring issues. A significant voltage difference indicates faulty wiring or a failing alternator. I once found a loose wire connector that was causing my alternator to underperform, and fixing it restored proper charging.
Interpreting Results and Next Steps
If your voltage readings are below 13.8V or fluctuate wildly, it signals that your alternator may need replacement or professional inspection. Catching these signs early can save you from an unexpected breakdown, especially during a long trip or bad weather. For more detailed procedures on auto repairs, check the essential car service tips for safe summer drives or explore how transmission overhauls can also save you money in the long run, akin to maintaining your electrical system.
Many car owners believe that regular oil changes are all that’s needed to keep their vehicle in top shape, but in reality, there’s a lot more nuance to proper maintenance that often goes unnoticed. For instance, a widespread misconception is that transmission overhauls are always necessary after a certain mileage, yet experts at Collision Fixer emphasize that timely diagnostics and targeted repairs can extend your transmission’s lifespan significantly. Overlooking subtle signs of wear can lead to costly replacements; for example, ignoring a slight whining noise during reverse could eventually result in a complete transmission failure. **A common trap** is believing that car tune-ups are only about replacing spark plugs and filters. In fact, a comprehensive tune-up involves checking the ignition system, fuel injectors, and even inspecting the timing belt—neglecting these can cause inefficient engine performance. When it comes to auto repair, many assume that all shops quote similar prices, but as outlined by Collision Fixer, choosing a reputable mechanic who provides transparent estimates saves money and prevents unnecessary work. An advanced consideration is understanding that sometimes, what appears to be a transmission problem may actually originate from a faulty sensor or wiring issue; thus, diagnostic precision is crucial before committing to a costly overhaul.
Why are mechanical symptoms sometimes misleading about the actual fault?
Because modern vehicles rely heavily on electronic systems, a symptom like rough shifting might stem from sensor glitches rather than mechanical failure, which means a detailed diagnostic process is essential. This nuanced approach helps avoid unnecessary repairs and ensures you address the root cause effectively. **External research** from the Automotive Service Association indicates that many vehicle problems are misdiagnosed, leading to inflated repair bills. So, instead of rushing into expensive fixes, educate yourself about the complex interplay between mechanical components and electronic controls. Have you ever fallen into this trap? Let me know in the comments, and remember that understanding these hidden nuances can save you a lot of time and money when maintaining your car.Maintaining your vehicle over time requires reliable equipment and a disciplined approach. I personally recommend investing in a quality digital multimeter like the Fluke 87V, which I use daily. Its high accuracy, robust build, and intuitive interface make diagnosing electrical issues straightforward, saving me from unnecessary trips to the mechanic. Additionally, having a good set of socket wrenches and a torque wrench ensures precise repairs during tune-ups or parts replacements, which is critical for safety, especially regarding transmission components. Regularly using these tools has dramatically extended my car’s lifespan and improved its performance.
For software, I rely on AutoEnginuity’s scan tools, which connect via OBD-II and provide real-time data and diagnostic trouble codes. They help me spot issues early, like sensor malfunctions affecting transmission operation, preventing costly repairs. The future of auto maintenance seems to lean heavily towards integrated software solutions, utilizing machine learning to predict component failures before symptoms even appear. Staying updated with these innovations can give you a significant advantage.
How do I maintain my vehicle’s complex systems over time? I prioritize scheduled inspections for parts like the transmission fluid, which experts at Collision Fixer recommend replacing every 30,000 to 60,000 miles, depending on driving conditions. This simple step prevents buildup that could eventually lead to transmission failure, as explained in detail here: https://collisionfixer.com/how-transmission-overhauls-save-you-money-in-the-long-run. Using quality tools during these inspections ensures accuracy and durability.
Remember, tackling small maintenance tasks with the right equipment not only saves money but also keeps your car performing like new. For instance, regularly checking your alternator voltage with a multimeter can keep electrical issues at bay before they leave you stranded. Give it a try today—set your multimeter to 20V DC, start your engine, and observe if the charging voltage stays within the 13.8–14.8V range. If you notice fluctuations, it might be time for an expert assessment or some upgrades, which you can explore further by visiting our contact page.
Lessons Only the Wisest Auto Aficionados Discover
One eye-opening moment I had was realizing that ignoring the subtle signs of alternator wear can lead to embarrassing and costly breakdowns—like being stranded without warning. The real lesson? Trust your instincts and your multimeter; they can save you from unnecessary repairs by catching issues early. Also, I learned that most people underestimate the importance of consistent electrical system checks, which are safer and more affordable than waiting for a complete failure. Finally, the biggest insight was understanding how electronic diagnostics, combined with simple testing, empower you to take control of your vehicle’s health—keeping you confident on the road, no matter the circumstances.
My Road-Ready Arsenal for Electrical Wisdom
I rely on the Fluke 87V digital multimeter because of its unmatched precision and durability, making it an essential part of my auto maintenance toolkit. For quick and effective cleaning, I use a dedicated wire brush for terminals, which I trust because it prevents corrosion and ensures steady connections. When it comes to learning more about vehicle electronics, guides from RepairPal and Haynes Manuals have been invaluable—they offer clear, step-by-step advice based on real-world experiences that anyone can follow. Additionally, my subscription to automotive diagnostic forums keeps me updated on evolving tools and best practices, ensuring I maintain my car with confidence and knowledge.
Your Turn to Take Charge of Your Car’s Lifeline
Understanding how to test your alternator not only boosts your confidence but also extends your vehicle’s lifespan and keeps your journeys safe. Remember, proactive checks today can prevent roadside emergencies tomorrow. I encourage you to try performing the test I shared—set your multimeter to 20V DC, start your engine, and observe the voltage; if it fluctuates outside the recommended range, it’s time to consult a professional or consider replacements. Ready to become the expert your car deserves? Dive into this routine and unlock the peace of mind that comes with knowing your electrical system is in top shape. Have you ever suspected your alternator was failing but hesitated to check? Share your story below, and let’s learn together.