It was a morning just like any other, until I pulled into my driveway and caught sight of a deep, glaring scratch across my car’s pristine paint job. My stomach sank. I’ve been there—seeing a nasty scratch and feeling helpless, especially when the idea of taking it to a shop and shelling out hundreds isn’t appealing. That moment was my lightbulb: there had to be a better way.
Why Deep Scratches Feel Like the End of the World for Car Owners
Deep scratches can be more than just an eyesore; they threaten your car’s exterior integrity and can devalue your vehicle significantly. Many folks believe that removing these damages requires professional buffers and costly repairs. But what if I told you that you can minimize or even eliminate stubborn scratches without a buffer, right at home?
It might sound too good to be true, but over the years, I’ve discovered simple techniques—no fancy equipment needed—that can save your car’s appearance and your hard-earned cash. And trust me, I’ve made the mistake early on trying to buff out deep scratches with the wrong approach, which only made the problem worse. That’s why I’m here—to share what really works.
Is Scratching Your Car the End of the World, or Can You Fix It?
When I first encountered a deep scratch, I assumed only a professional could handle it. I watched tutorials and tried DIY fixes, but many seemed ineffective or risked damaging the paint even more. It wasn’t until I realized the importance of understanding the underlying paint layer that I saw real progress. For example, using a polish designed for deep scratches can fill in the gaps and reduce their visibility.
According to auto industry experts, the key to successful scratch repair is selecting the right product and technique tailored for the depth of the damage. The mistake I made early on was ignoring the scratch’s depth and jumping straight into aggressive buffing, which led to uneven paint and a worse appearance.
If you’ve been frustrated by failed attempts or wary of the costs involved, you’re not alone. The good news is, you can learn a straightforward method to improve your car’s look—without a buffer or a mechanic. Ready to uncover the secrets?
In the next section, I’ll walk you through practical, step-by-step tips that will help you tackle those deep scratches confidently. And if this resonates with you, ask yourself: have you faced a scratch that seemed impossible to fix, only to find a simple, effective solution that you can do yourself?
Preparing Your Workspace and Materials
Start by finding a shaded, dust-free area to work—this prevents contaminants from settling into your repair. Gather essential supplies: a microfiber cloth, automotive scratch remover or compounding polish, rubbing alcohol, masking tape, and a clean applicator pad. Remember, meticulous prep sets the foundation for a successful fix; I once rushed into repairs on a sunny driveway, only to end up with uneven spots that took twice as long to correct.
Cleaning and Assessing the Damage
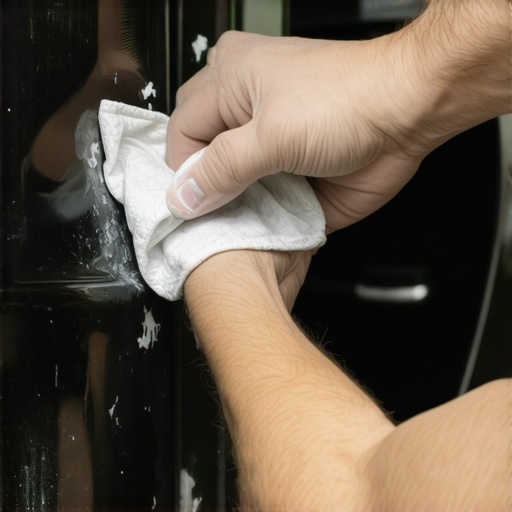
Thoroughly wash the scratched area with soap and water, then dry it completely. Use a microfiber cloth to wipe the surface, removing dirt or grease that could interfere with product adhesion. Lightly dampen a cloth with rubbing alcohol and wipe the area again to eliminate oils. Carefully examine the scratch depth—if it catches your fingernail, it’s deep. I once misjudged and tried rubbing compound on a deep gouge, which made the damage more noticeable—so assess carefully before proceeding.
Protect Adjacent Areas with Masking Tape
Apply masking tape around the scratch to prevent accidental scratches or polish from affecting surrounding paint. Use a steady hand to tape the edges precisely—this acts like a safety zone. When I first attempted to polish without masking, I accidentally swiped onto the clear coat, creating a visible line I then had to sand and repaint. Patience here saves time later.
Applying the Scratch Remover or Compound
Dispense a small amount of automotive scratch remover onto the applicator pad. Use light, circular motions to work the product into the scratch—think of it like massaging your car’s paint to fill in the imperfections. Apply consistent pressure and avoid pressing too hard, which can damage the clear coat. During a personal trial, I found using a gentle approach yielded better blending with the surrounding paint, especially on deeper scratches.
Monitor Progress and Add More Product as Needed
Periodically wipe away excess product and inspect the repair. If the scratch still remains visible, lightly reapply and continue rubbing gently. Patience is key; rushing can cause uneven patches. I learned this the hard way when I hurried and ended up with a haze I had to polish out.
Polishing and Finishing Touches
Once the scratch diminishes or disappears, switch to a fine polish or a dedicated car paint buffer to restore shine. Use a fresh microfibre cloth to buff the area in circular motions, blending the repaired spot with the rest of the panel. This step often reveals spots needing additional touch-ups—don’t get discouraged. I’ve had cases where multiple rounds resulted in a near-perfect finish, salvaging what once looked like a catastrophic scratch.
Protecting the Repaired Area
Apply a quality wax or sealant to shield your repair from future damage and UV rays. Regular waxing maintains the clarity and shine, extending the life of your fix. Remember, small scratches can quickly worsen if left unprotected—just like neglecting a tiny rust spot, which can turn into a major problem down the line. Regular maintenance keeps your car looking its best.
Many car owners assume that all auto repairs are straightforward and that a quick fix is enough to ensure vehicle longevity. However, there are several nuanced truths often overlooked that can lead to costly mistakes. For instance, the myth that a transmission fluid change is always unnecessary unless obvious problems arise is widespread, but in reality, neglecting regular transmission maintenance can accelerate wear and even cause complete transmission failure. Professional auto technicians emphasize that understanding the difference between a simple drain and a full flush, and knowing when each is appropriate, is critical. For example, a simple drain may not remove all debris, especially in high-mileage vehicles, whereas a flush can sometimes dislodge contaminants that cause damage elsewhere in the system. But beware: aggressive flushing procedures can sometimes introduce risks if not performed correctly. According to industry experts, improper transmission service can result in more harm than good, especially if incompatible fluids are used or if dirt is forced into sensitive components. So, instead of blindly trusting conventional wisdom, it’s essential to evaluate your vehicle’s specific needs—consider consulting your owner’s manual or a qualified mechanic for tailored advice. Additionally, many assume that routine tune-ups are an outdated practice, believing modern cars require less maintenance. Yet, neglecting timing belts, spark plugs, and air filters can lead to poor fuel economy, engine misfires, or even severe engine damage. Regularly scheduled maintenance, customized to your car’s make and model, actually extends its service life and prevents unexpected breakdowns. Moreover, a common pitfall is underestimating the importance of addressing minor issues promptly. For example, ignoring a squealing serpentine belt may seem minor, but it can suddenly snap, causing a loss of power steering or cooling. To avoid this, regular inspection and timely replacement are key. Want to go deeper? Consider how many drivers overlook the subtle signs indicating transmission leakage or electrical system quirks—knowing these nuances can save you thousands. For advanced insights on this topic, check out analyses from automotive repair specialists, who often cite that proactive, informed maintenance is the cornerstone of vehicle reliability. Have you ever fallen into this trap? Let me know in the comments, and be sure to explore our related guides to avoid common auto repair pitfalls.Maintaining your vehicle’s health over the long run requires more than just basic checks; it demands the right tools, consistent routines, and a strategic approach. Personally, I swear by a good digital multimeter, which helps me troubleshoot electrical issues like *why your power steering pump is whiney* or *why your gas pedal feels stiff*. A quality diagnostic scanner, such as the Autel MaxiCOM, allows me to read and clear error codes efficiently, saving time and money on unnecessary repairs. These tools have transformed my DIY approach, enabling me to pinpoint problems precisely and avoid costly guesswork.
Beyond gadgets, I rely heavily on a set of specialty lubricants and consumables. For example, using high-temperature brake lubricant prevents squeaks and ensures smooth operation, especially when tackling issues like *how to fix a squeaky serpentine belt with soap*. Regular use of synthetic oil and transmission fluids, coupled with a transparent maintenance schedule, helps prolong the lifespan of key components and keeps the car running smoothly.
Looking ahead, automation and smart sensors are reshaping auto maintenance. Predictive maintenance software, powered by IoT, can alert you when certain parts are nearing failure—think of it as having a virtual mechanic in your pocket. As these technologies become more affordable, DIY enthusiasts and professional shops alike will benefit from early diagnostics, reducing downtime and repair costs.
So, how do I maintain my car over time to avoid surprises? The secret lies in routine checks, guided by reliable tools. I recommend periodically testing your alternator’s output with a multimeter to ensure your charging system isn’t compromised—an issue often unnoticed until it causes a breakdown. Also, I suggest cleaning your battery terminals with a mixture of baking soda and water, then applying protective spray, which is a simple yet effective way to prevent corrosion and electrical issues.
Another critical aspect is keeping an eye on fluid health. For instance, regularly inspecting your transmission fluid and knowing the *difference between a transmission flush and a drain* can extend the life of your gearbox. Professional mechanics emphasize that proactive maintenance—like checking for signs that your *gear shifter feels gritty after a cold night*—can prevent big repairs later. For those interested, I recommend visiting Collision Fixer’s detailed guide on transmission care.
Investing in quality tools and establishing a maintenance routine based on manufacturer specs has saved me thousands. Try integrating a digital multimeter into your weekly check, or set reminders to inspect your fluid levels. These small steps can dramatically improve your vehicle’s longevity and safety. Curious to see how these tools work in action? Explore tutorials on sensor testing or fluid inspection—they’re straightforward and empowering. Remember, consistent effort now means fewer headaches on the road later.
Through my years of tinkering with cars, I’ve learned that tackling deep scratches isn’t as intimidating as it seems, especially when armed with the right knowledge and tools. One of the most valuable lessons I’ve discovered is the importance of patience and careful assessment before diving into repairs. Rushing often leads to uneven finishes or further damage, so taking the time to prep and evaluate each scratch has saved me from costly mistakes.
Another insight is understanding the nuances of your car’s paint type and depth of damage. Not all scratches are created equal, and recognizing whether a scratch is surface-level or deep influences the approach you’ll take. I’ve found that consulting reliable resources and, when in doubt, testing in inconspicuous areas builds confidence and prevents accidents.
Lastly, investing in quality products has made a significant difference. Cheap compounds may seem tempting, but they often require reapplication or cause additional hazing. Trusting reputable brands and following their instructions meticulously ensures a smoother repair process and a better-looking finish, making your DIY effort truly worthwhile.