I remember the first time I faced a stubborn brake caliper that wouldn’t budge. It was late afternoon, and I was just trying to get my minivan ready for a weekend trip. Suddenly, I noticed that one brake pedal felt spongy, and the car was pulling slightly to one side. I crawled under my vehicle, scratching my head, realizing that a caliper was sticking — but I wasn’t about to spend hours removing it just to fix a simple issue. That moment was a lightbulb for me: there had to be ways to unstick a brake caliper without the hassle of complete disassembly.
Mastering the Art of the Brake Caliper Trick
If you’ve ever experienced squeaking brakes, uneven braking, or a pedal that’s softer than usual, you know how frustrating it can be. But the good news is that in many cases, you don’t need to remove the caliper entirely to get it functioning smoothly again. Today, I’ll share proven techniques from my own toolbox and experience that help you fix a sticky caliper right in your driveway, saving time and money. Plus, a properly functioning brake system is crucial for your safety, and I’ll show you how to avoid costly repairs down the line.
Is It Really Worth Trying a Quick Fix First?
Before you dive into complex repairs, remember that some sticking calipers are simply the result of dirt or corrosion on the slider pins or pistons. A quick flush or a pressurized cleaning can often solve these issues. However, I learned early on that rushing into parts replacement without diagnosing the root cause is a mistake. For example, I once replaced a caliper only to find the issue returned because I overlooked a worn piston seal. It’s essential to approach this carefully, respecting safety standards and not just patching the problem. According to experts at the Motor Association, proper lubrication of slider pins and regular brake maintenance can extend the life of your calipers significantly, preventing sticking altogether. Do you ever experience your brakes grabbing or sticking unexpectedly? If so, you’re not alone—and the good news is that with some patience, you can fix this without a full caliper removal or expensive shop visits.
With that in mind, let’s look at practical, step-by-step methods to unstick your brake caliper safely and effectively, so you can get back on the road confidently and keep your brakes in top shape.
Detaching the Wheel and Accessing the Caliper
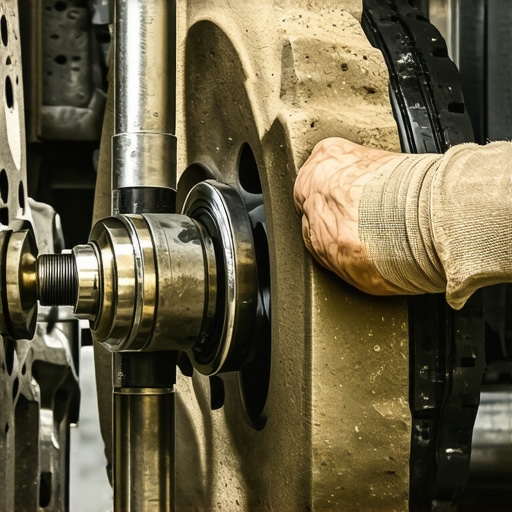
Start by safely lifting your vehicle with a jack and securing it on jack stands. Remove the lug nuts with a wrench, then take off the wheel to expose the brake assembly. Once the wheel is off, you’ll see the caliper—think of it as the brake’s gatekeeper—clamped onto the rotor. During my own experience, I found that just exposing the caliper made troubleshooting much simpler.
Inspecting Slider Pins and Pistons for Corrosion or Dirt
Check the slider pins which allow the caliper to move smoothly. If you notice rust or debris, it’s often the culprit behind sticking brakes. Similarly, examine the pistons for corrosion or buildup. I once encountered a caliper where sludge had hardened around the piston, causing it to stick like glue. Cleaning these components is key to restoring function.
Cleaning and Lubricating Slider Pins
Remove the slider pins and soak them in brake cleaner. Use a wire brush to scrub off rust and debris. Once clean, apply high-temperature brake grease—think of it as a lubricant that lets the pins slide effortlessly. Reassemble the pins, ensuring they move freely. During my project, a generous application saved me from future caliper sticking issues.
Reconditioning the Pistons and Brake Seal
If the pistons are corroded or the seal looks worn, gently press the piston back into the caliper using a C-clamp. Be cautious to not damage the rubber seal; if it’s cracked or degraded, replacing the seal kit is essential. I learned this the hard way when reusing a faulty seal, leading to brake fluid leaks. Proper sealing prevents new dirt from sneaking in and causing future sticking.
Pressurizing and Flushing the Brake System
After cleaning, it’s time to bleed and flush the brake fluid. Old or contaminated fluid can contribute to piston sticking and sluggish braking. Attach a brake bleeder or use a clear hose to pumped brake fluid from the bleed valve. During my attempt, I used a simple syringe to push fresh fluid through, which made the brakes feel responsive again. Regular fluid maintenance prevents corrosion and ensures a smooth caliper action.
Testing the Repair and Ensuring Smooth Operation
Once everything is reassembled—wheel, lug nuts, and vehicle lowered—press the brake pedal a few times to seat the pads and check for firm resistance. If the pedal feels spongy or the caliper still sticks, revisit the components. In my case, a thorough inspection and additional lubrication resolved the issue entirely.
Keep in mind that neglecting brake maintenance may lead to more costly repairs down the line. Regularly inspect slider pins and replace brake fluid as recommended by your manufacturer. For persistent problems, consulting a professional might be worthwhile, but many quick fixes can be done right at home, saving you time and money.
 When it comes to automotive maintenance, many car owners fall prey to misconceptions that can lead to costly mistakes. A prevalent myth is that a simple oil change or filter replacement is all that’s needed for a reliable tune-up. However, this oversimplification ignores the complex interplay of engine components and other systems like the transmission, which often require more nuanced attention. For example, believing that regular oil changes alone prevent transmission issues can be misleading; neglecting transmission fluid health can cause hunting for gears or delayed shifts, as discussed in expert analyses at collisionfixer.com.
Another common mistake is thinking that quick-fix solutions are permanent. For instance, applying a quick brake fluid flush might temporarily improve braking feel, but if underlying issues like piston corrosion or sticking calipers are ignored, the problem will resurface. It’s crucial to diagnose whether corrosion or internal seal wear is causing sticking — a subtlety many overlook. As detailed in articles on modern transmission behavior, ignoring the intricacies of gear hunting often leads to premature transmission failure if not properly addressed.
Furthermore, some believe that collision repairs are simply superficial bodywork. In reality, hidden damage such as frame cracks or rust hidden beneath paint can compromise safety and vehicle longevity. The misconception that all collisionFixes are cosmetic is risky; proper inspection using specialized tools can reveal critical structural issues.
Have you ever fallen into this trap? Let me know in the comments.
### How can advanced diagnostics prevent costly auto repair mistakes?
Advanced diagnostics, including scan tools and meticulous inspection protocols, uncover issues that basic checks might miss. Relying solely on symptom-based repairs without comprehensive diagnostics increases the risk of recurring problems. For example, a persistent check engine light might not just signal a faulty sensor but could indicate deeper issues like clogged fuel injectors or failing sensors that need attention. Recognizing hidden nuances in systems like EVAP or turbochargers ensures repairs are effective and durable.
Expert insights emphasize that understanding the nuances, such as the role of tiny vacuum leaks or the importance of precise transmission calibration, can significantly extend vehicle lifespan. Skipping this detailed troubleshooting, especially in modern vehicles with sophisticated electronic controls, is a shortcut that often leads to more expenses down the line. To deepen your understanding, I recommend checking out detailed guides that explain common pitfalls, such as [why your check engine light keeps coming back on](https://collisionfixer.com/why-your-check-engine-light-keeps-coming-back-on).
In summary, debunking myths and understanding hidden complexities in car maintenance not only saves you money but also enhances your vehicle’s safety and performance. Always consider a comprehensive approach to tune-ups, and stay vigilant about what might be lurking beneath the surface.
Investing in the Right Equipment for Long-Term Success
Maintaining your vehicle’s performance requires more than just basic tools; it demands precision instruments designed for automotive diagnostics and repair. Over the years, I’ve found that a high-quality OBD-II scanner like the BlueDriver Bluetooth Professional has become indispensable. It connects seamlessly with my smartphone, providing real-time error codes, live data, and reset capabilities. This device helps me quickly identify issues before they escalate, saving me both time and money. Additionally, a digital multimeter allows me to check electrical connections with pinpoint accuracy, essential when diagnosing sneaky problems like fluctuating sensor signals or intermittent glitches.
Another must-have in my toolkit is a hydraulic brake caliper piston press. It facilitates safely retracting pistons without damaging seals, especially when replacing brake pads or seals. For fluid flushing, I use a pressure brake bleeding kit, which speeds up the process and ensures no air bubbles remain in the system, maintaining optimal brake response.
Maximizing Results with Software and Documentation
Beyond physical tools, I rely heavily on repair manuals from manufacturers like CollisionFixer. These manuals provide step-by-step procedures tailored to specific models, ensuring I don’t miss critical steps. For diagnostics, I prefer software such as OBDeleven for Volkswagens or Snap-on tools for broader applications. They integrate directly with scanning hardware, decoding complex error codes and showing live sensor data. The future of auto maintenance points toward AI-powered diagnostic tools that can simulate system behaviors, making troubleshooting more accurate than ever.
How do I keep my tools effective over time?
Regular calibration of electronic diagnostic tools ensures accuracy. For mechanical equipment like brake piston presses or fluid extractors, periodic cleaning and lubrication prevent wear and tear. Storing tools in a clean, organized manner reduces corrosion and accidental damage. Also, keeping firmware and software updated guarantees compatibility with the latest vehicle models and diagnostics protocols. As vehicle technology advances, so must our toolkit and knowledge base.
This proactive approach not only cuts down repair time but also extends the lifespan of your tools. If you’re curious about diagnostics, I recommend trying out a comprehensive scanner like the latest OBD-II devices. With a bit of investment, you’ll develop a deeper understanding of your vehicle’s health and avoid unexpected breakdowns down the road.
What Making Mistakes Taught Me About Brake Repairs
I realized early on that rushing to replace calipers without thorough diagnosis often led to repeating the same issues. Ensuring I understood the root causes—like corrosion or dirt—saved time and prevented unnecessary expenses. Over time, I learned that patience and attention to detail are invaluable in auto repair.
Tools and Resources That Transformed My Approach
My DIY toolkit expanded with a quality OBD-II scanner like BlueDriver, which provides instant error reports. A hydraulic caliper piston press made reconditioning pistons safer and easier. Combining these with manufacturer manuals from CollisionFixer gave me confidence to tackle complex problems without second-guessing myself. Trustworthy resources and well-chosen tools elevate your repair game.
Take Action and Keep Your Brakes Reliable
Every brake system deserves regular attention to prevent sticking and ensure safety. Regular inspection of slider pins, timely fluid changes, and gentle piston reconditioning can save you from costly repairs. Don’t wait until your brakes become problematic—stay proactive, and your vehicle will thank you for it. Remember, the more you learn and practice, the more confident you’ll become in maintaining your car’s health.
Inspired to Improve Your Brake Routine? Share Your Experiences
Have you ever tried fixing a sticking caliper or faced unexpected brake issues? What worked best for you? Drop your stories or questions below—let’s learn from each other’s journeys toward safer, smoother drives.