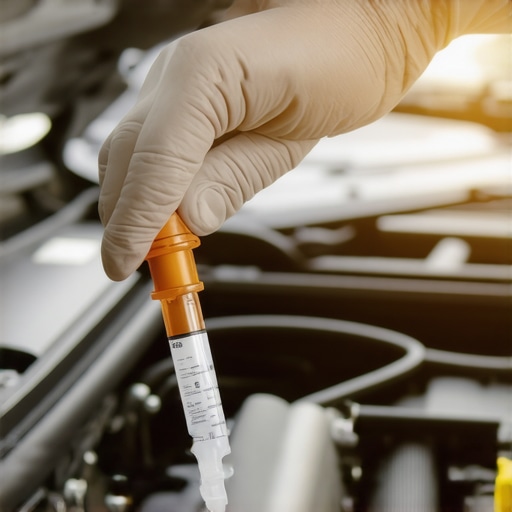
Ever had that sinking feeling when your engine starts misfiring, overheating, or leaking coolant? I remember the exact moment I realized my beloved car was in trouble—smoke billowing from the engine bay, and that peculiar sweet smell of antifreeze lingering in the air. It struck me then: could it be a blown head gasket? That tiny, sneaky failure that often hides behind the scenes, yet can wreak havoc if not caught early.
Why Detecting a Blown Head Gasket Matters More Than You Think
Knowing how to test for a blown head gasket isn’t just tech jargon or a mechanic’s secret—it’s a lifesaver for your vehicle’s health and your wallet. A blown head gasket can cause serious engine damage if ignored, leading to costly repairs or even engine replacement. Early detection can save you hundreds, maybe thousands, and keep your travels smooth.
But here’s the thing: diagnosing this problem can be tricky. Many folks rely on guesswork or expensive tests at the repair shop, which isn’t always necessary. I’ve been down that road—and a costly mistake I made early on was ignoring subtle signs, thinking they’d just fix themselves. Spoiler alert: they usually don’t.
What I’ve learned from personal experience—and what I want to share—is how a simple chemical test can be your first line of defense. It’s surprisingly straightforward and affordable, and it gives you peace of mind knowing whether your engine’s internal health needs professional attention.
Are you tired of second-guessing that mysterious engine smell or that occasional loss of power? Whether you’re a seasoned DIYer or just someone who wants to save time and money, mastering this test can make a real difference. Before jumping into the step-by-step process, let’s explore the common doubts folks have about this method.
Is Testing for a Blown Head Gasket with a Chemical Kit Actually Worth the Hype?
I admit, I was skeptical at first. I thought, “Can a simple chemical really tell me what’s wrong inside my engine?” Turns out, yes—but only if you understand what to look for and avoid common pitfalls. Early on, I tried to force a test without proper knowledge, which led to confusing results. That mistake taught me the importance of following the instructions carefully and interpreting the results correctly.
So, if you’re wondering whether this method is reliable or just another gimmick, I encourage you to look into trusted sources—like automotive experts who recommend chemical tests for their simplicity and accuracy. ([source](https://collisionfixer.com/how-to-check-for-a-blown-head-gasket-at-home))
In the upcoming sections, I’ll walk you through exactly how to perform this test, what signs to expect, and how to interpret your results. No need to be overwhelmed—consider this your friendly neighbor’s guide to diagnosing one of the sneakiest engine issues out there. Ready to get started? Let’s dive into the practical steps that could save your engine—and your day.
Gather Your Supplies and Prepare Your Engine
First, ensure your engine is cold to prevent burns and inaccurate readings. Gather a chemical tester kit designed for head gasket leaks—these are affordable and available at auto parts stores. Pop the hood, locate the radiator cap, and remove it carefully. It’s like preparing your kitchen before cooking—having everything ready makes the process smoother.
Inspect and Drain the Coolant
Before performing the test, it’s best to drain a small amount of coolant from the radiator into a clean container. This helps prevent dilution of the test fluid. To do this, loosen the radiator drain plug and let out a few ounces of coolant. Be cautious—antifreeze is toxic and should be handled with gloves.
Insert the Test Fluid and Run the Engine
Carefully follow the instructions on your chemical test kit. Typically, you’ll insert a small aspirator or dipstick into the test container filled with the special fluid. With the engine running at idle, add a few drops of the fluid into the test chamber. It’s like adding a dye to a pipeline—look for color changes to spot leaks.
Pro tip: During this process, I once mistakenly rubbed the test chamber against a hot engine component, causing the fluid to bubble uncontrollably. That messy mistake reminded me to keep the chamber stable and away from heat sources. Keep a steady hand, and be patient—hurrying can lead to false positives.
Observe Color Changes and Interpret Results
Watch the test fluid carefully. A color change from yellow to green or a dark hue indicates the presence of combustion gases in the coolant—a sign of a blown head gasket. If the fluid remains unchanged, it’s less likely that the gasket has failed.
Remember, false positives can occur if exhaust gases contaminate the coolant externally or if there’s residual pressure. For definitive confirmation, paired testing with a chemical block test enhances accuracy.
Double-Check and Take Action Accordingly
If your test suggests a blown head gasket, consider scheduling a professional diagnosis, especially if you’re not experienced with engine repairs. Ignoring this warning can lead to severe engine damage—it’s like ignoring a warning light on your dashboard.
Regular maintenance and early detection keep your engine running smoothly. For more tips on vehicle longevity, visit maximize your car’s lifespan with regular tune-ups.
Many car owners operate under misconceptions that can lead to costly mistakes during repairs. One prevalent myth is that all auto repairs are straightforward and can be DIYed without much risk, but in reality, professional expertise is often crucial, especially with complex systems like transmissions or collision repairs. Overestimating your DIY skills can result in incomplete fixes or further damage, emphasizing the importance of consulting certified technicians; for example, see how professional transmission overhauls can save money in the long run [here](https://collisionfixer.com/how-transmission-overhauls-save-you-money-in-the-long-run).Another common trap is believing that regular tune-ups are unnecessary if your car isn’t showing symptoms. This complacency can lead to overlooked issues that escalate into major failures. Routine maintenance, including comprehensive inspections, can reveal hidden problems before they become emergencies; learn more about maximizing your car’s lifespan with [regular tune-ups](https://collisionfixer.com/maximize-your-cars-lifespan-with-regular-tune-ups). A subtle yet significant misconception involves the role of car fluids. Many think that replacing fluids only when they look dirty is sufficient, but using quality synthetic oils and timely flushes are vital for optimal performance and preventing internal damage. Advanced enthusiasts understand that neglecting fluid maintenance can cause internal corrosion and wear—key factors in long-term vehicle health. Despite the evidence, some believe that auto repairs always come with inflated, unnecessary costs. This myth can prevent you from seeking honest quotes or understanding the real value of quality parts and skilled labor; for insights, see [how to avoid overpaying for repairs](https://collisionfixer.com/contact-us). When it comes to collision damage, superficial fixes might seem adequate, but underlying structural issues demand comprehensive repairs to ensure safety and durability. Recognizing the difference can save lives and money, as discussed in [collision repair expertise](https://collisionfixer.com/top-signs-your-car-needs-expert-auto-repair-now). Now, a question for the savvy reader: How do you differentiate a genuine, thorough auto repair from a superficial fix that might cost you more later? Let’s dig deeper—share your thoughts in the comments! Remember, understanding these nuances helps you make informed decisions and avoid costly mistakes. For more expert tips, visit [Collision Fixer](https://collisionfixer.com) and stay ahead in your auto care journey.
Investing in the Right Equipment for Auto Maintenance
Having the proper tools is crucial for effective car maintenance and repairs. I personally rely on a high-quality digital multimeter because it allows me to quickly diagnose electrical issues such as faulty sensors or wiring problems. A reliable multimeter like the Fluke 115 offers precision, durability, and ease of use, which I’ve found invaluable during troubleshooting sessions. Additionally, an OBD-II scanner, such as the Innova 3160g, enables me to access engine codes and monitor real-time data from my vehicle’s electronic control unit (ECU). This tool is essential for diagnosing check engine lights or monitoring sensor performance, prolonging the lifespan of the engine and transmission.
Besides diagnostic gadgets, I always keep a set of basic hand tools—socket wrenches, screwdrivers, pliers—and a portable jump starter. These items help me address minor repairs or emergencies on the road without waiting for roadside assistance. I’ve also invested in a quality creeper and work light to make underneath repairs safer and more comfortable.
Why Regular Tool Upgrades Matter in the Long Run
Tools evolve with technology; for example, recent advancements in battery-powered tools mean quicker and more efficient repairs. Staying updated with the latest equipment, such as cordless impact wrenches or wireless diagnostic scanners, can significantly reduce repair time and improve the quality of your work. As vehicle systems become more complex—integrating sensors, electronic modules, and even software—you’ll need corresponding tools capable of interfacing with these systems efficiently.
Incorporating Software for Better Maintenance
Beyond physical tools, vehicle-specific diagnostic software like OBDLink or BlueDriver connects your smartphone or tablet directly to your car’s ECU. I prefer these apps because they are user-friendly, often providing detailed explanations of error codes and repair suggestions. For example, BlueDriver offers extensive repair reports that help identify whether you should proceed with DIY fixes or consult a professional. Regularly reviewing live data from your car can reveal subtle issues before they escalate, an approach I recommend for extending your vehicle’s efficiency and avoiding costly repairs. Look for software that updates regularly, ensuring compatibility with the latest vehicle models and systems.
Predicting Future Trends in Car Maintenance
The trend toward integrated diagnostic systems and smart repair tools is only gaining momentum. Anticipate a future where vehicles themselves can automatically alert you to issues via connected apps, and repair tools will feature AI-driven diagnostics to guide even novices through complex repairs. Staying ahead of these developments by investing in current tech will ensure your maintenance routine remains effective and efficient.
How do I maintain my tools and software over time?
Consistent maintenance of your equipment is vital for reliability. Regularly calibrate your diagnostic devices, update software when updates are available, and keep tools clean and organized. Proper storage prevents damage and extends the lifespan of delicate electronic components. For hardware, check connections and batteries periodically; for software, ensure you’re running the latest versions. By adopting these habits, you’ll ensure your tools remain ready when needed, avoiding unnecessary delays or misdiagnoses—saving you time and money in the long run. If you want to boost your vehicle’s longevity, don’t forget to explore tips like maximizing your car’s lifespan with routine tune-ups.
Start implementing these tools and practices today, and you’ll notice how much more confident you become in handling maintenance tasks. For personalized assistance or more detailed advice on tools, visit Collision Fixer’s contact page and connect with experts dedicated to keeping your vehicle in top condition.
The Hardest Lesson I Learned About Auto Repair, Transmission, Tune-Ups, and Collision Fixing
One of the most valuable insights I wish I knew earlier is that not all auto repairs are straightforward—sometimes, what seems like an easy fix can hide deeper issues that only a professional can accurately diagnose. Rushing into DIY repairs without proper knowledge can lead to costly setbacks, especially with complex systems like transmissions or collision repairs that require specialized tools and expertise.
Another lesson is that myths about regular maintenance, such as ignoring tune-ups when your car isn’t acting up, can cause small problems to snowball into major damages over time. Proactive, routine inspections and timely tune-ups are a small investment that pay off by extending your vehicle’s lifespan and saving you money in the long run. Remember, neglecting minor signs often leads to expensive repairs, so staying ahead of potential issues is key.
Finally, I learned that trusting cheap parts or cutting corners can jeopardize your safety and your wallet. Genuine, high-quality parts and proper repairs might cost more upfront but guarantee durability and peace of mind. Don’t fall for the misconception that auto repairs always have to be expensive—smart choices and the right knowledge make all the difference in securing your vehicle’s health.