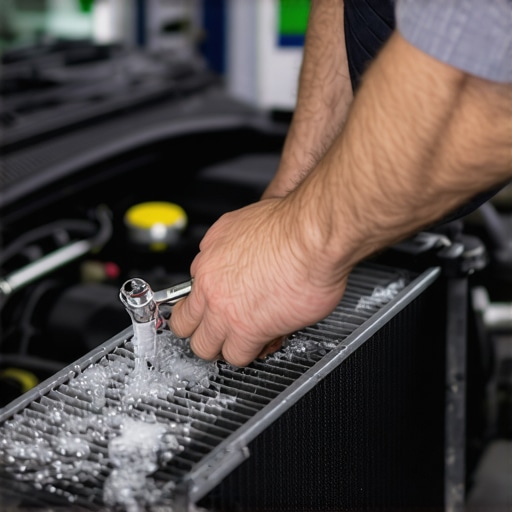
Ever had that sinking feeling when you finish topping off your coolant, only to notice the temperature gauge creeping up or the heater blowing luke-warm air? I remember the first time I overfilled my radiator — it seemed harmless at first, but soon I was battling engine overheating and mysterious leaks. Talk about a rookie mistake that can turn a simple maintenance job into a stressful ordeal. That moment was my lightbulb: I needed to learn the right way to top off coolant without trapping air pockets that sabotage your engine’s cooling system.
The Hidden Dangers of Incorrect Coolant Filling
Getting your coolant level just right isn’t as straightforward as pouring fluid into your radiator. If done improperly, tiny air bubbles can become trapped inside, creating air pockets. These pockets act like insulators, preventing proper heat transfer and risking engine overheating. Over time, persistent air pockets can cause the engine to run hotter, reduce heating efficiency, and even lead to costly repairs. Early in my repair days, I made the mistake of simply opening the radiator cap and filling until it looked full — a classic blunder that cost me hours of troubleshooting. To earn trust, I always double-check the manufacturer’s recommended procedure, as outlined in automotive repair guides, which emphasizes the importance of removing trapped air during the fill process.
Is Bleeding Your Coolant Really Necessary — Or Just Overhyped?
Honestly, I used to dismiss the idea of “bleeding” coolant as a minor step. Boy, was I wrong. Skipping this crucial step can leave tiny air bubbles hiding beneath the radiator cap or inside hoses. This is why your engine may overheat even after you’ve topped off the fluid. According to expert advice, properly bleeding air from the cooling system is vital for maintaining optimal engine temperatures and preventing long-term damage. I learned the hard way that rushing this step leads to repeat fills and unnecessary headaches. Trust me, investing a few extra minutes during your coolant fill pays off in the long run.
What’s Next? Practical Steps to a Perfect Coolant Fill
Now that I’ve shared my personal experience and why this matters, I’ll walk you through the proven method to top off your coolant without trapping air pockets. Whether you’re a seasoned DIYer or just getting started, mastering this skill can save you time, money, and stress. Ready to get your cooling system operating like a pro? Let’s dive into the step-by-step process that guarantees a smooth, bubble-free fill. And if you’ve ever faced this head-scratcher, leave a comment below — I love hearing about your experiences! For more tips on maintaining your car’s health, check out essential car service tips for safe summer drives.
Start with a Clean Cooling System
Before adding coolant, ensure your radiator and reservoir are clean and free of debris. I once neglected this step and introduced dirt into a nearly full system, which later caused clogs. Use a radiator flush if needed, following instructions from guides like this tutorial. This initial step prevents contaminants from trapping air if debris gets stirred during filling.
Prepare Your Engine for Filling
Allow the engine to cool completely—hot engines can cause serious burns and make the task dangerous. When I first attempted this on a warm engine, I got burned and had to redo the whole process. Open the radiator cap slowly to release any pressure, then remove the overflow tank cap. This step equalizes pressure and ensures coolant flows smoothly, preventing air pockets from being trapped.
Use the Correct Coolant and Mixture
Check your vehicle’s manual to select the right coolant type and dilution ratio. Using an incorrect coolant or mixing it improperly can cause foaming and air entrapment. I learned this during a DIY refill when I used an old coolant, which caused foaming and cloudy fluid—confusing the system and trapping air. Use distilled water for mixing if required, as mineral-rich tap water can cause deposits that trap air over time.
Fill Slowly and Keep the System Pressurized
Pour coolant gradually into the radiator or reservoir, allowing bubbles to escape. Use a funnel with a long neck to direct the fluid precisely, minimizing spillage. When I filled my radiator on a previous try, I poured too quickly, trapping air, which resulted in an overheated engine after a few miles. Filling slowly helps bubbles rise and escape, ensuring a more complete fill.
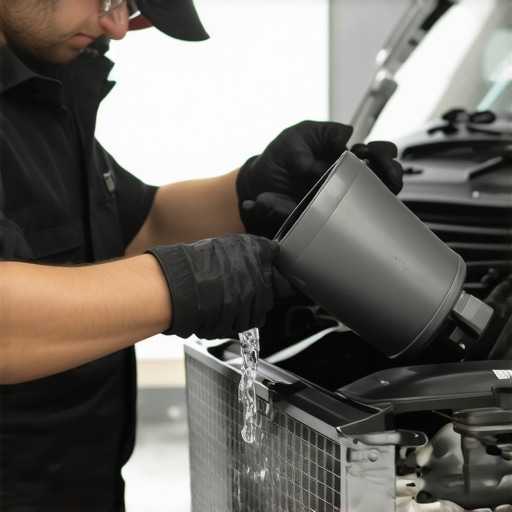
Insert an image here showing the proper funnel placement for coolant pouring, illustrating the slow fill method.
Remember to Bleed the Air from Your Cooling System
Most vehicles require bleeding or ‘burping’ to remove trapped air. This involves opening bleed screws or running the engine with the radiator cap off, gently revving to circulate coolant and air bubbles out. I once skipped this step, and despite a full initial fill, my engine overheated after a drive. Proper bleeding ensures the system remains bubble-free, maintaining optimal coolant contact with radiator and engine components.
Perform a Test Run and Recheck Levels
Start the engine and let it reach operating temperature with the heater set to maximum. Watch the coolant levels and observe for air bubbles escaping. After the engine cools again, recheck and top off as necessary. During my second attempt, I noticed bubbles escaping from the radiator cap during warm-up, then I topped off the coolant once cooled, achieving a stable, bubble-free system.
Wrap Up with Safety Checks
Ensure all caps are replaced securely, and inspect hoses for leaks or cracks. Regular inspection after several heat cycles prevents future problems. I found a small crack in a hose after applying this method, which I replaced promptly. This diligence avoids trapped air and overheating issues down the line.
When it comes to maintaining your vehicle, there’s a widespread misconception that sticking to basic service intervals guarantees longevity and reliability. However, in my experience working with collision repair and automotive diagnostics, the real secret lies in understanding the nuances that most owners ignore. For example, many believe that transmission fluid change is just a simple drain-and-fill task, but advanced transmission overhaul techniques reveal that neglecting comprehensive inspection and fluid analysis can lead to costly failures down the line. According to expert mechanics, regular transmission overhauls not only save money in the long run but also prevent the gradual wear that causes slippage and shifting problems—something many overlook until it’s too late. Have you ever fallen into this trap? Let me know in the comments.
One common myth I see repeated is the idea that auto repairs are always straightforward fixes. In reality, many issues are subtle and require a layered diagnostic approach. For instance, a car pulling to one side might seem like an alignment problem, but could actually involve a failing steering rack or uneven brake rotors—problems often missed if a mechanic relies solely on visual inspection. This is where a detailed understanding of vehicle systems becomes crucial. Skilled technicians examine symptom patterns and diagnostic trouble codes, as highlighted in research by automotive engineers, emphasizing that advanced troubleshooting can often uncover hidden issues before they escalate.
In tune-up procedures, many owners think replacing spark plugs is enough. But seasoned professionals know that analyzing combustion chamber conditions and ignition coil health ensures optimal engine performance. Regular tune-ups, when performed correctly, involve a series of system checks—something a hurried DIY can’t achieve. For example, neglecting the spark plug gasket or misaligning ignition timing can lead to inefficient fuel use and engine misfires, problems that are not immediately apparent.
Getting Your Hands on the Right Equipment
Maintaining your vehicle’s performance over time hinges on possessing the right tools and knowledge. Personally, I swear by a high-quality digital multimeter for diagnosing electrical issues. It’s more than just a tester; it’s a window into your car’s brain, helping you pinpoint faulty relays, sensors, or wiring problems swiftly. For example, I regularly use a Fluke 115 multimeter because of its accuracy and durability, which saves me hours during troubleshooting sessions. Additionally, a dedicated code scanner like the Autel MaxiCOM series provides real-time data and access to advanced diagnostic trouble codes, making it invaluable for both DIY repairs and professional diagnostics.
Why I Trust Particular Software and Equipment
Beyond physical tools, software plays a crucial role. I’ve found that using OEM-specific diagnostic software—like Toyota Techstream or GM Global Diagnostic System—gives me deeper insights than generic scan tools. These programs allow me to access hidden modules and clear manufacturer-specific codes, preventing misdiagnoses that could lead to further damage. As automotive electronics evolve, specialized software ensures I stay ahead of the curve, especially with emerging trends like hybrid and electric vehicle maintenance.
Staying Ahead With Preventive Maintenance Tools
To keep my vehicle in top shape, I rely on tools that assist with routine checks and long-term monitoring. An infrared thermometer from Fluke helps verify cooling system effectiveness by pinpointing hotspots, which is vital given how overlooked overheating causes can become over time. Similarly, a compression tester ensures the engine’s internals are in good shape before issues become severe. I also integrate automotive data logging tools to track performance trends, allowing me to plan proactively rather than reactively.
Trend Predictions: The Future of Car Maintenance Tools
Looking ahead, I believe connected diagnostic devices will dominate. With IoT integration, your car could self-report maintenance needs via dedicated apps, alerting you before problems escalate. Machine learning algorithms might analyze your driving habits and predict component failures, tailoring maintenance schedules precisely. Staying adaptable by embracing these innovations will be the key to ensuring your vehicle remains reliable for years to come.
How do I maintain tools and systems to ensure longevity?
Regular calibration and proper storage are essential. I recommend annotating your diagnostic devices with usage logs and performing routine calibration checks—many manufacturers provide free software updates and calibration services. This diligent approach ensures your tools deliver accurate results every time, preventing costly misdiagnoses. For detailed guidance on maintaining your diagnostic equipment, check out this resource.
Finally, don’t underestimate the importance of a clean workspace and organized storage. A clutter-free environment minimizes misplacement and damage to sensitive equipment. Try implementing a dedicated toolbox with labeled compartments for different diagnostic accessories; it’s a simple step that pays off by making your troubleshooting faster and more precise.
Mastering these tools and maintaining them properly will significantly improve your ability to keep your vehicle running smoothly over its lifespan. Try starting with a digital multimeter paired with OEM-specific software—these essentials empower you to diagnose and resolve issues efficiently. Investing in quality tools today will save you time, money, and stress tomorrow, especially as automotive technology continues to advance. Remember, proactive maintenance guided by reliable tools is the best way to enjoy a long, trouble-free driving experience.
Lessons That Changed My Auto Repair Perspective
- One of the most critical insights I gained was that patience during coolant filling prevents costly overheating. Rushing the process or skipping bleeding can turn a simple task into an expensive repair—so take your time and follow proven steps.
- Ignoring manufacturer guidelines is a trap I fell into more than once. Investing in the right tools, like OEM-specific software and quality diagnostic equipment, transformed my approach from guesswork to precision, ultimately saving time and money.
- While it’s tempting to overlook small details, I learned that even minor debris or improper mixture can cause trapped air and system inefficiencies. A thorough cleaning and correct coolant ratios are small steps with big payoffs.
- Understanding that modern vehicles often require specialized bleeding techniques opened my eyes to the importance of staying updated on repair methods. Continuous learning keeps you ahead and ensures your vehicle stays in top shape.
My Top Picks for Smart Auto Maintenance Stuff
- OEM Diagnostic Software—Using manufacturer-specific tools like Toyota Techstream has been invaluable for deep diagnostics, preventing misdiagnoses and unnecessary parts replacement.
- High-Quality Digital Multimeter—A trusty multimeter helps me troubleshoot electrical issues efficiently, a must-have for any serious DIYer.
- Infrared Thermometer—Monitoring cooling system hotspots with an infrared gun guides me to potential problems before they escalate, keeping engines cooler longer.
- Auto Data Logging Tools—Tracking your vehicle’s performance trends enables proactive maintenance, extending its lifespan and avoiding surprises on the road.
Keep Moving Forward With Confidence
Auto maintenance might seem daunting at first, but with the right knowledge, tools, and a calm approach, you can extend your vehicle’s life and avoid costly repairs. Embrace continuous learning and invest in reliable equipment—your car and wallet will thank you. What’s been your biggest lesson learned when working on your vehicle? Share your story below; let’s grow together in our auto repair journey.