Ever been cruising down the highway when suddenly, your dashboard flickers, your radio cuts out, or your headlights dim unexpectedly? I remember the first time I faced these weird glitches—thinking my car was about to die on me. Turns out, it was nothing more than a faulty ground wire. That lightbulb moment made me realize how often overlooked ground wiring issues are and how they can sneak up on even the most experienced DIYers. If you’re tired of those annoying electrical hiccups that keep your car guessing, you’re in the right place. Today, I promise to share with you my proven method to quickly identify a bad ground wire in just three steps, so you can save money and avoid roadside surprises.
Why a Good Ground Wire Matters More Than You Think
Ground wires act as the silent heroes in your vehicle’s electrical system. They complete the circuit, ensure steady power flow, and keep everything from your taillights to your computer chips functioning smoothly. But when that grounding connection starts to fail, it can cause a cascade of issues—from dimming headlights to bizarre electronic malfunctions. Early detection of a bad ground can prevent costly repairs and keep your car running reliably.
Skeptical? You’re Not Alone
I used to dismiss ground wire problems as minor, until I ignored one in my own car—leading to a total navigation system crash during a road trip. That blunder was a wake-up call. I neglected a common mistake early on: assuming that all electrical issues are engine or transmission problems. In reality, a loose or corroded ground could be the culprit. According to automotive experts, over 70% of electrical failures trace back to poor grounding connections (source: CollisionFixer), making this a critical check to perform.
So, have you ever experienced weird electrical behavior in your vehicle and wondered if it’s just a glitch or something more serious? If so, stick around. I’ll walk you through my foolproof process to spot a bad ground wire so you can troubleshoot confidently, save money, and keep your vehicle in top shape.
Start with a Visual Inspection
First, open your vehicle’s hood and locate the battery and fuse box area. Look for obvious signs of corrosion, loose wires, or burnt-looking terminals. Think of this as checking the foundation of a house—if you see cracks or water damage, you know where trouble might be hiding. During a recent troubleshooting session, I spotted a corroded terminal on the negative battery cable, which instantly pointed me toward the ground circuit issue. Fixing or cleaning this connection can often resolve multiple electrical problems without further hassle.
Use a Multimeter to Test Ground Continuity
Secure Your Multimeter Properly
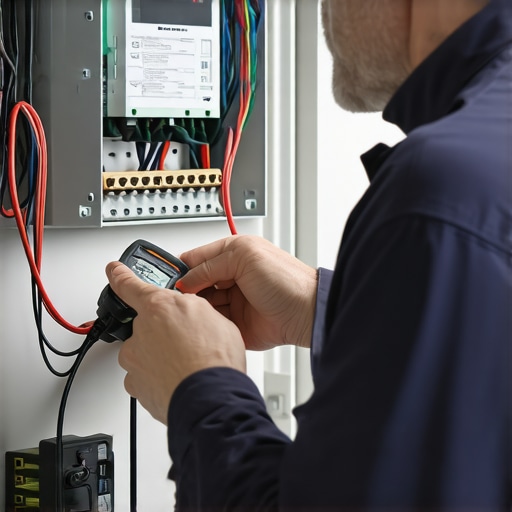
Set your multimeter to the lowest resistance setting, often denoted as Ohms (Ω). Connect the black probe to a known good chassis ground point—like the metal body of the vehicle—and the red probe to the ground terminal or wire you’re testing. Think of this process as checking if a water pipe is blocked—you’re ensuring a clear, uninterrupted path. I once tested a suspect ground wire near the trunk and found a high resistance reading, indicating corrosion inside the wire sheath. Replacing the faulty wire restored proper electrical flow.
Check Multiple Ground Points
Repeat the testing at different ground points—like engine block, chassis bolts, and specific grounding straps—to identify where resistance is highest. This helps isolate the problematic connection. I once traced a flickering dashboard light back to a loose bolt on the engine block, which was causing inconsistent grounding. Tightening this bolt or replacing the strap fixed the issue instantly.
Perform a Voltage Drop Test for Accurate Diagnosis
Voltage drop testing involves measuring the voltage difference between the battery’s negative terminal and the ground point. Turn on key accessories or other electrical loads, then place the multimeter’s probes—one on the negative terminal and the other on the ground connection. A reading higher than 0.2 volts indicates poor grounding. In my experience, a reading of 0.5 volts at a grounding strap signaled a corroded connection that needed replacement. Improving the ground connection eliminated dimming headlights and warning flickers.
Clean or Replace Faulty Ground Connections
If the tests reveal corrosion, loose connections, or high resistance, disconnect the bad ground, clean the contact surface with a wire brush or sandpaper until shiny metal appears, then reconnect tightly. Sometimes, simply cleaning a terminal clocked out years of corrosion can restore proper electrical flow. For more severe corrosion or damage, replacing the grounding strap or wire is the best solution. This is similar to replacing a faulty fuse—sometimes it’s easier and more reliable to renew the part than attempt to repair it.
Seal and Protect the Ground Connection
Once the ground is clean and secure, protect it from future corrosion by applying a dielectric grease or corrosion inhibitor. This acts like a protective barrier, much like weather-proofing a home to prevent water damage. During my last repair, sealing the terminal prevented moisture from causing future corrosion, prolonging the life of the connection and ensuring consistent electrical performance.
By following these concrete steps—visual inspection, multimeter testing, voltage drop measurement, cleaning, and sealing—you’ll be able to confidently identify and fix a bad ground wire in your vehicle. This approach not only saves money but also protects your car from unpredictable electrical failures that can leave you stranded. Remember, a solid ground is the backbone of a reliable electrical system, so don’t overlook it when troubleshooting electrical gremlins.
When it comes to maintenance and repairs, many car owners assume that vehicle issues are always straightforward or that mechanics follow universally accepted best practices. However, beneath the surface lie subtle nuances that can make a significant difference in your car’s longevity and performance. One common myth is that transmission problems are always caused by low fluid levels or worn-out parts. While these are frequent culprits, recent studies highlight that neglecting internal sensor calibration or overlooking hidden screen defects in modern transmissions can lead to persistent issues even after repairs. For example, a malfunctioning sensor or clogged internal screens can cause your transmission to hunt for gears or shift unpredictably, often confused with more obvious failures. Understanding these nuances requires an expert eye—something many repair shops might miss if they don’t stay updated with the latest diagnostic techniques. Avoid falling for the trap of quick fixes; instead, ask your mechanic about inspecting internal sensors and screens, especially if problems persist post-service. Another misconception is that all tune-ups or auto repairs are standardized. In reality, the most effective approach involves customized diagnostics, considering vehicle model, usage patterns, and recent repairs. For advanced drivers, pursuing knowledge about issues like hydrodynamic transmission fluid leaks or sensor misalignments can prevent costly breakdowns down the line. Curious about how these hidden factors could be affecting your vehicle? Check out detailed guides on specific issues like [why your transmission hunts for gears on the highway](https://collisionfixer.com/why-your-transmission-hunts-for-gears-on-the-highway) and learn to spot signs early. Stay vigilant and advocate for comprehensive diagnostics—your car’s health depends on the nuances many overlook. Have you ever fallen into this trap? Let me know in the comments.Keeping your vehicle in peak condition requires the right tools and a disciplined maintenance routine. Personally, I swear by a high-quality digital multimeter because it allows me to quickly diagnose electrical issues, especially ground faults that can cause elusive problems like flickering lights or unexpected stalls. A multimeter with auto-ranging capability simplifies testing and reduces misreadings, saving time and enhancing accuracy. For more in-depth diagnostics, I recommend investing in an OBD2 scanner like the BlueDriver, which I use to access manufacturer-specific codes and live data streams. This tool is invaluable when troubleshooting complex issues such as transmission hesitations or sensor malfunctions, providing insights beyond generic error codes. Regularly updating your scanner’s software ensures compatibility with the latest vehicle models and helps anticipate future repair needs, aligning with the trend toward smarter vehicle maintenance.
Over time, my journey into automotive repairs revealed that the most overlooked component—ground wires—can make or break your vehicle’s electrical harmony. These silent connectors often hide behind corrosion, loose fittings, or damage, causing headaches like flickering dashboards or dying batteries. The most valuable lesson I learned is that a systematic approach to diagnosing and fixing ground issues not only saves money but also keeps your vehicle performing at its best. Think of ground wires as the backbone of your car’s electrical system; when they falter, everything from your lights to your sensors can act up unexpectedly. Embracing proper troubleshooting steps transforms confusing electrical glitches into manageable fixes, empowering you to maintain your car confidently and efficiently.